Step-by-Step Guide to Using Jenkins for Continuous Integration in iOS Projects
Preface
As everyone knows, competition among apps has reached a white-hot stage where user experience is king and quality comes first. Users are very picky. If a company’s marketing team spends heavily to promote an APP and finally acquires some users, but then an online bug causes a batch of users to experience crashes during use, the lighter consequence is that the money spent on early promotion may all go to waste; the more severe consequence is that the app develops a poor reputation and can no longer grow its user base in the future. If we calmly analyze the root cause, it is simply that the product went online before its quality was up to standard. Aside from some subjective factors, I believe a large portion of the objective factors can be prevented. Based on a set of development-practice recommendations proposed by experts, CI + FDD can help us solve the objective factors to a great extent. The rest of this article mainly discusses Continuous Integration, continuous integration (CI for short).
####Table of Contents
- 1.Why We Need Continuous Integration
- 2.Continuous Integration Tool — Jenkins
- 3.iOS Automated Packaging Commands — xcodebuild + xcrun and fastlane - gym Commands
- 4.Automatically Uploading to Third-Party Platforms Such as fir / Pgyer After Packaging
- 5.Complete Continuous Integration Workflow
- 6.Jenkins + Docker
I. Why We Need Continuous Integration
When talking about why we need it, we need to start with what it is. So what is continuous integration?
Continuous integration is a software development practice: many teams integrate their work frequently, with each member usually integrating daily, resulting in multiple integrations per day. Each integration is verified by an automated build (including tests) to detect errors as quickly as possible. Many teams have found that this approach can significantly reduce integration problems and make team development faster.
CI is a development practice. A practice should include three basic modules: a process that can build automatically, compile code automatically, and distribute, deploy, and test automatically; a code repository, such as SVN or Git; and finally, a continuous integration server. Through continuous integration, we can use automation and other means to obtain product feedback at high frequency and respond to that feedback.
So what benefits can continuous integration bring us? Here I recommend an article, which divides Continuous integration (CI) and test-driven development (TDD) into 12 steps. The benefits, however, multiply, resulting in 24 advantages.
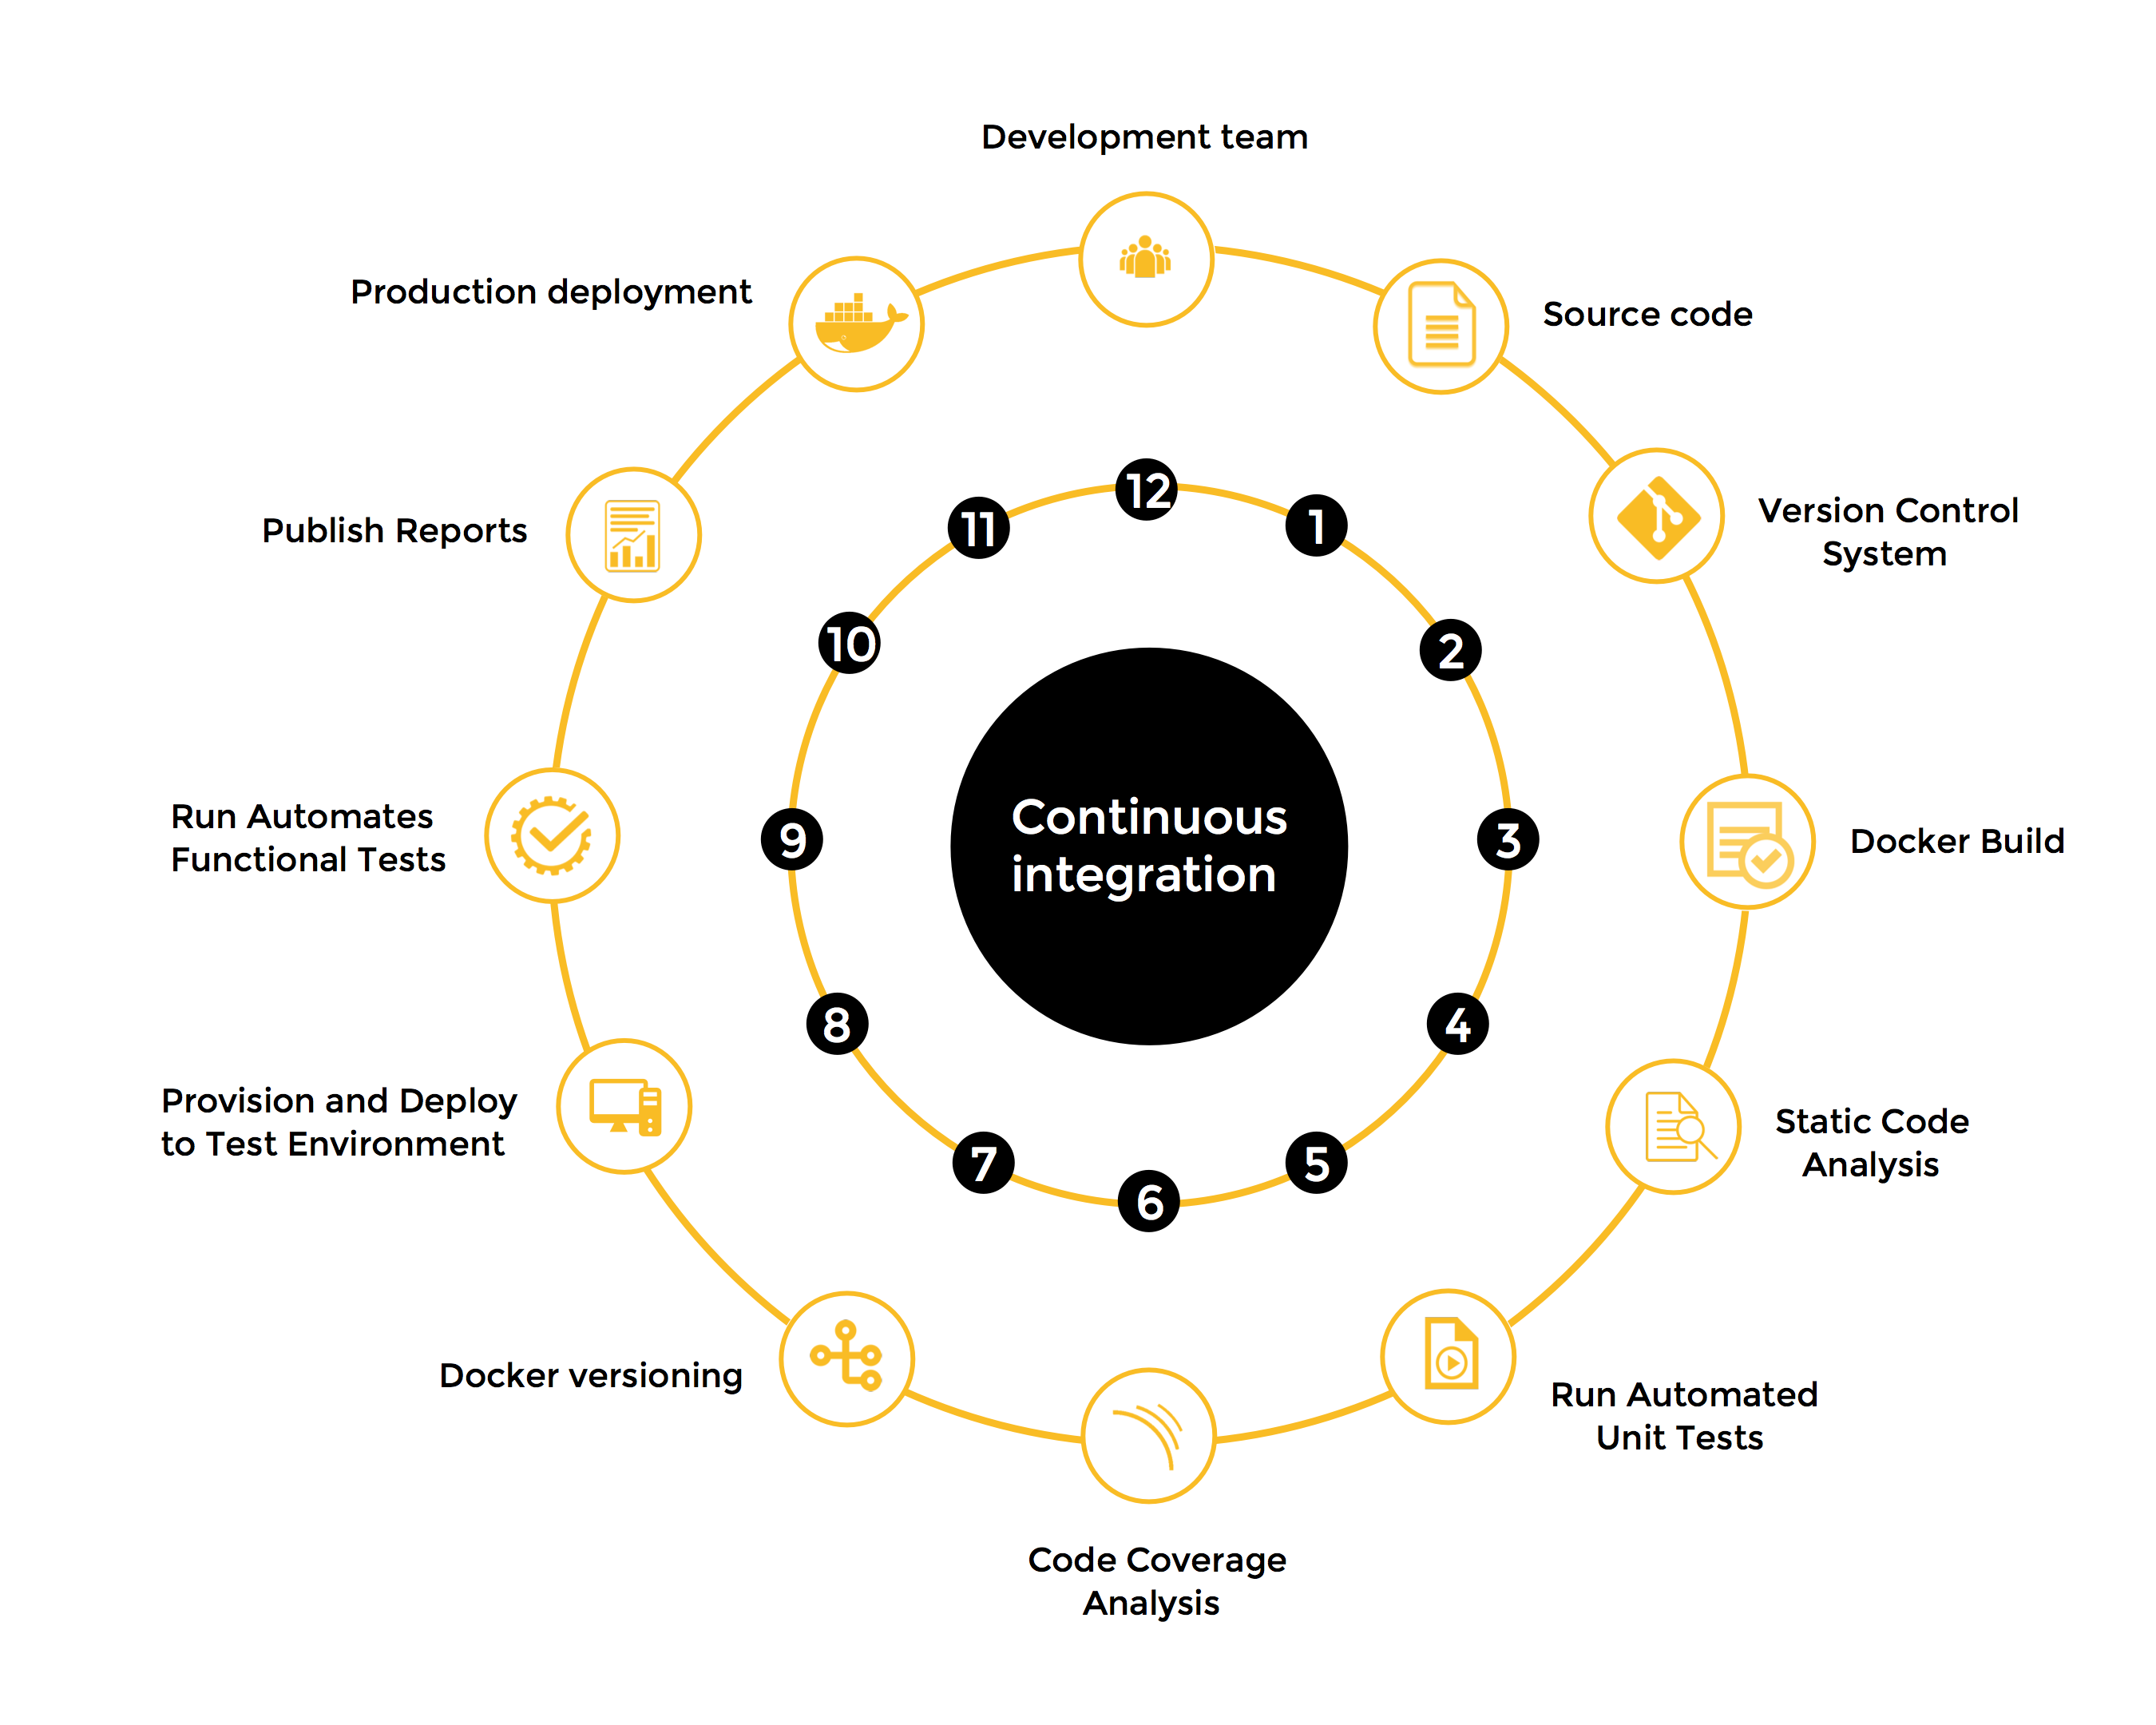
Let me talk about some advantages I have deeply experienced after using CI.
1. Shorten the development cycle and iterate versions quickly
At the beginning of each release, we estimate the development cycle, but delays always happen for various reasons. Some of these are objective factors. As product lines increase and iteration speeds get faster, the pressure on testing also grows. If testing only starts after development is fully complete, it will have a long impact on the schedule. At that point, late integration can seriously slow down the project. If we can integrate continuously as early as possible and enter the 12-step iteration loop shown above as soon as possible, we can expose issues earlier, resolve them sooner, and do our best to complete tasks within the scheduled time.
2. Efficiency brought by an automated pipeline
Packaging is actually a very time-consuming task for developers, and it does not require much technical sophistication. The more developers there are, the higher the chance of conflicts between code changes. In addition, without a production-line management mechanism, it is hard to guarantee the quality of the code in the repository. The team spends time resolving conflicts, and after resolving them, developers still need to package manually. If the certificate is wrong at this point, even more time is wasted. This time can actually be saved through continuous integration. One or two days may not look like much, but calculated over a year, it saves a lot of time!
3. Deployable at any time
With continuous integration, we can package on a daily basis. The biggest advantage brought by this high-frequency integration is that we can deploy and release at any time. This prevents the situation where, right before going online, there are vulnerabilities and bugs everywhere, everyone is scrambling to fix things, and after all that the product still cannot be deployed, severely affecting the release schedule.
4. Avoid low-level mistakes to a great extent
We can make mistakes, but making low-level mistakes is really unacceptable. The low-level mistakes here include the following: compilation errors, installation issues, API issues, and performance issues. Daily continuous integration can quickly discover compilation problems, because automated packaging will simply fail. After packaging, if testers cannot install the app by scanning the QR code, that issue will also be exposed immediately. API issues and performance issues can be discovered by automated test scripts. These low-level issues are exposed and presented by continuous integration, reminding us to avoid low-level mistakes.
II. Continuous Integration Tool — Jenkins
Jenkins is an open-source project that provides an easy-to-use continuous integration system, freeing developers from complicated integration work so they can focus on more important business logic implementation. At the same time, Jenkins can monitor errors that occur during integration, provide detailed log files and alerting capabilities, and visually show project build trends and stability in chart form.
According to the official definition, Jenkins has the following uses:
- Build projects
- Run test cases to detect bugs
- Static code analysis
- Deployment
Regarding these four points, Jenkins is quite convenient in actual use: 1.Automated project building and packaging can save developers a lot of time. More importantly, Jenkins maintains a set of high-quality, usable code for us and guarantees a clean environment. We often encounter packaging failures caused by incorrect local configuration. Now Jenkins acts as an impartial judge: if it cannot correctly compile an ipa, then there is a compilation error or configuration issue. Developers no longer need to argue that it runs locally, or that it stopped running after pulling so-and-so’s code. Everyone jointly maintains Jenkins’ ability to compile successfully, because Jenkins’ build environment is much simpler than our local environments; it is the cleanest, uncontaminated build environment. Developers only need to focus on coding. This is the convenience it brings to developers.
2.This can be used for automated testing. Generate a large number of test cases locally. Use the server to continuously run these cases every day. Run every API once every day. It may seem unnecessary, but in reality, a system that runs normally today may very well have problems tomorrow because of today’s code changes. With Jenkins, regression testing can be performed on a daily basis. As long as the code changes, Jenkins runs all regression test cases. When project schedules are tight, in many cases testing does not pay much attention to regression testing; after all, it may very well be “wasted effort” after running through it once. However, when regression testing is not timely, the system may become unusable when it is finally time to release. At that point, going back to find the cause is time-consuming: checking commit history and seeing hundreds of commits is also a headache to investigate. Daily regression testing can identify problems immediately. Testers can focus on unit testing every day and manually perform regression testing once a week. This is the convenience it brings to testers.
3.This is static code analysis, which can detect many code problems, such as potential memory leaks. Because the environment where Jenkins runs is clean, it can still find some problems that our complex local environments cannot, further improving code quality. This is the convenience it brings to quality inspection.
4.Deploy at any time. After Jenkins finishes packaging, subsequent actions can be configured. At this point, it is often used to submit the app to a system that runs test cases, or to deploy it to an internal testing platform to generate a QR code. Low-level issues during deployment, such as being unable to install, are immediately exposed. Testers only need to scan the QR code to install, which is very convenient. This can also be considered a convenience for testing.
The following example uses Weekly Release 2.15 from 2016-07-24 22:35 as an example.
Let’s start installing Jenkins. Download the latest pkg installer from the official website https://jenkins.io/ .
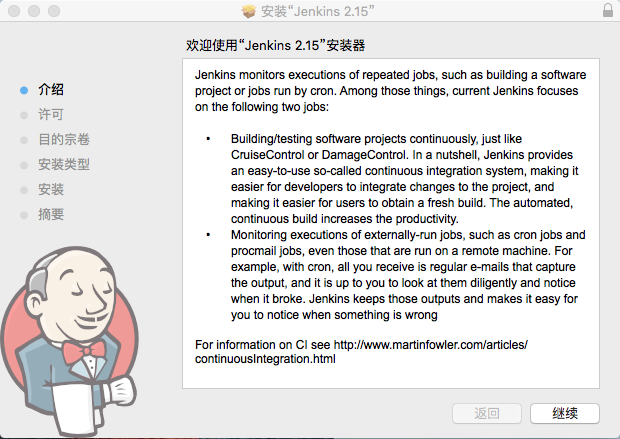
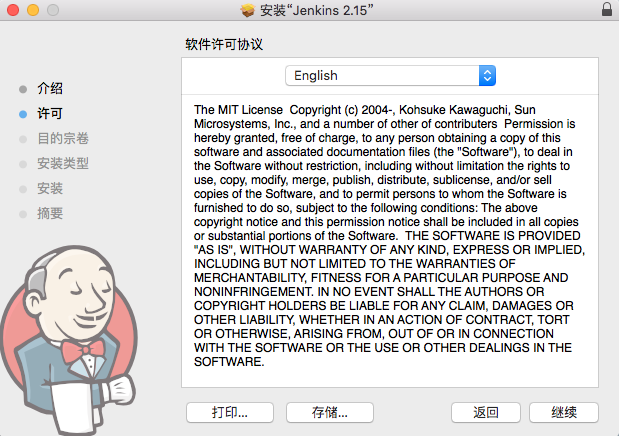
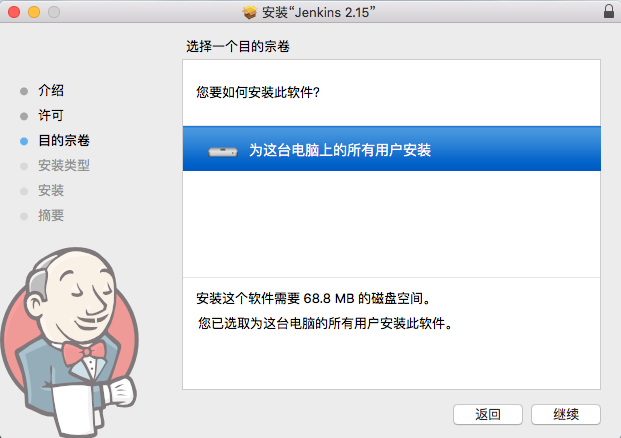
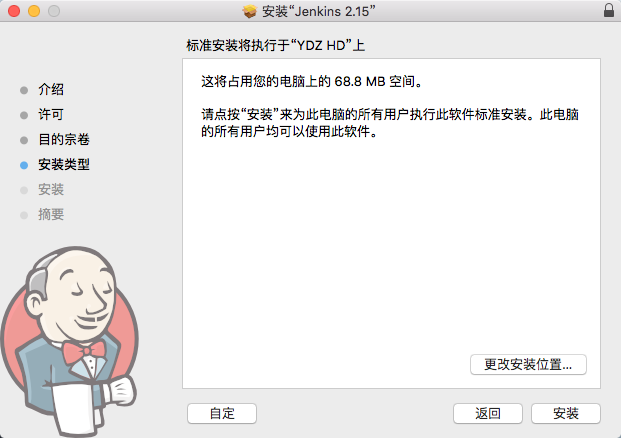
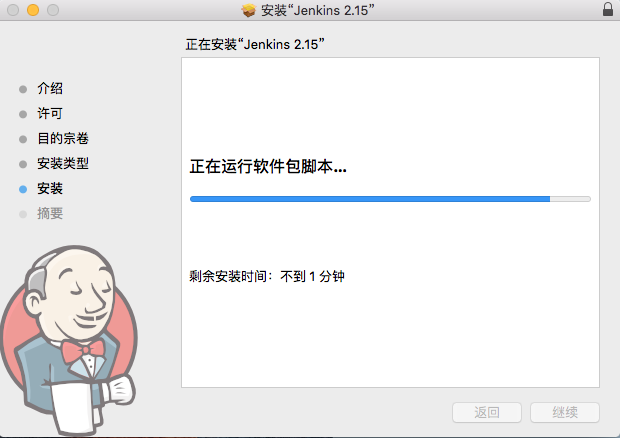
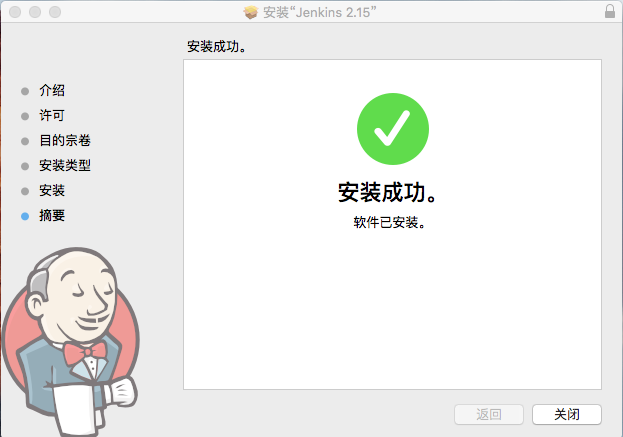
You can also download jenkins.war, then run Java -jar jenkins.war to install it.
After installation is complete, Safari may open automatically. If it does not, open a browser and enter http://localhost:8080
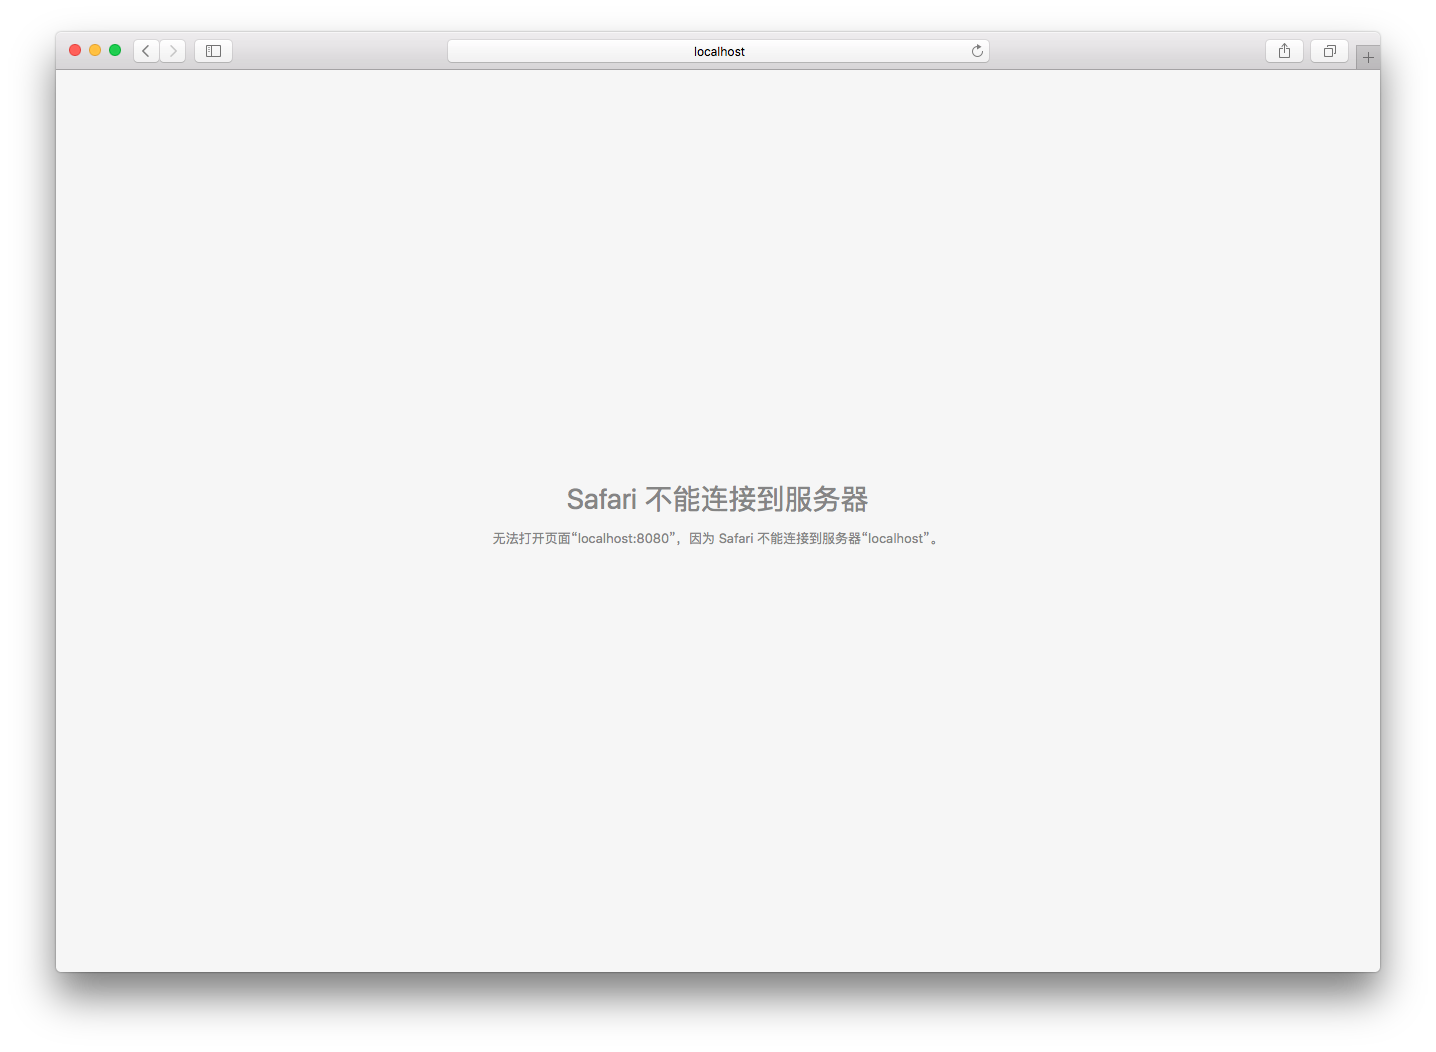
At this point, an error may be reported. If the following issue occurs, the reason is that there is a problem with the Java environment. Reconfigure the Java environment.
At this point, if you restart the computer, you will find that Jenkins has added a new user for you, named Jenkins, but you do not know the password yet. You may try guessing the password, but it will definitely be wrong, because the initial password is very complex. The correct approach is to open http://localhost:8080, and the initial password reset page shown below will appear.
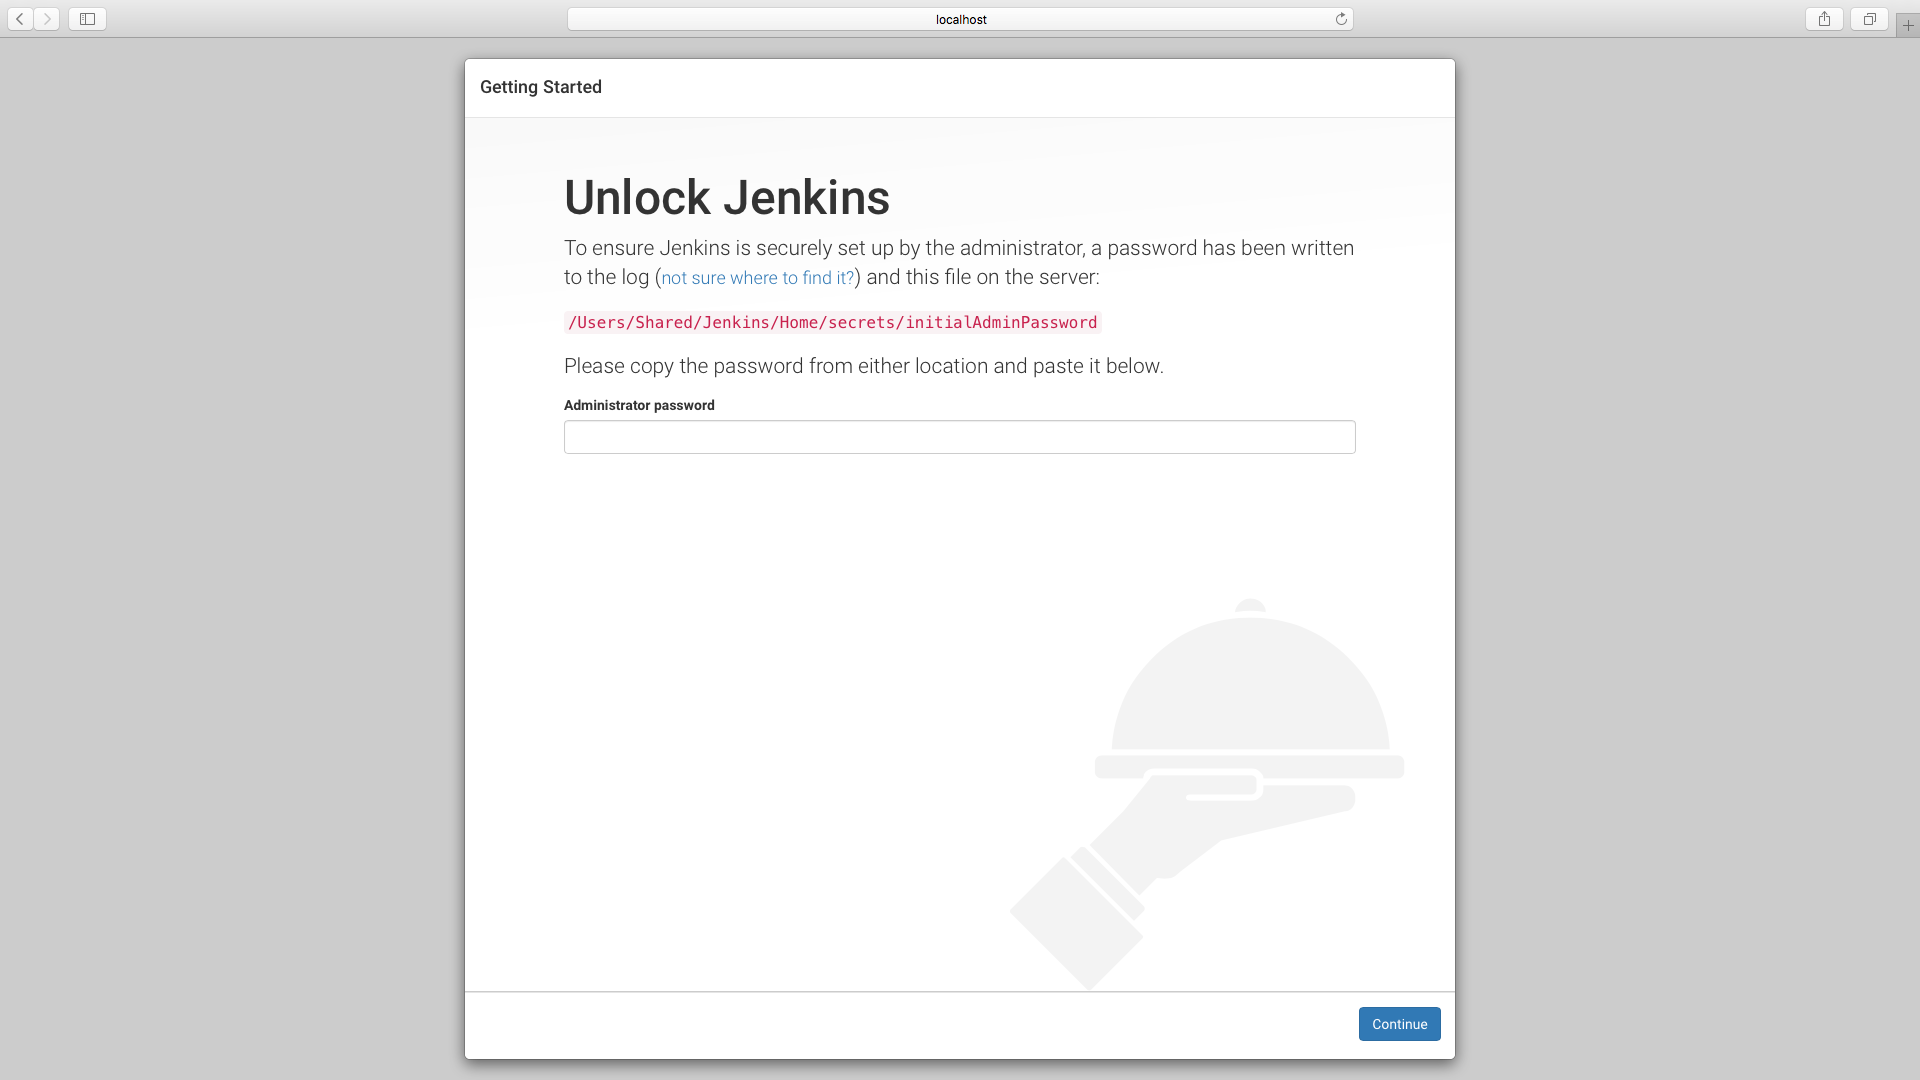
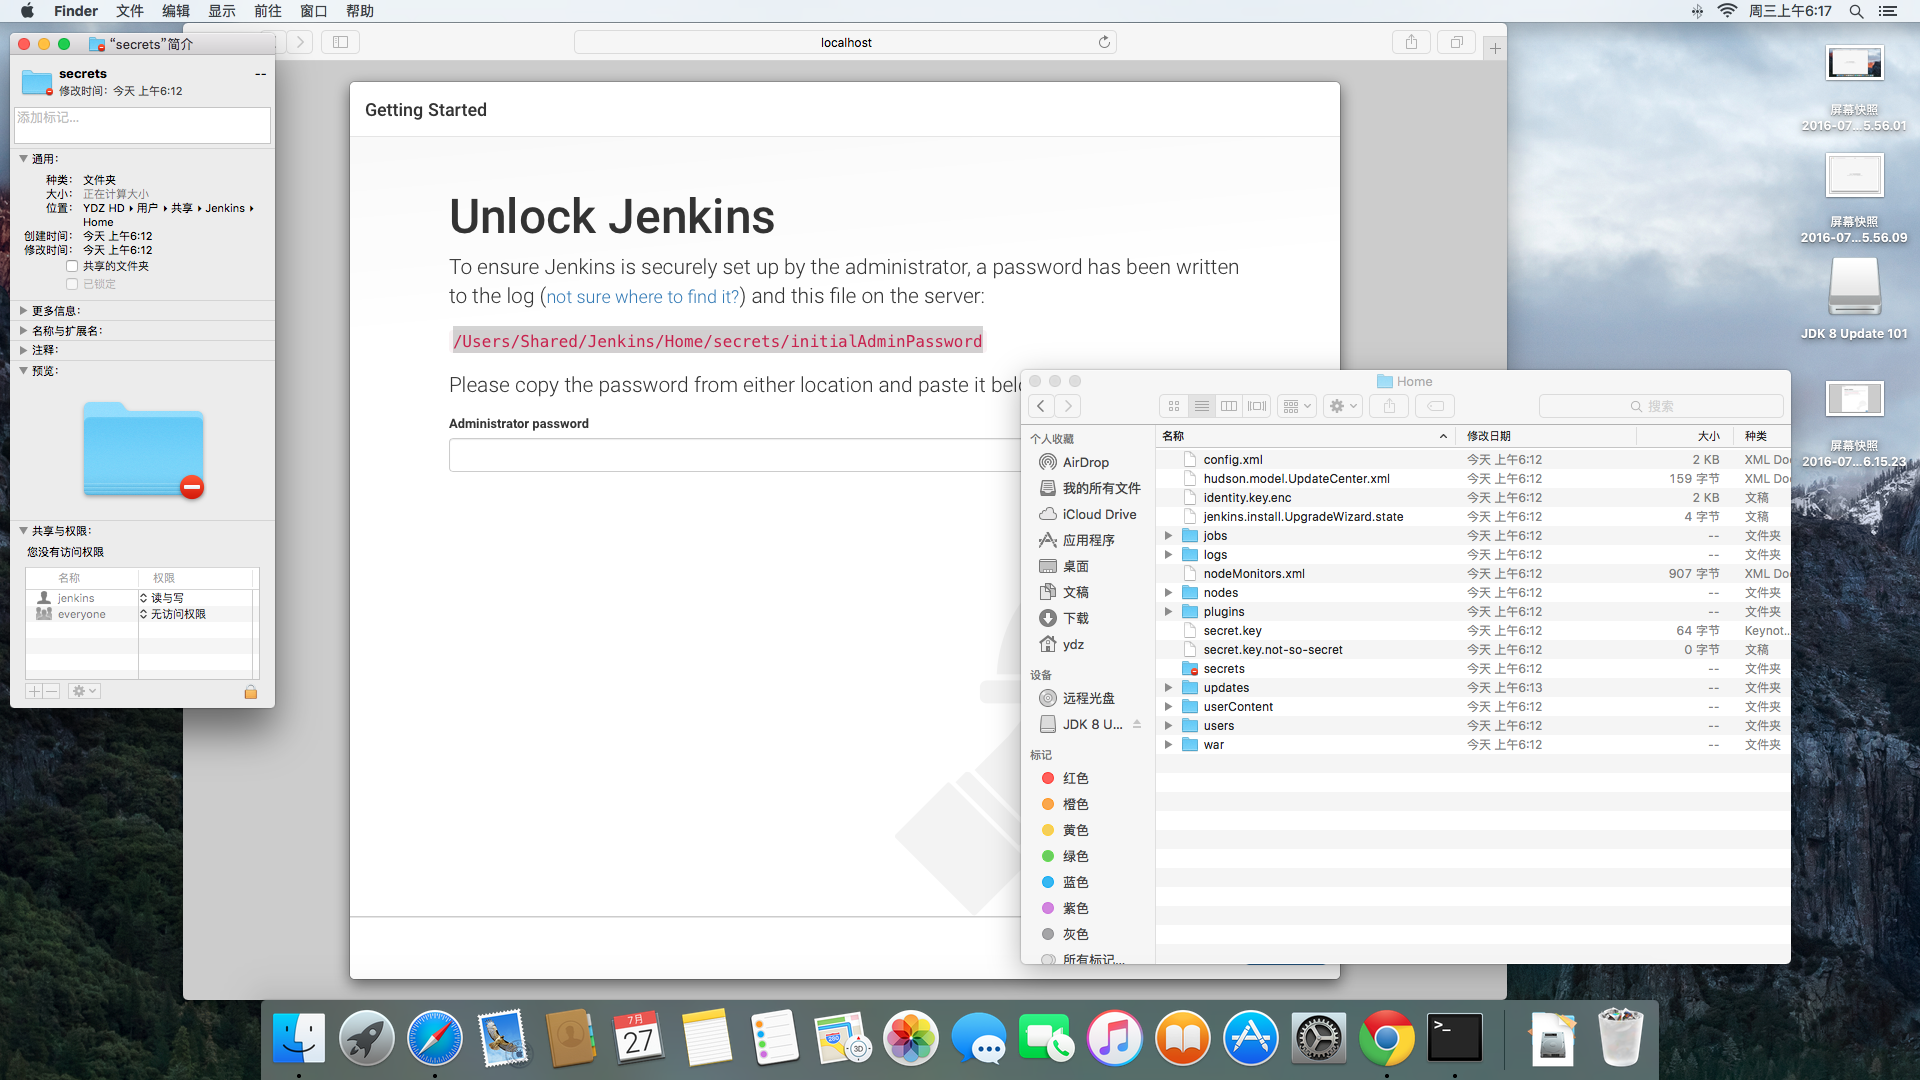
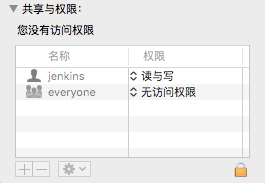
Follow the prompt and go to the /Users/Shared/Jenkins/Home/ directory. Although this directory is a shared directory, it has permissions; non-Jenkins users do not have read/write permission for the /secrets/ directory.
Open the initialAdminPassword file, copy the password, and then you can enter it on the web page to reset the password. As shown below:
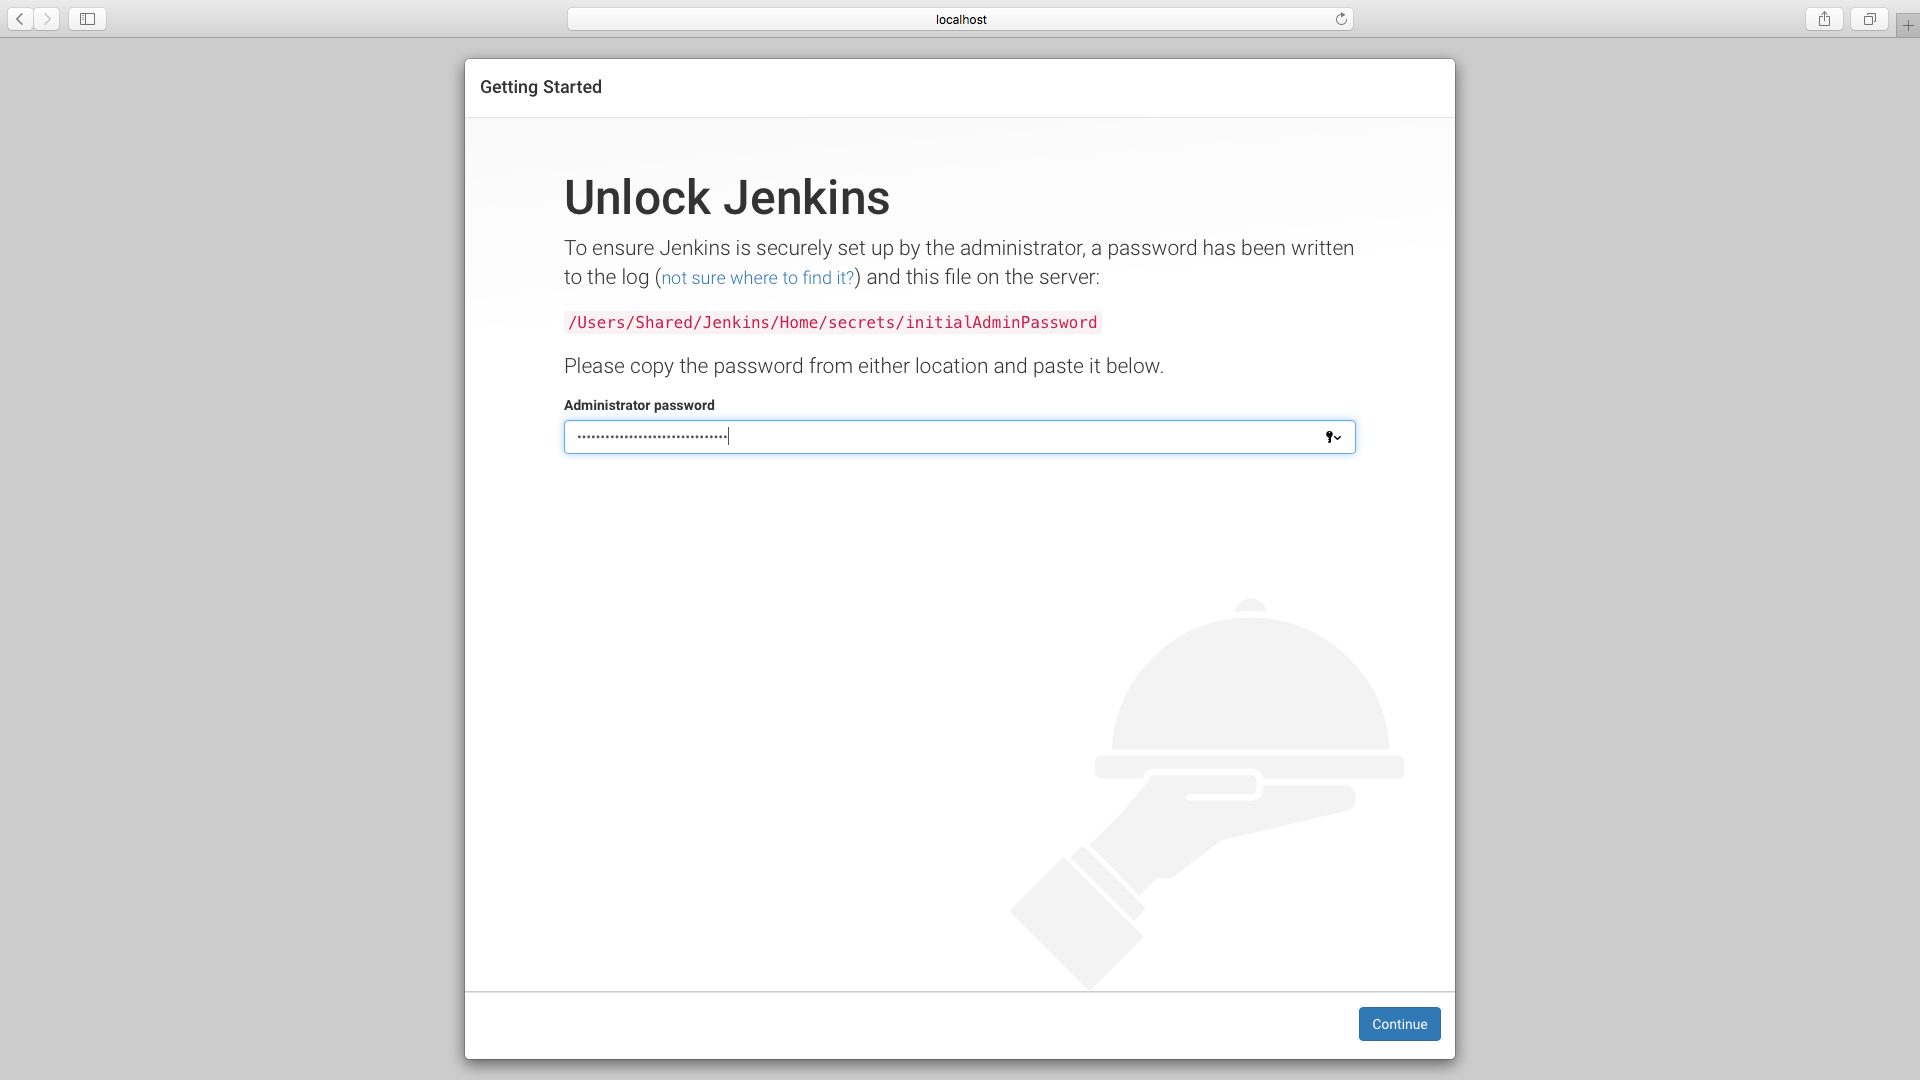
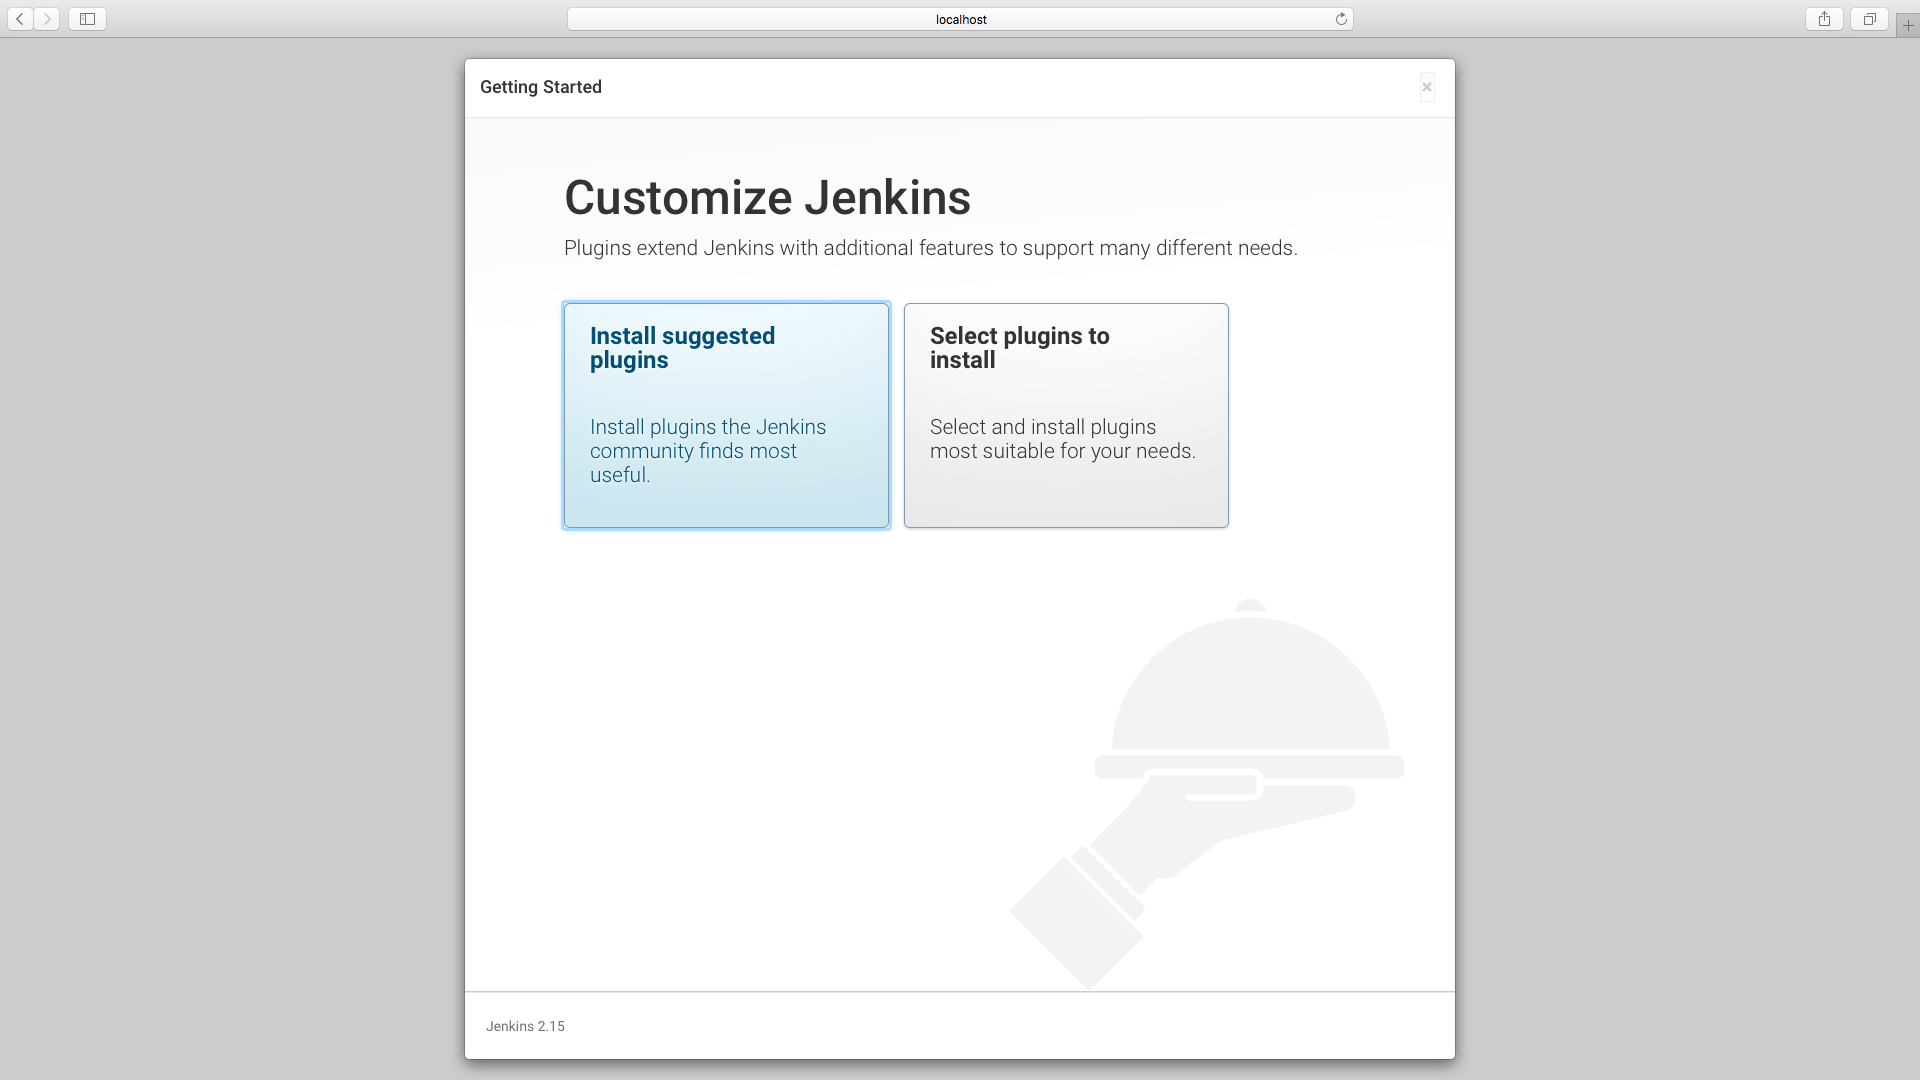
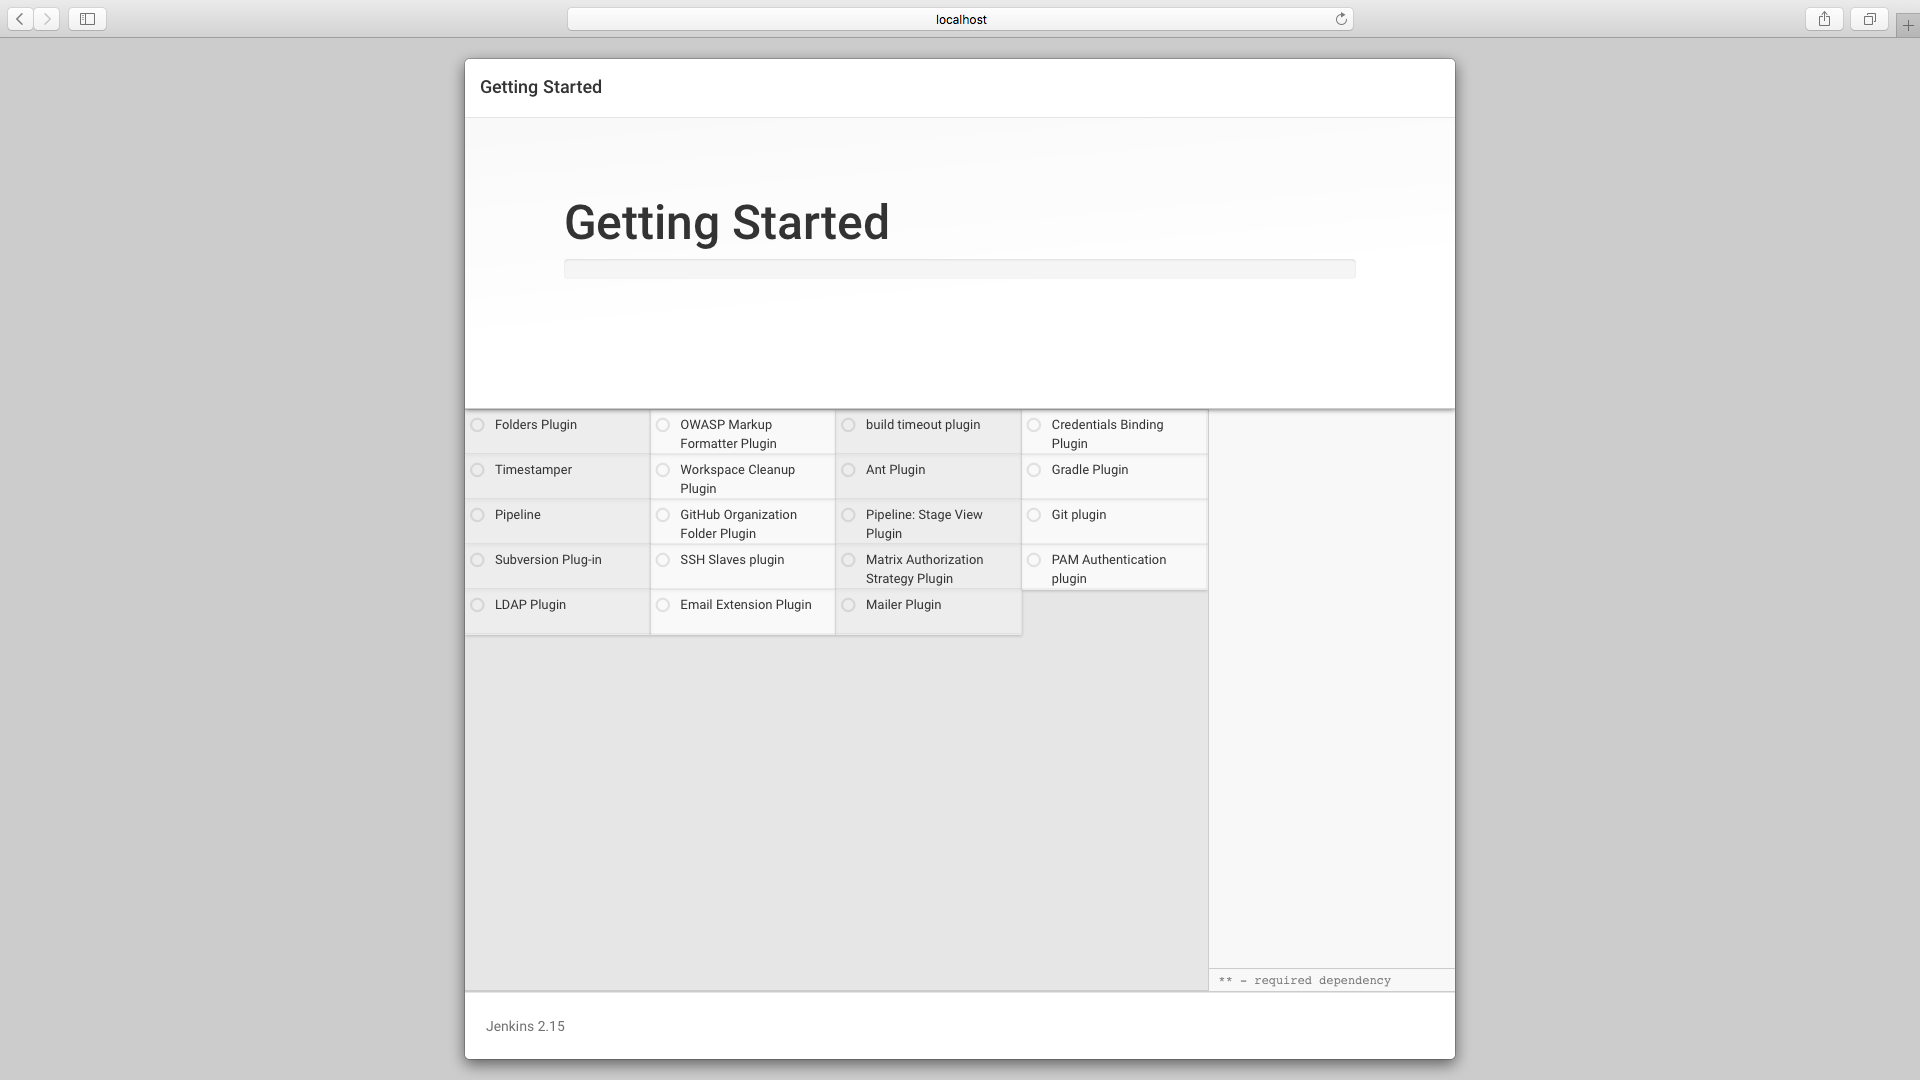
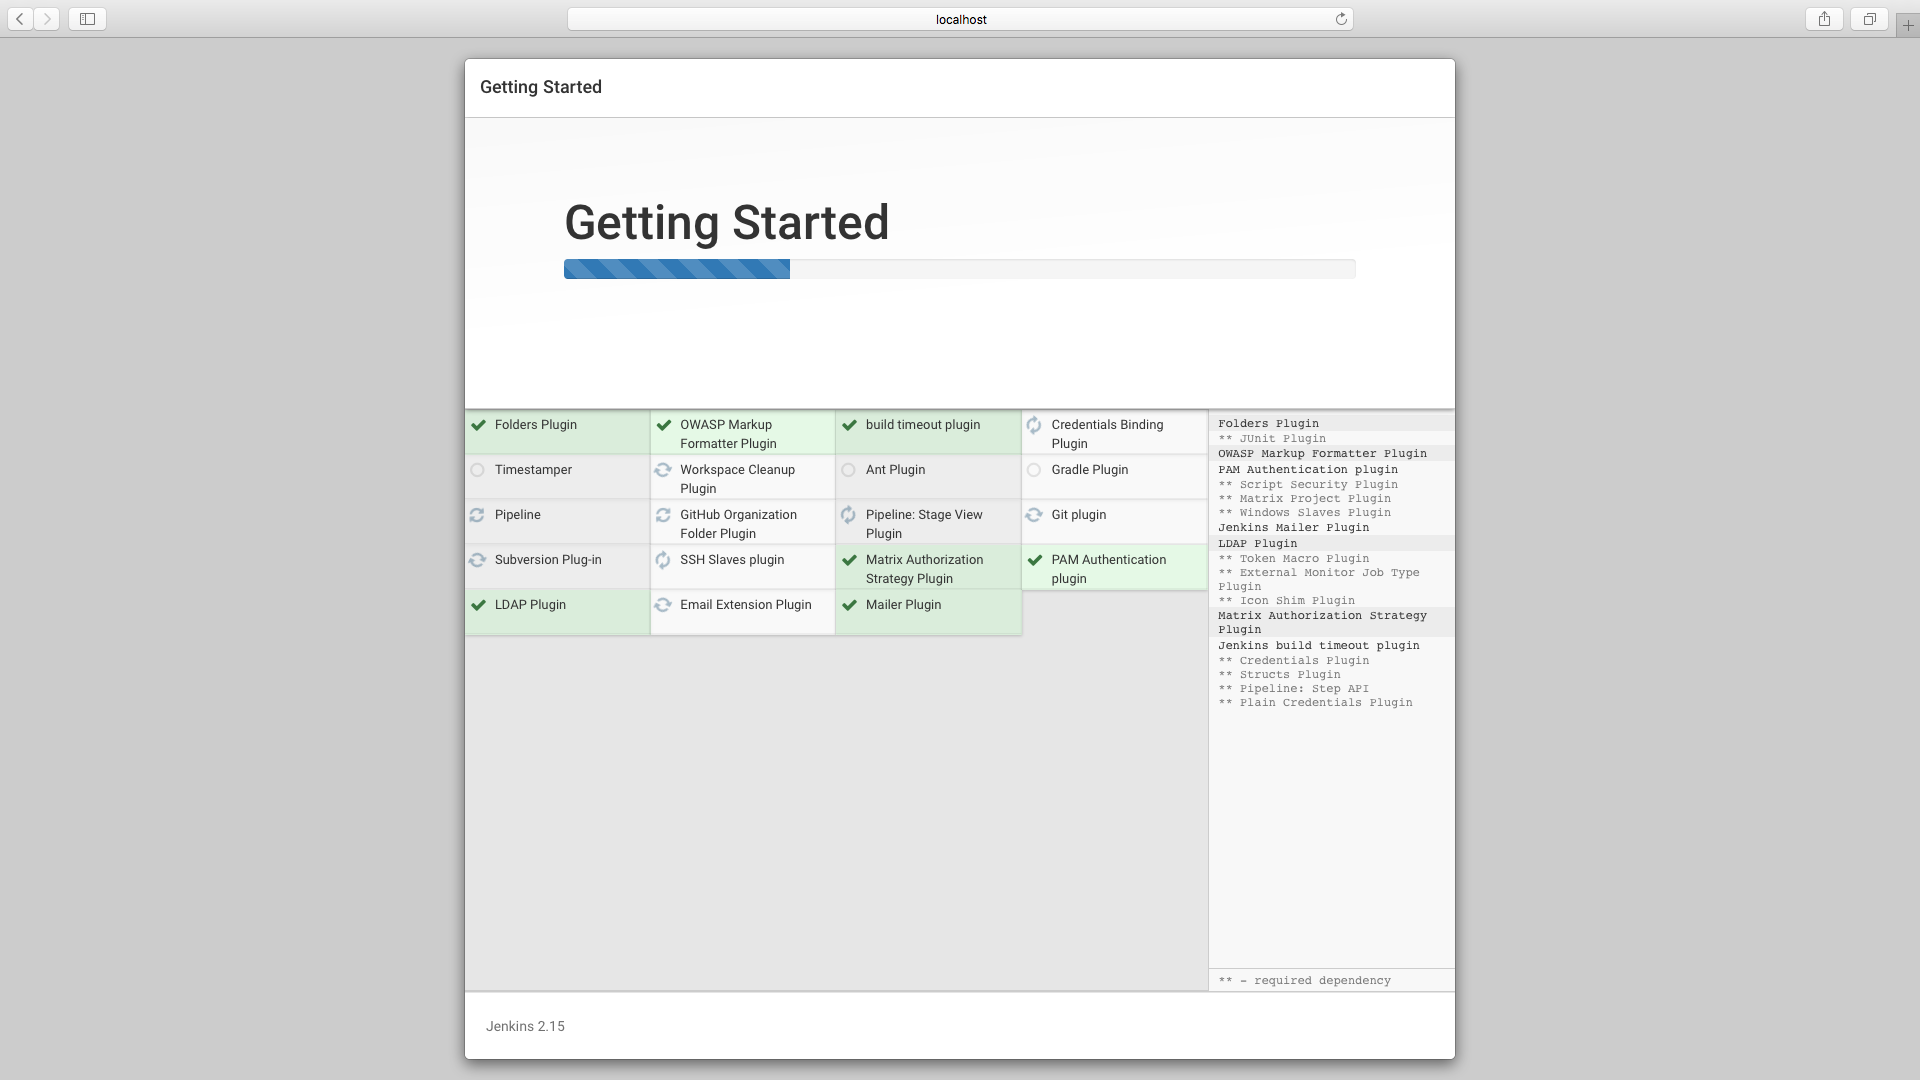
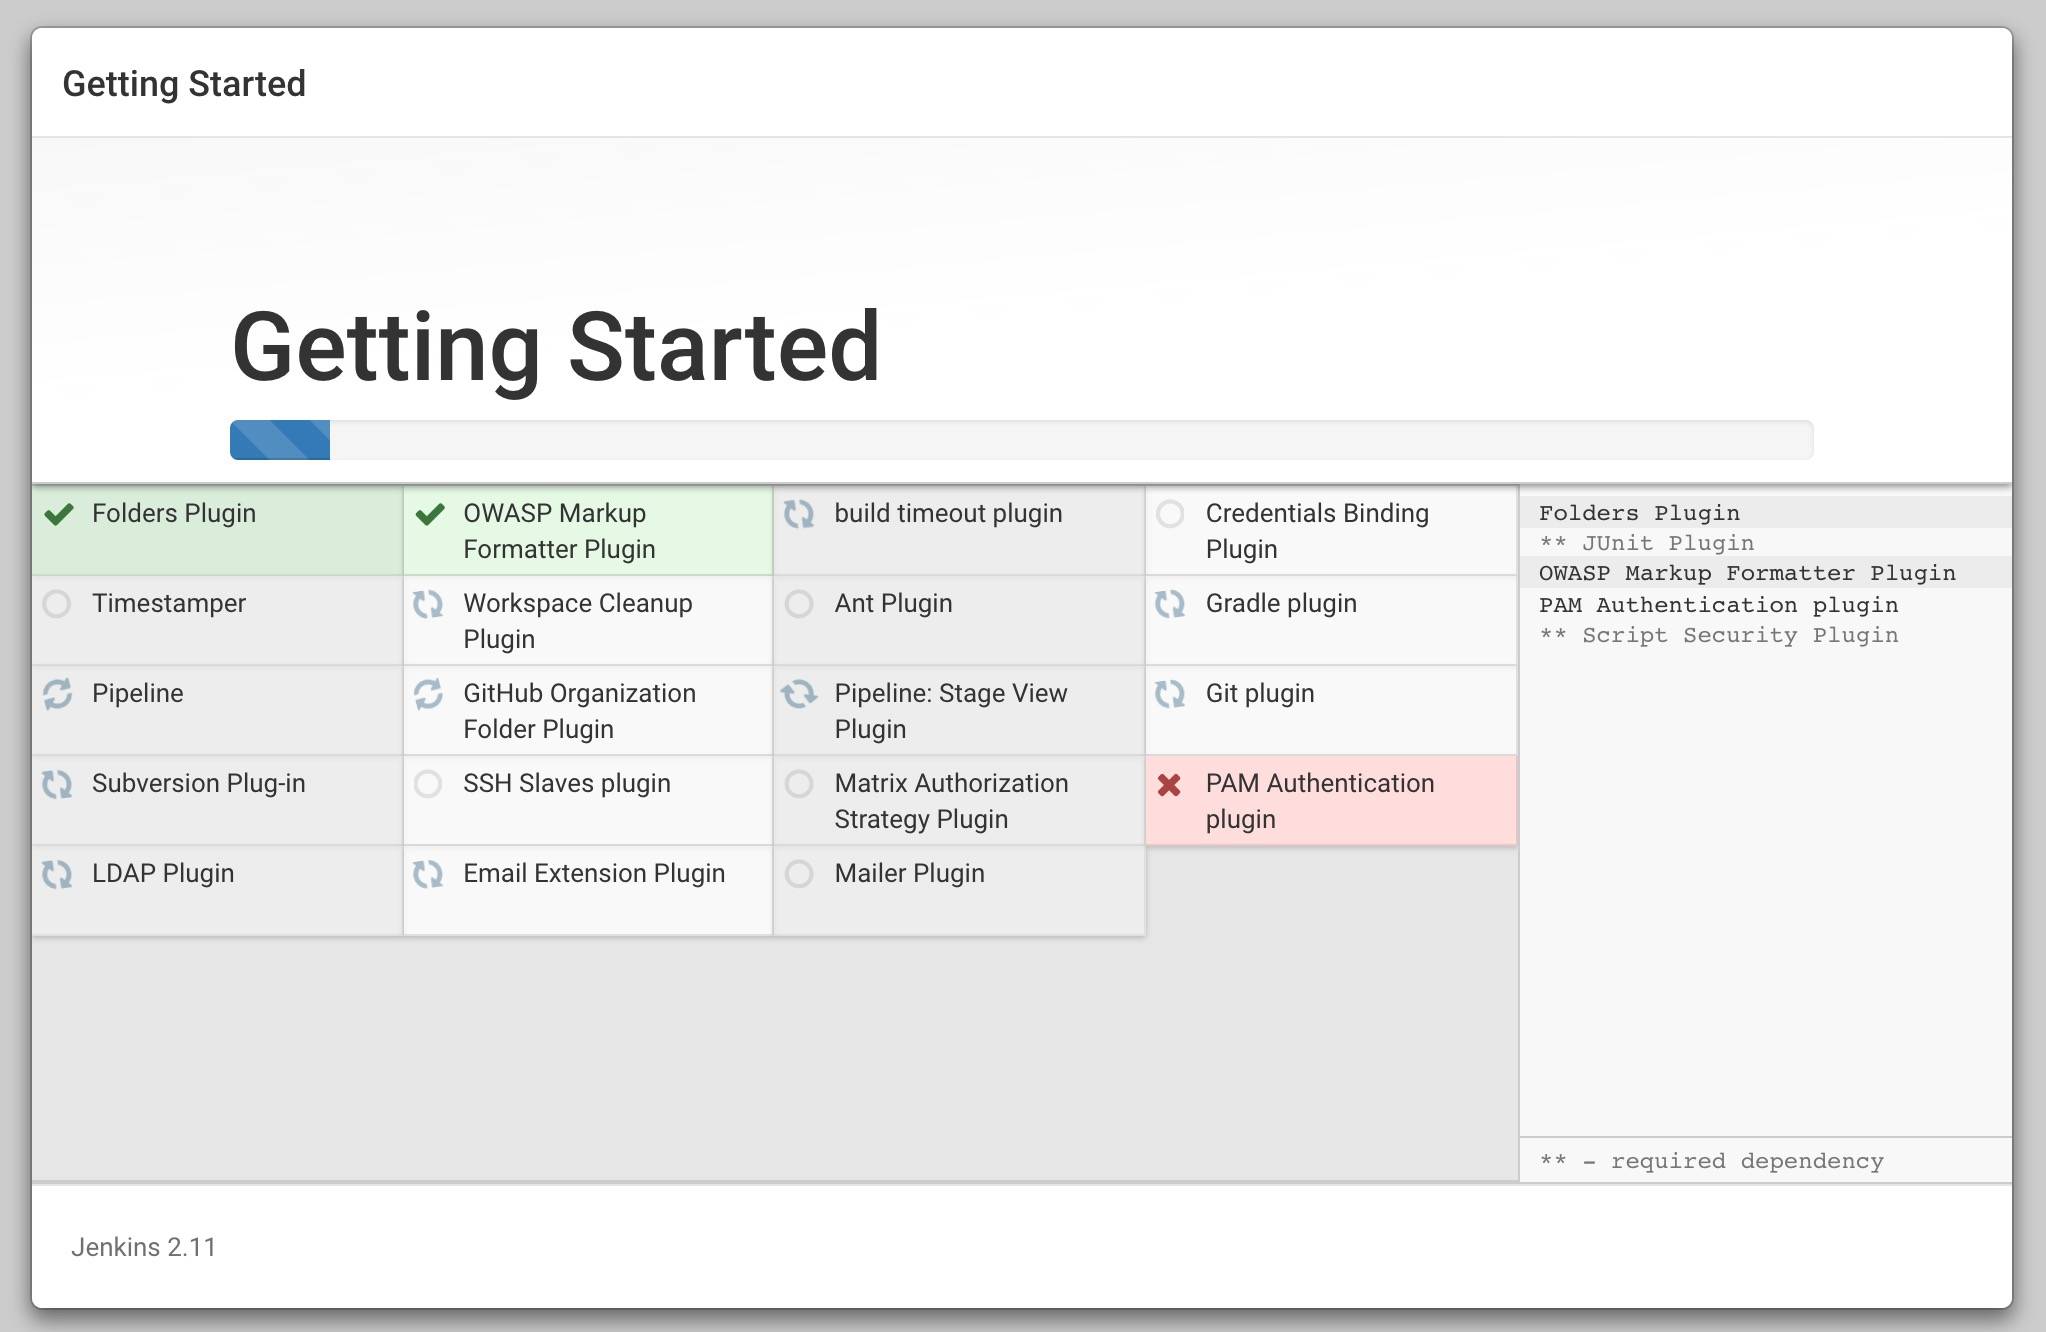
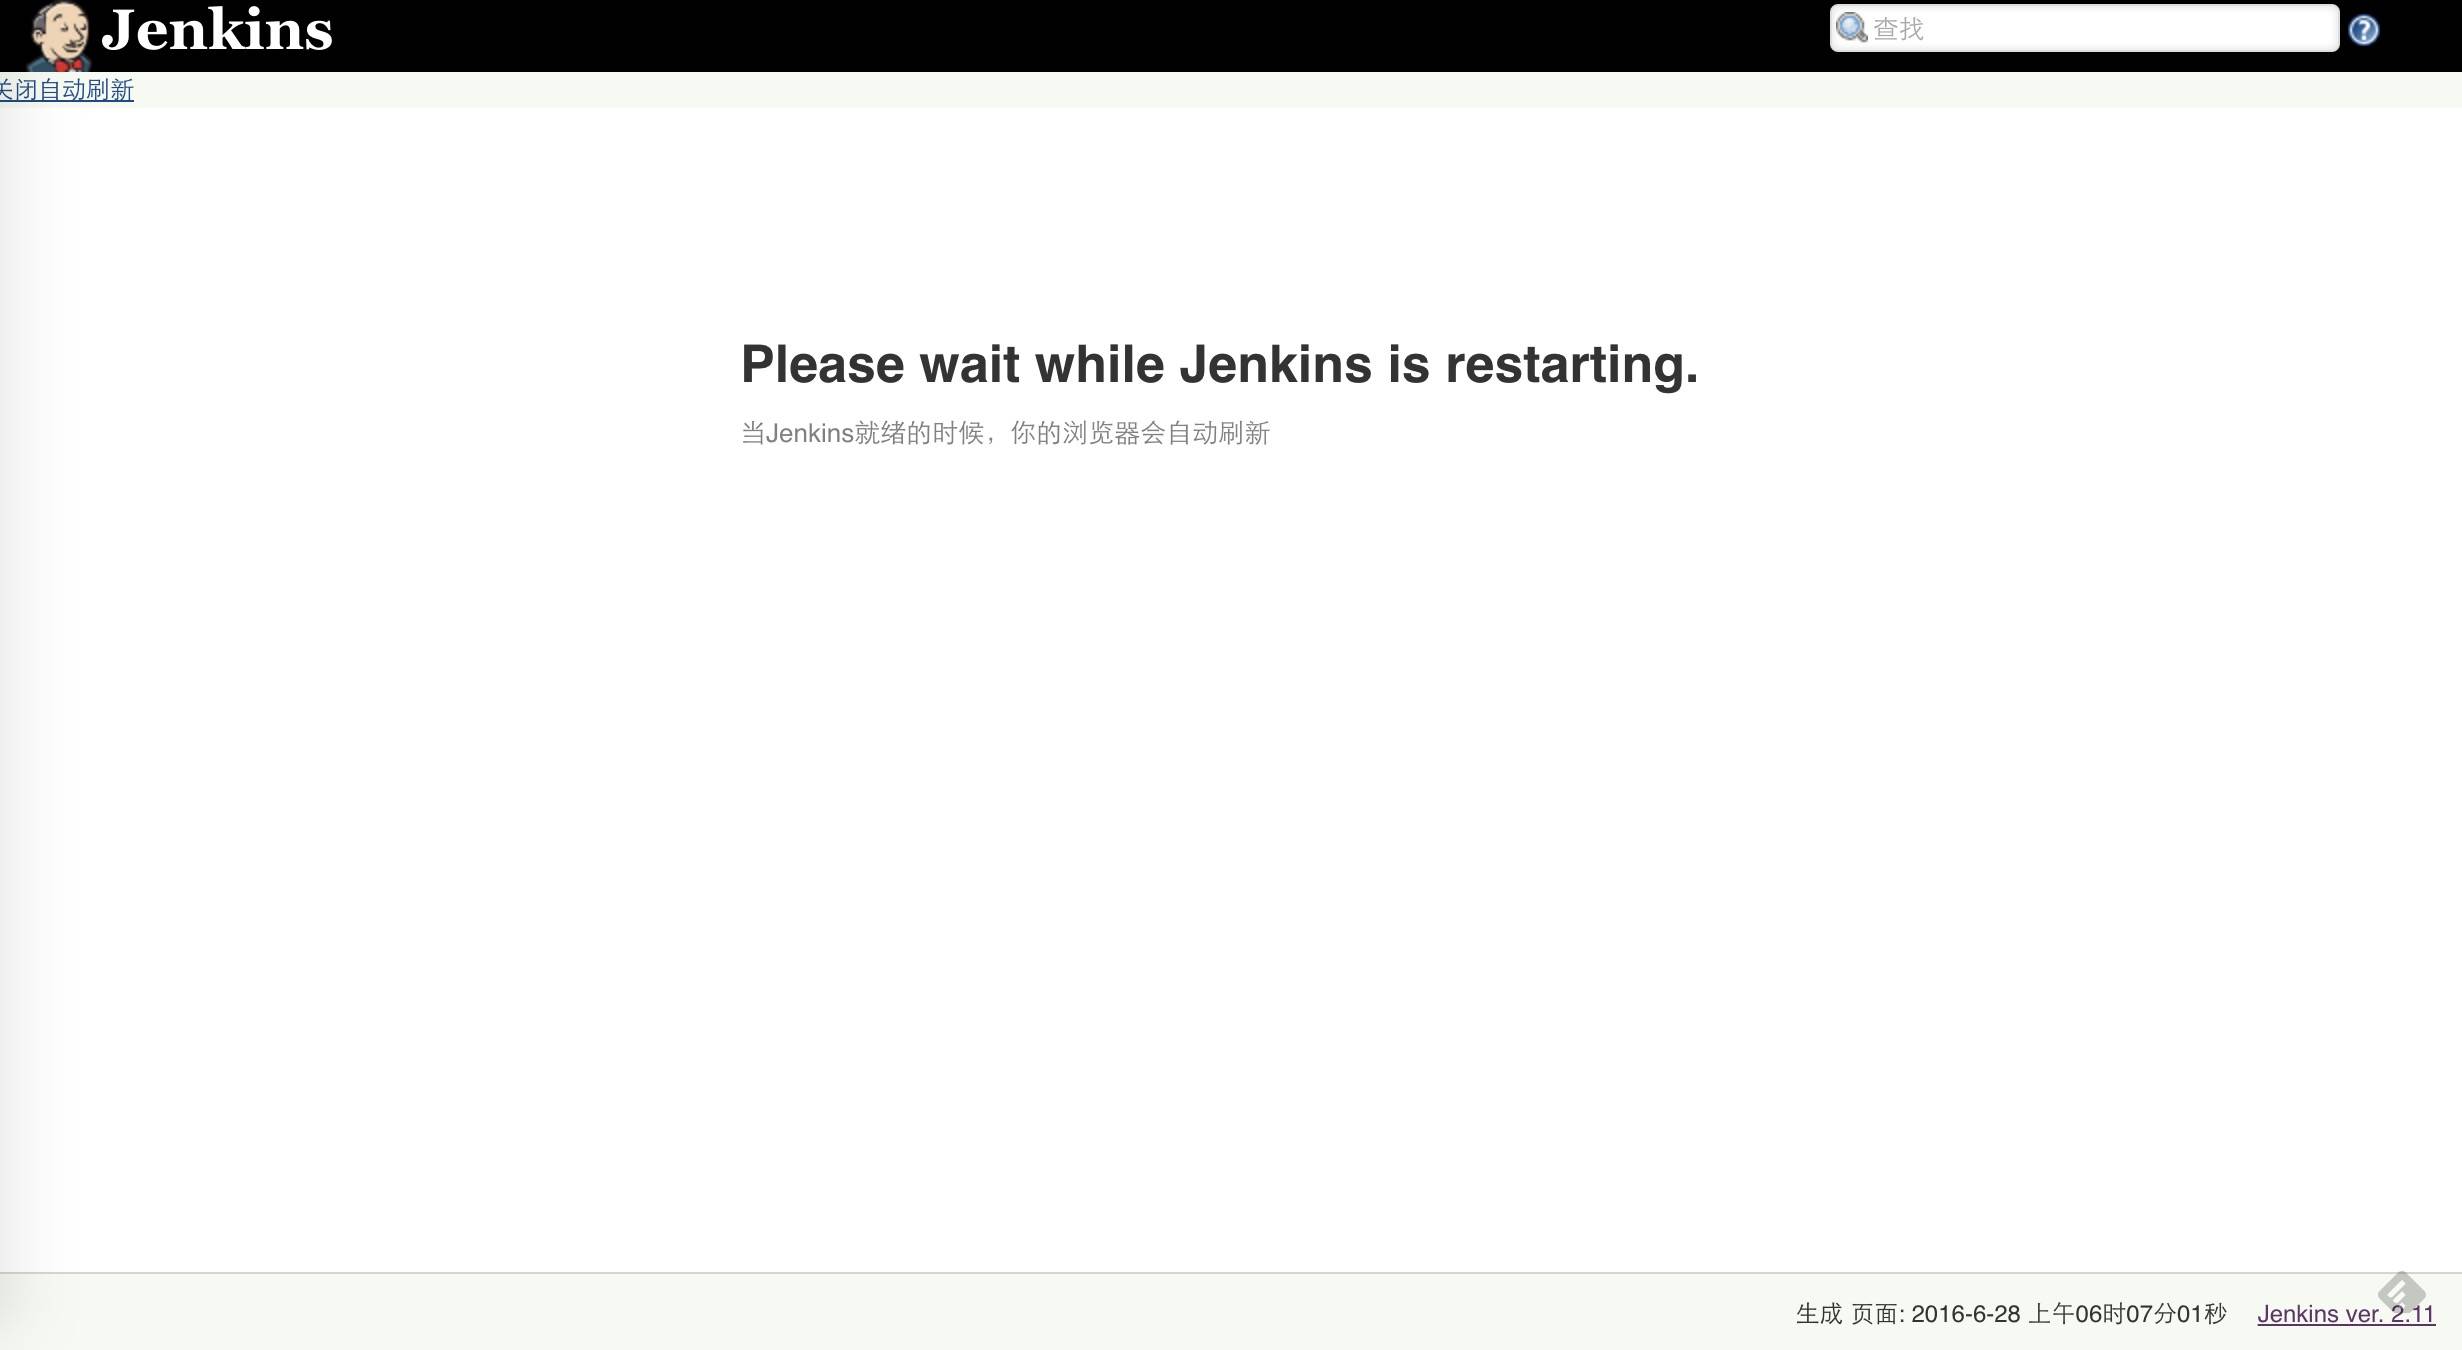
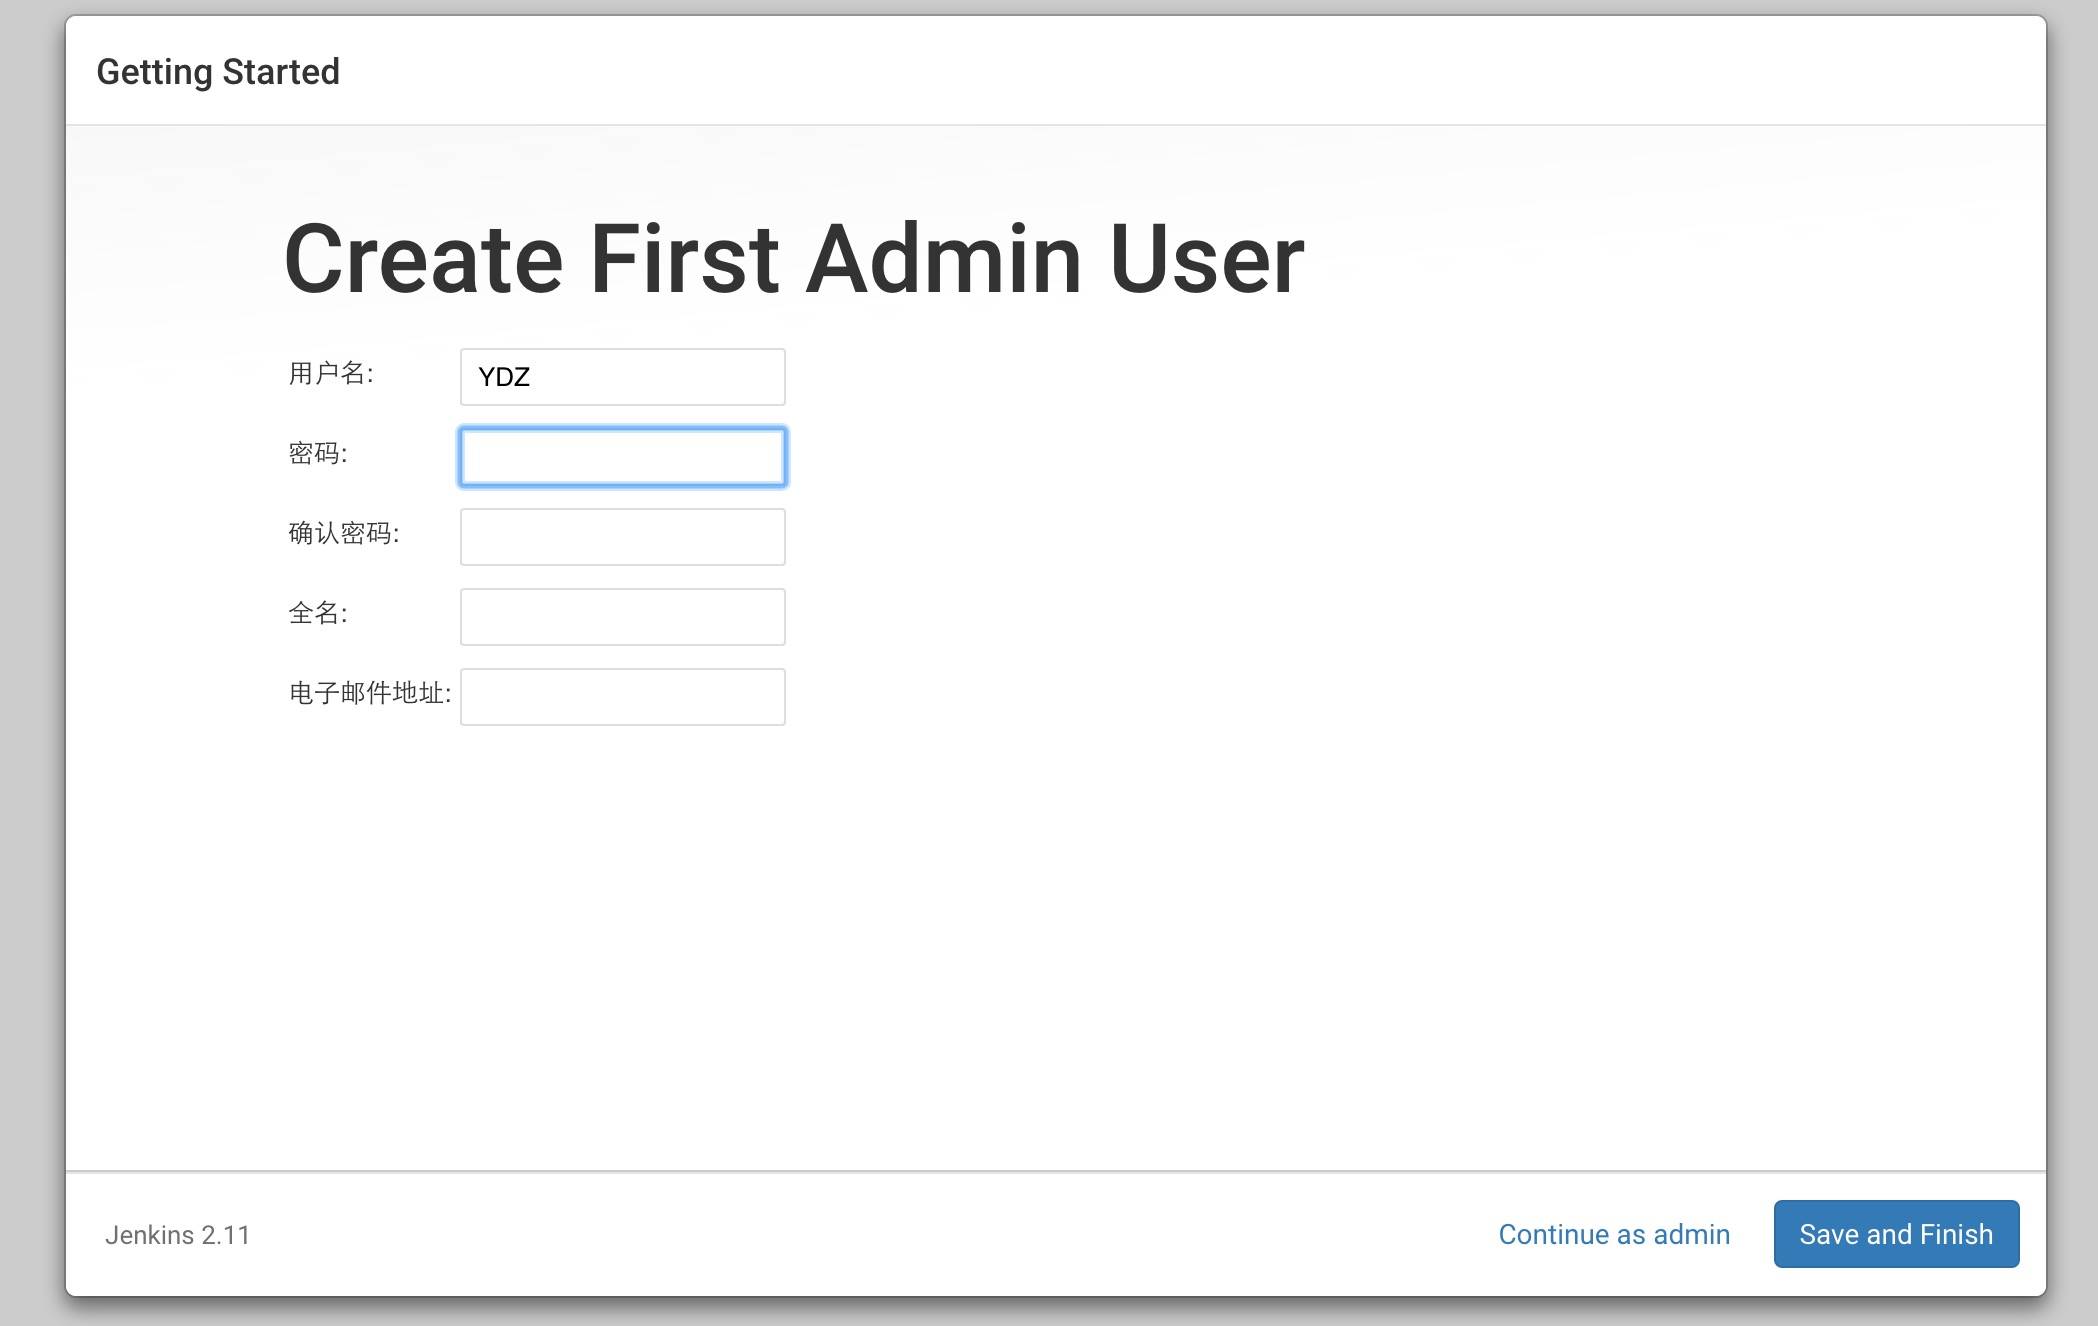
Proceed through the installation, enter the username, password, email, and so on, and the installation is complete.
Continue logging in to localhost:8080, select “Manage Jenkins” — “Manage Plugins”; we need to install some auxiliary plugins first.
Install the GitLab plugin Because we use GitLab to manage source code, and Jenkins itself does not include the GitLab plugin by default, we need to select Manage Jenkins->Manage Plugins, then in “Available Plugins” select both “GitLab Plugin” and “Gitlab Hook Plugin”, and install them.
Install the Xcode plugin The steps are the same as installing the GitLab plugin. Select Manage Jenkins->Manage Plugins, then in “Available Plugins” select “Xcode integration” and install it. Once this is installed, we can configure a build project.
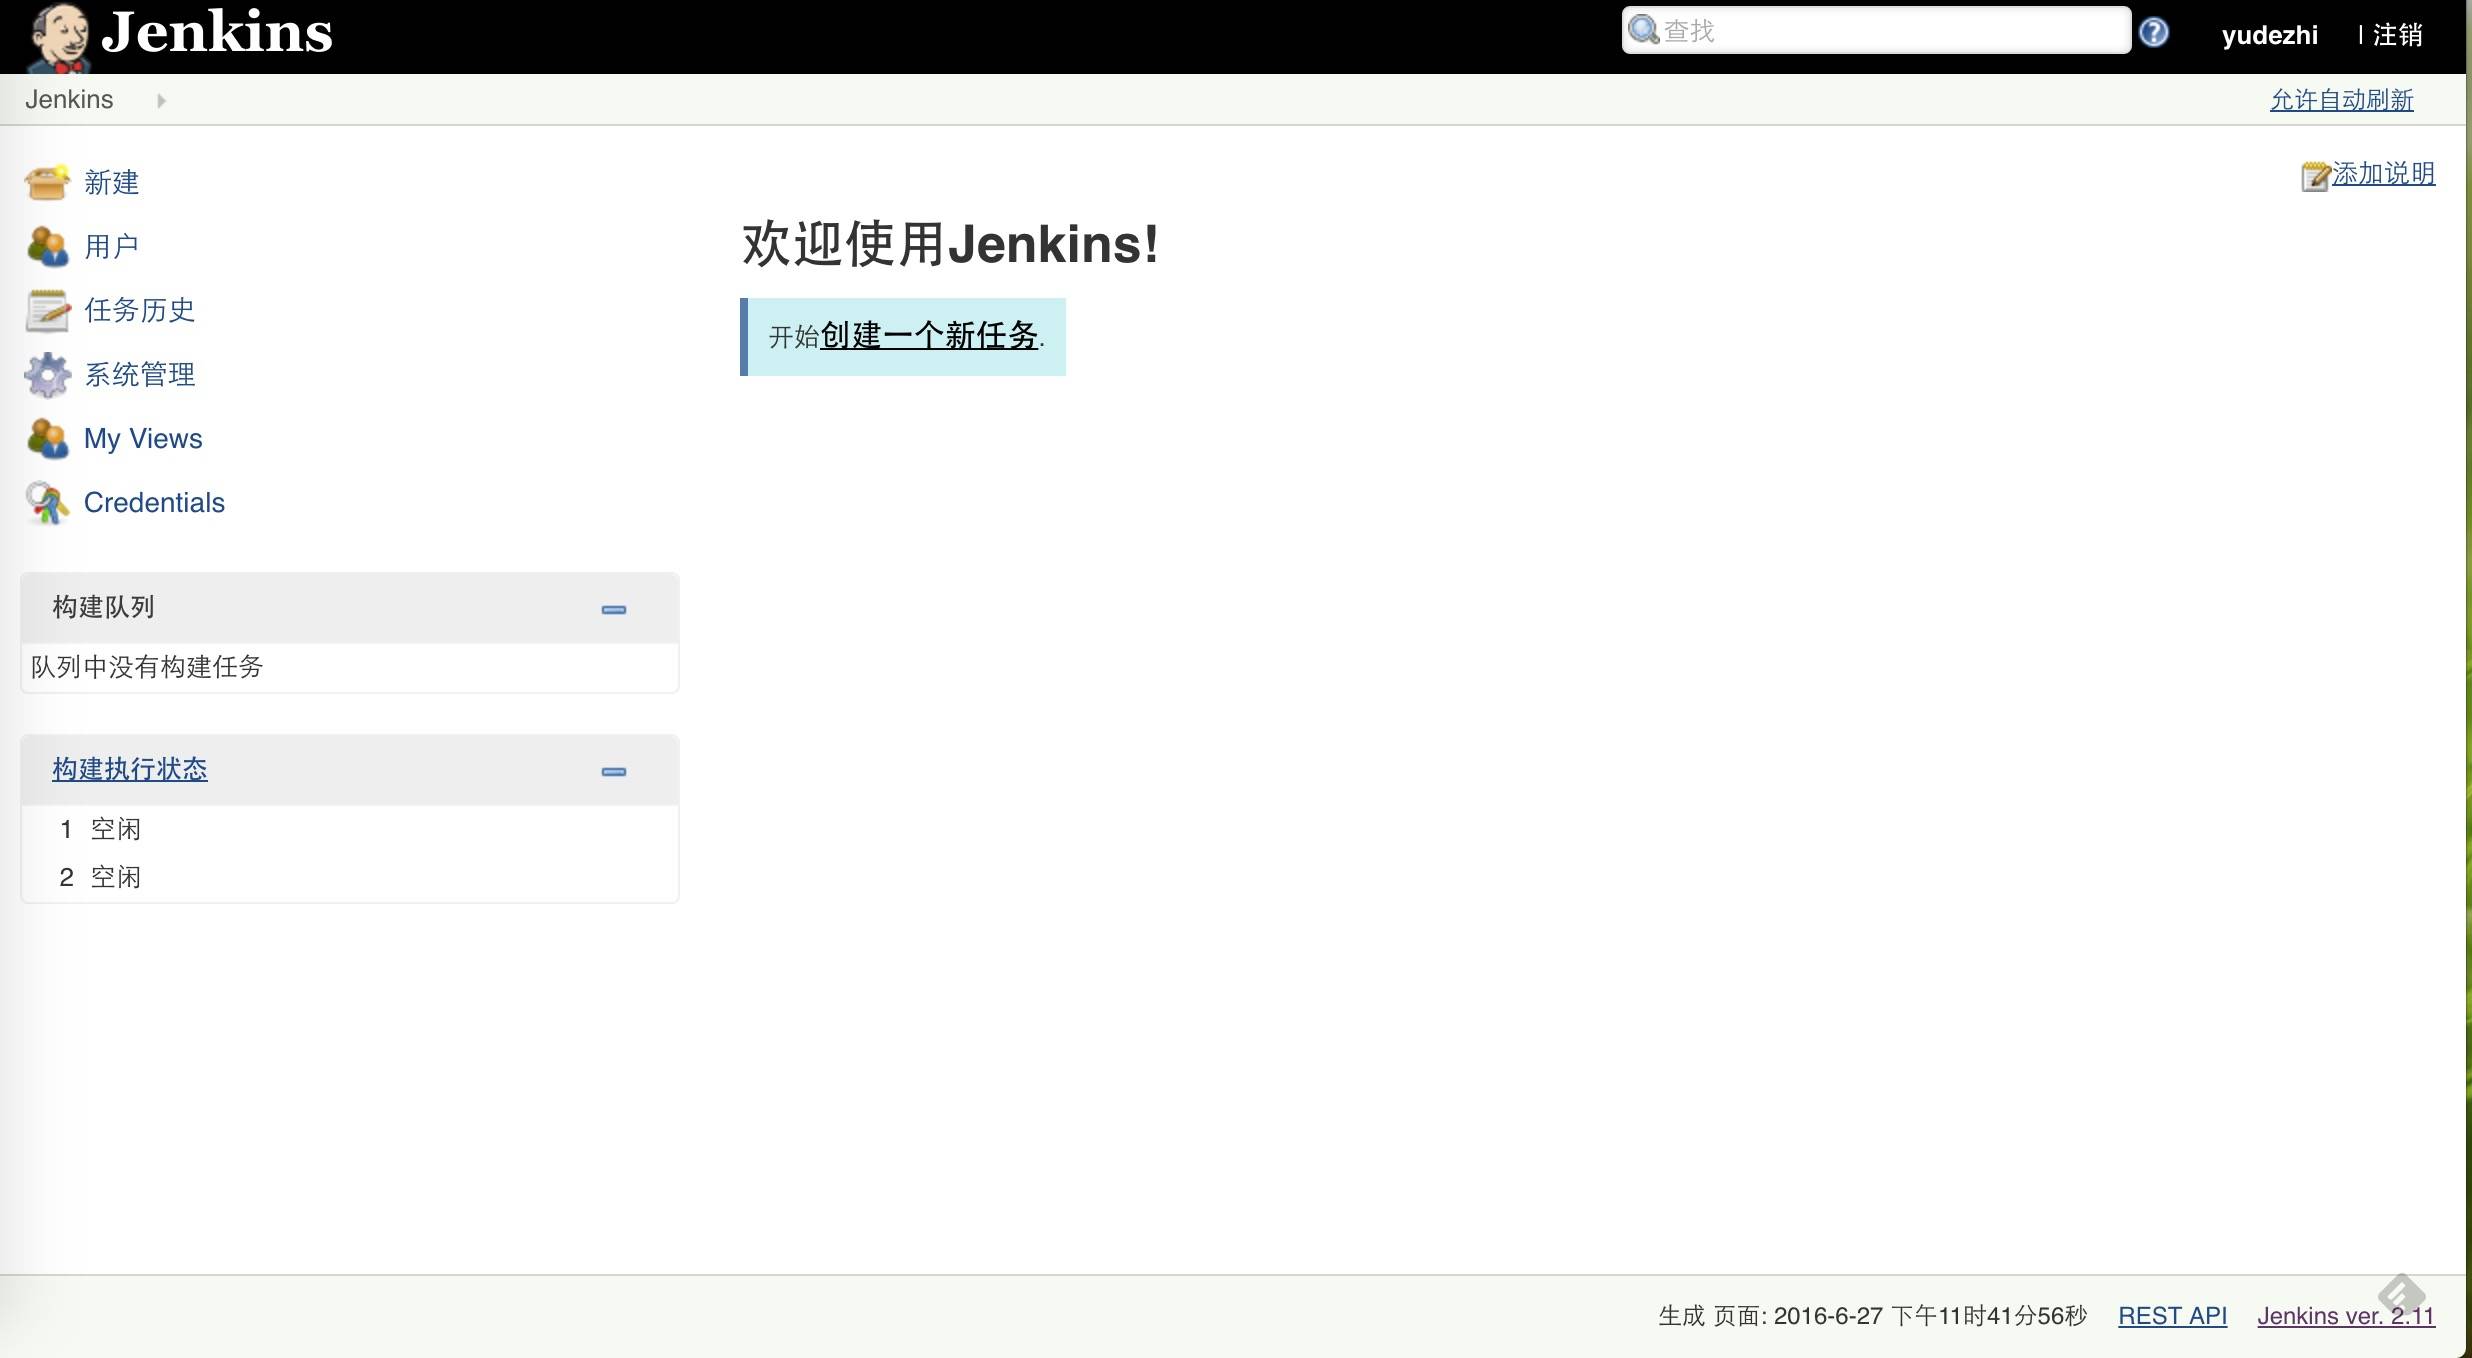
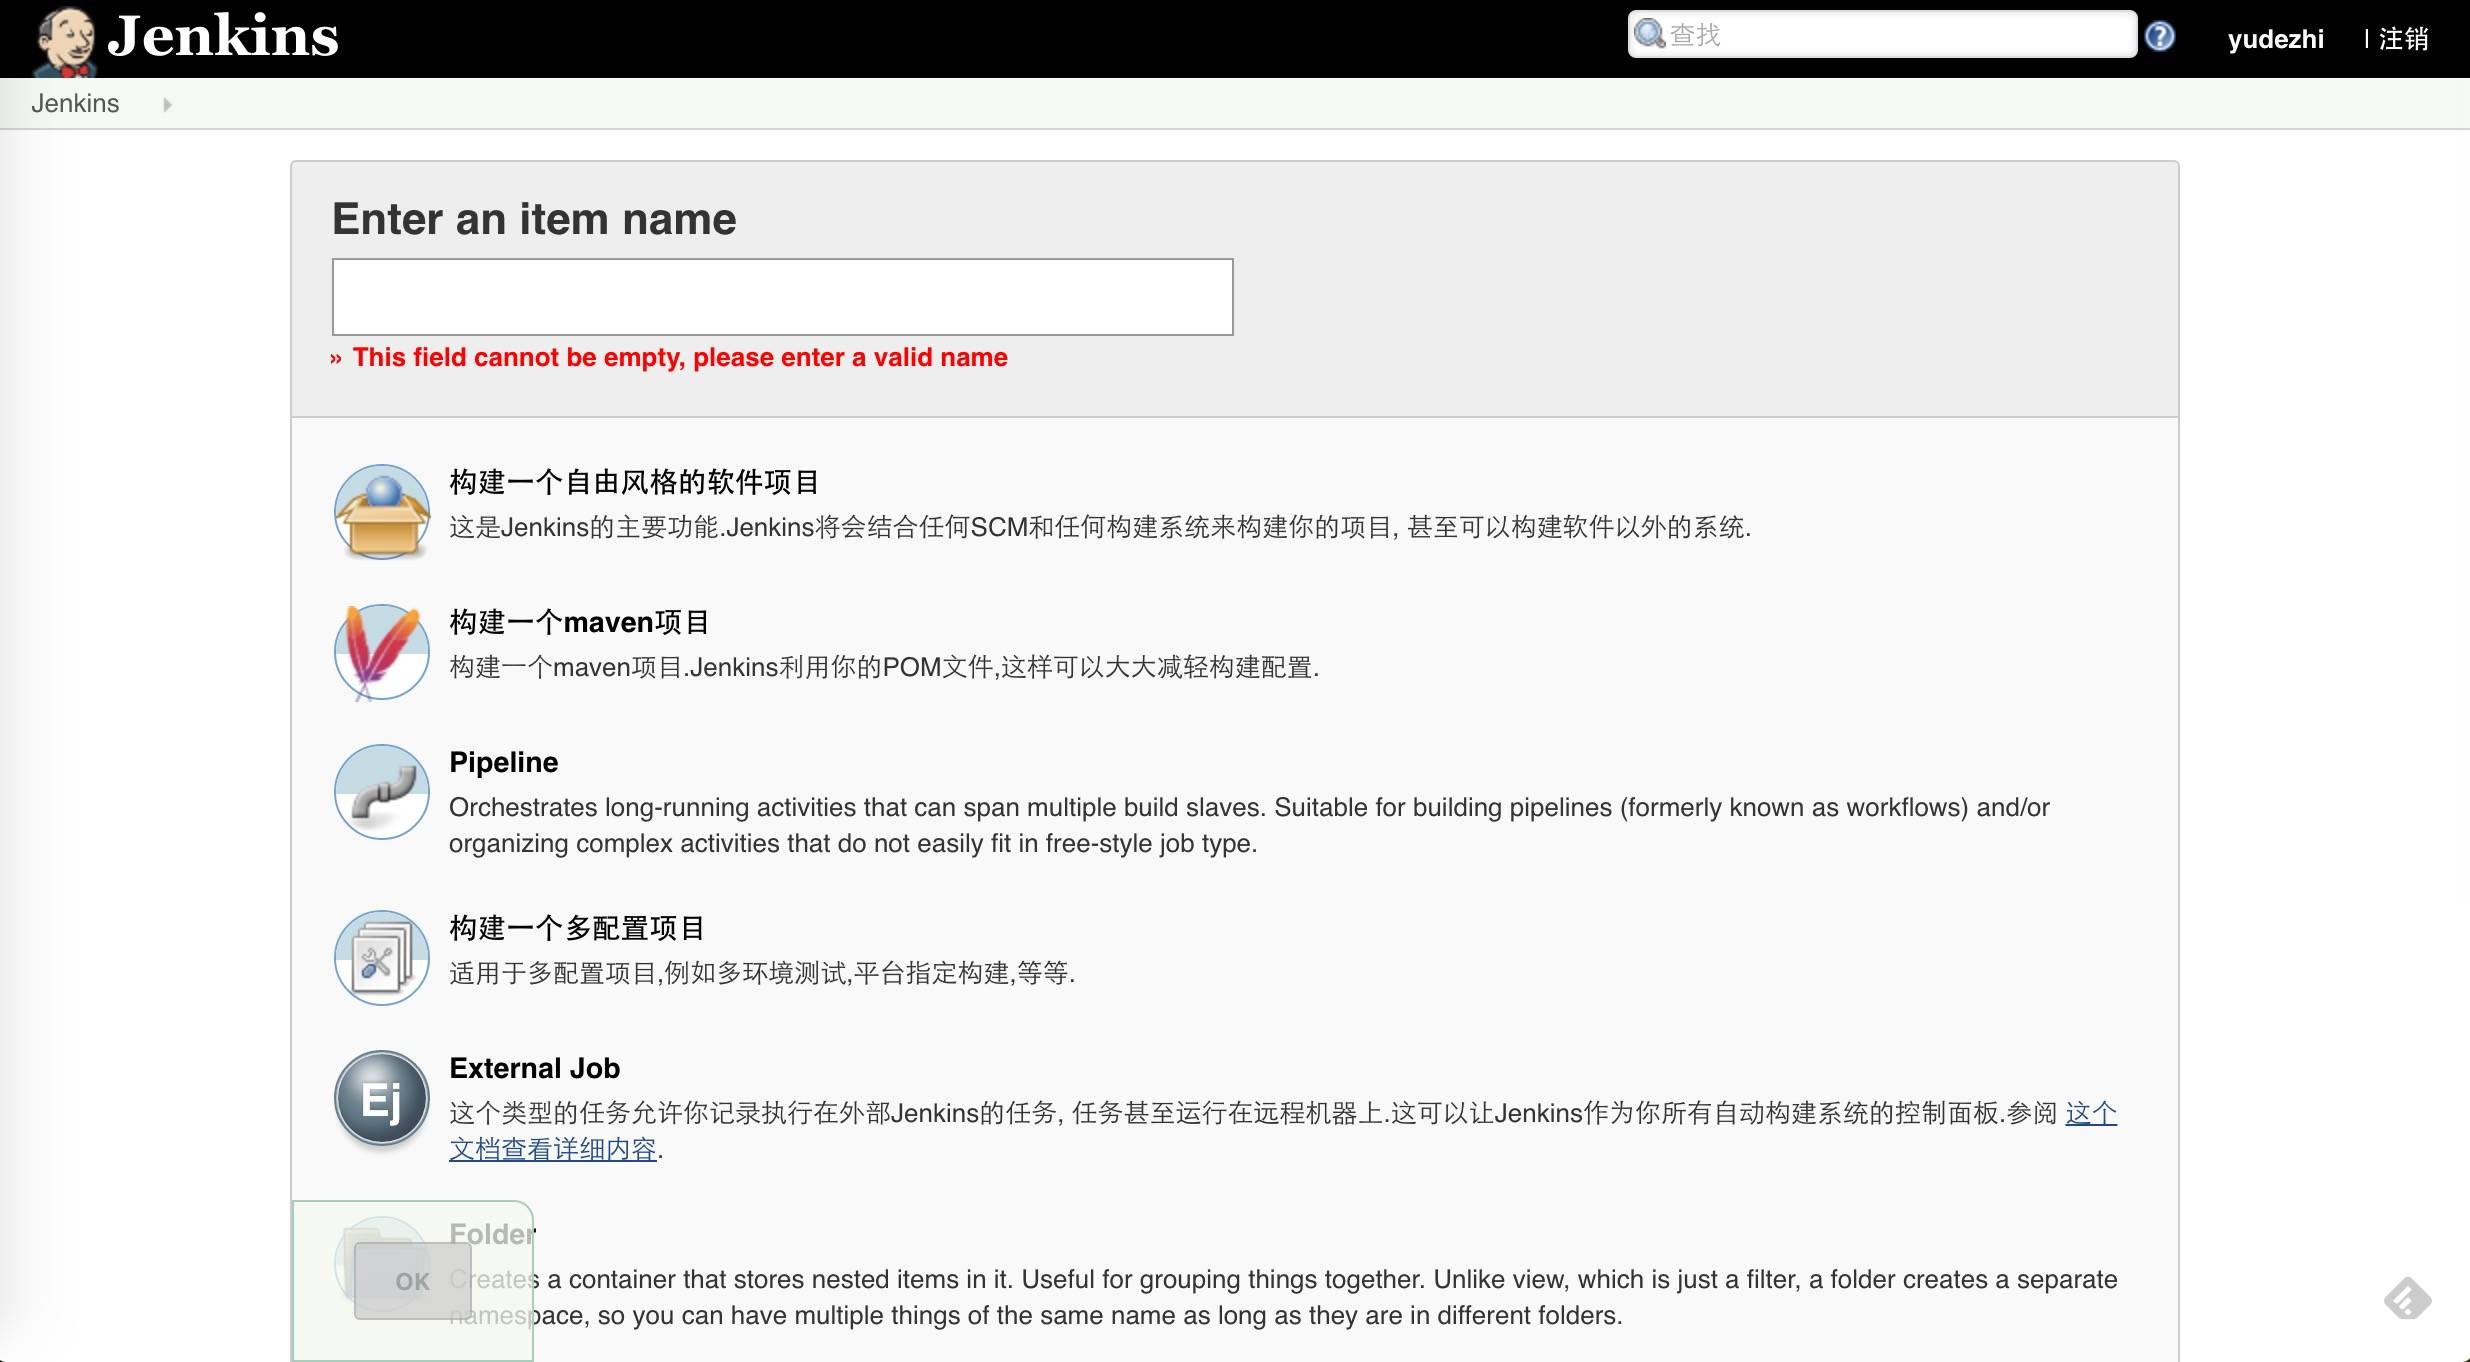
Click the newly created project and configure the General parameters.
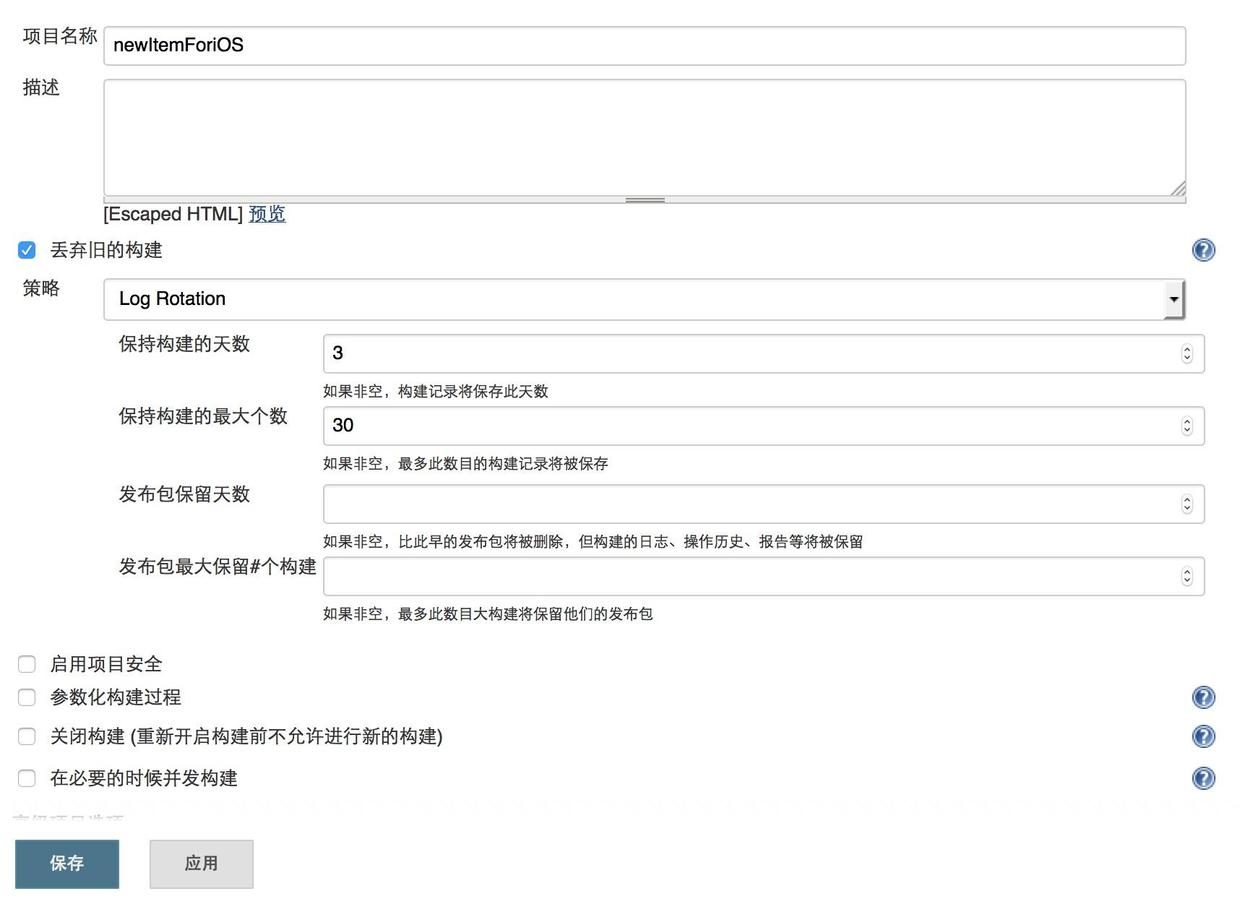
Here you can configure the retention days and retention count for build artifacts.
Next, configure Source Code Management.
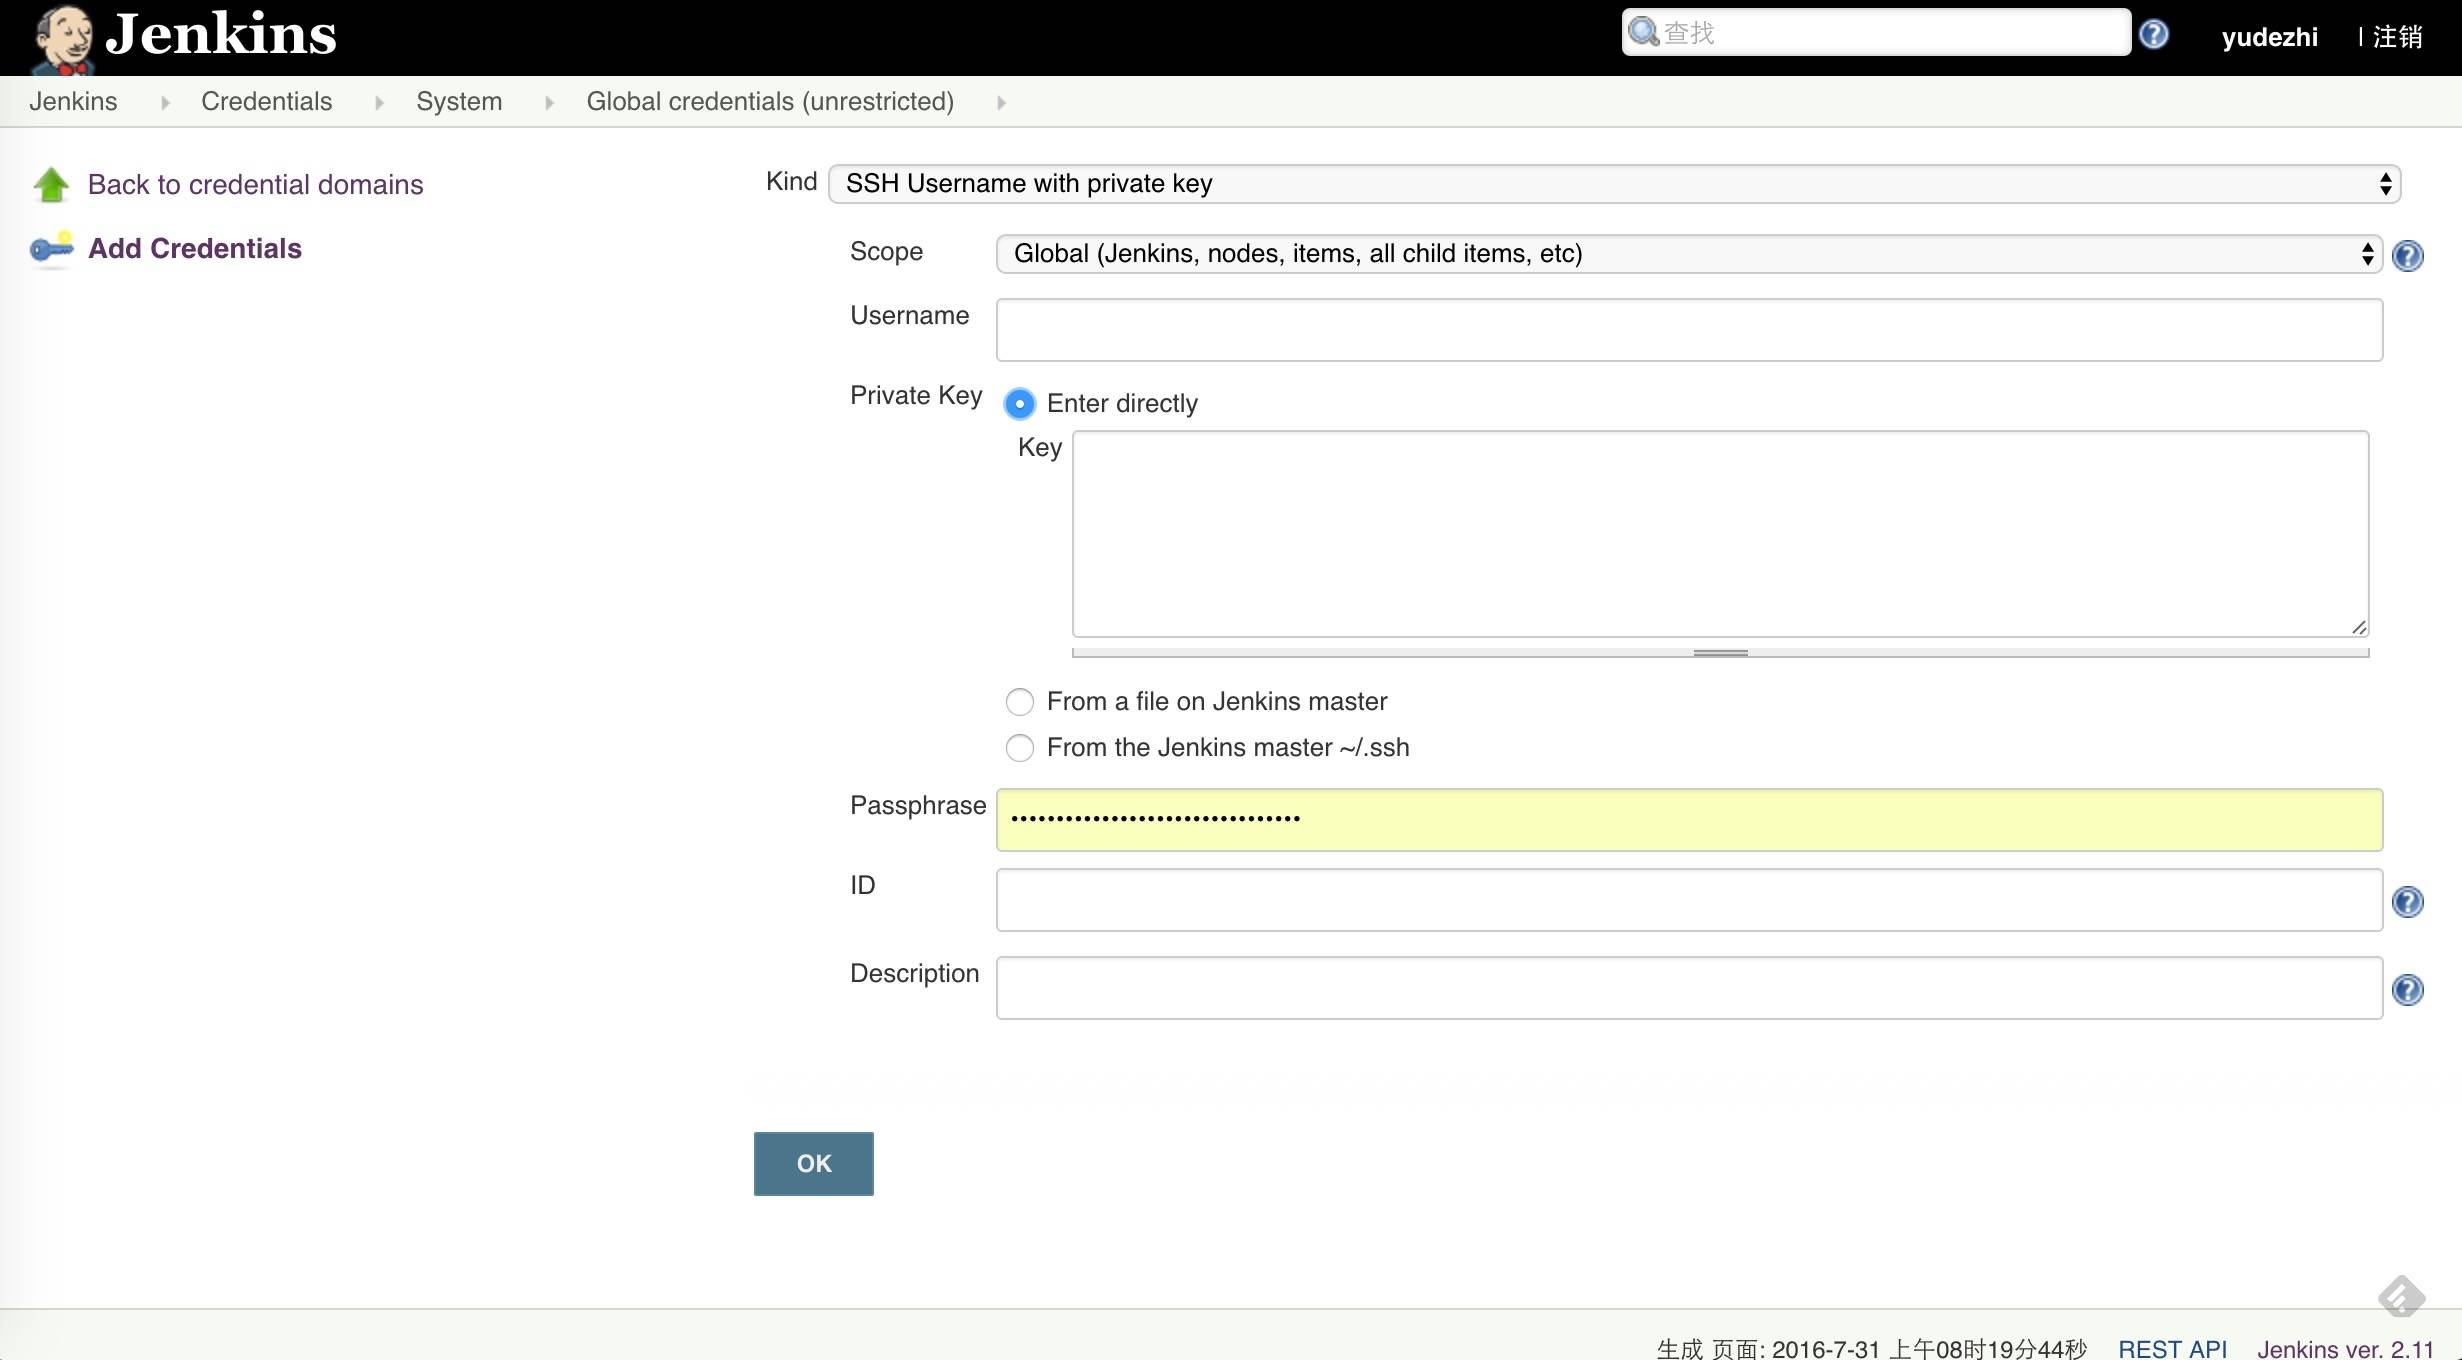
Since I am using GitLab here, first configure the SSH Key and add SSH in Jenkins credential management. On the Jenkins management page, select “Credentials”, then select “Global credentials (unrestricted)”, and click “Add Credentials”. As shown below, fill in your SSH information and click “Save”. This adds SSH to the global domain in Jenkins.
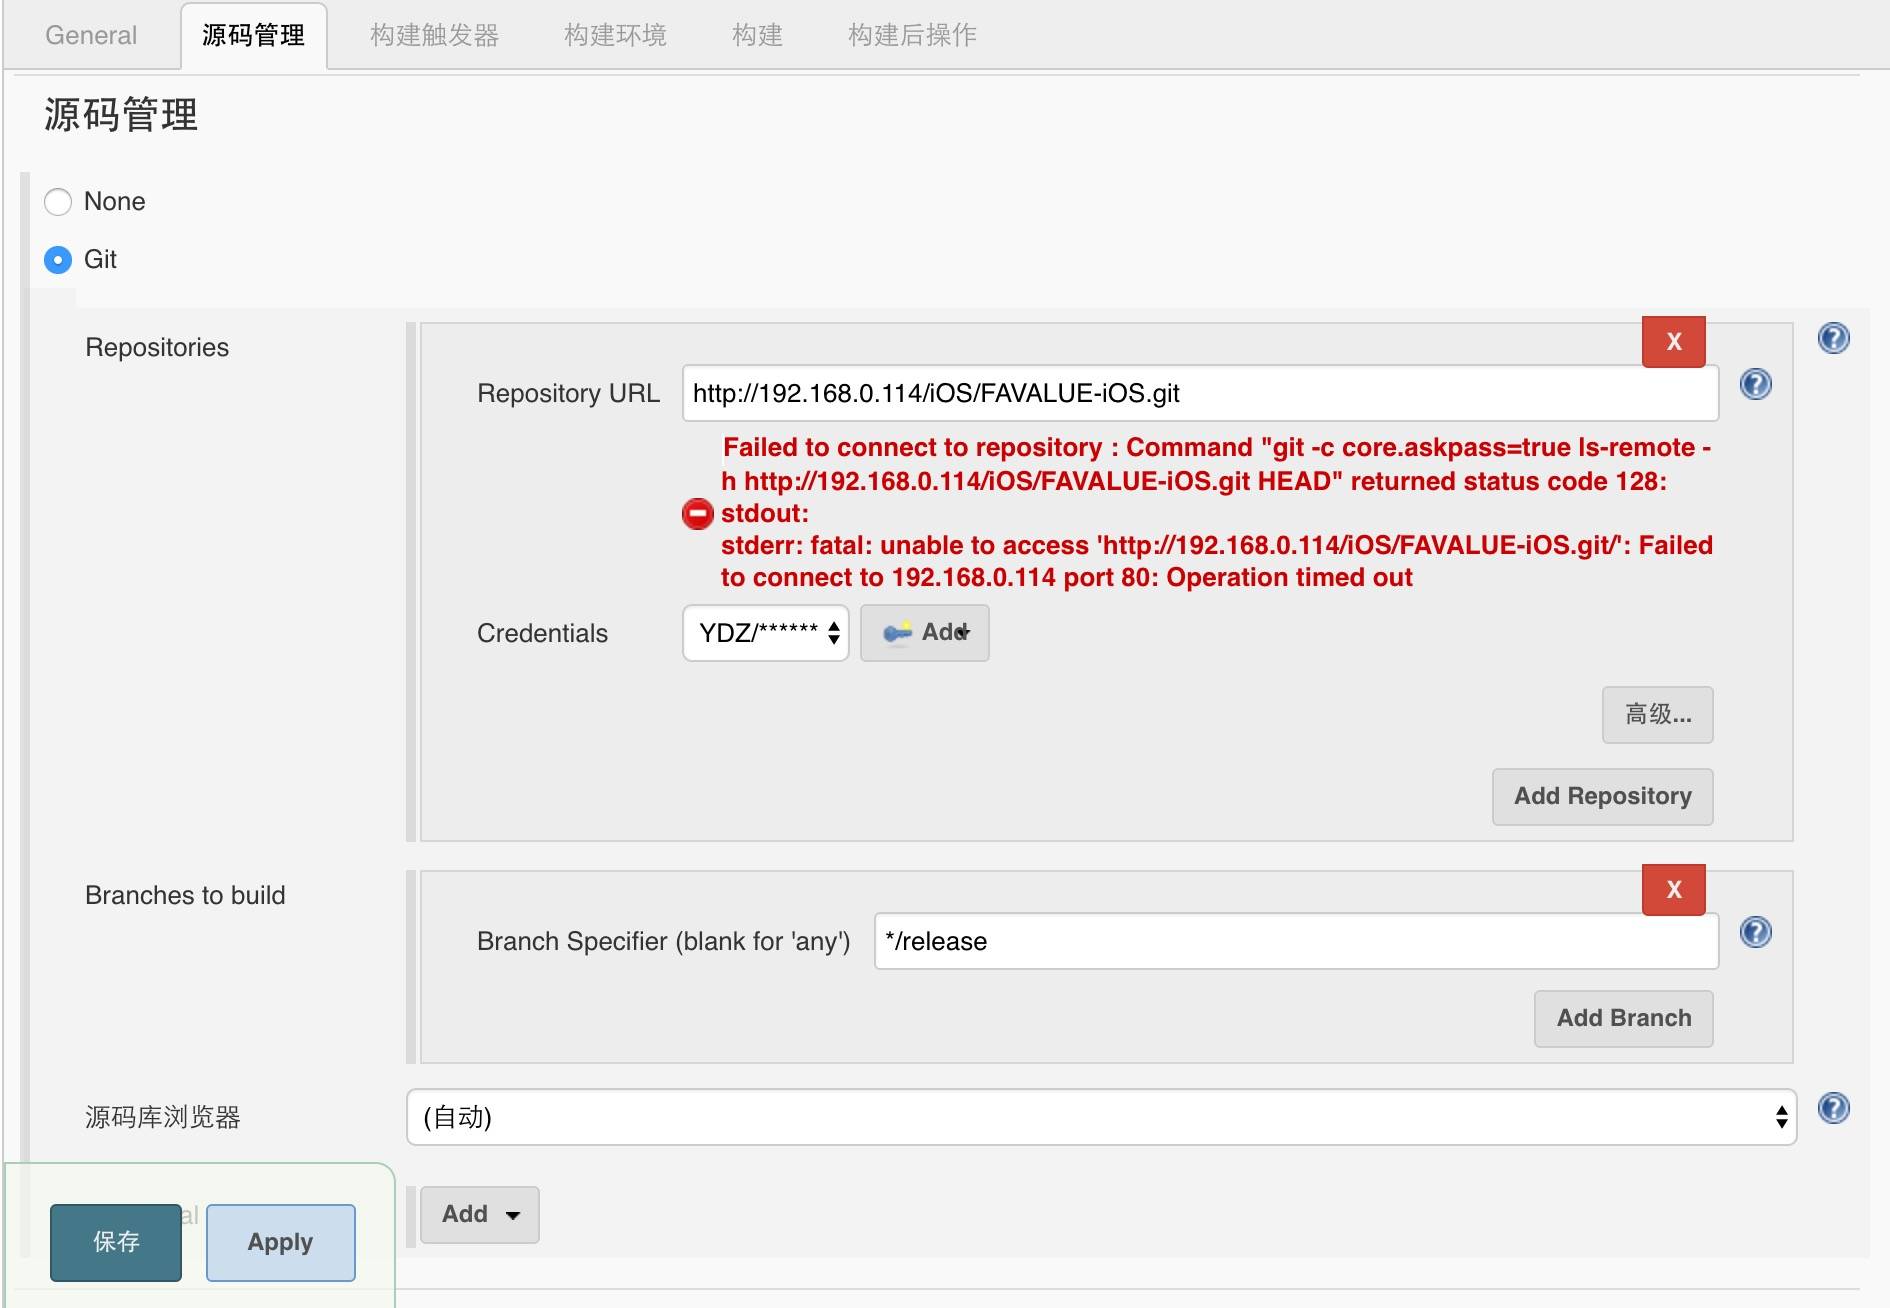
If the configuration is correct, you will not see the red warning shown in the image below. If you do see the prompt below, it means Jenkins has not yet connected to GitLab or SVN, so please check again whether the SSH Key is configured correctly.
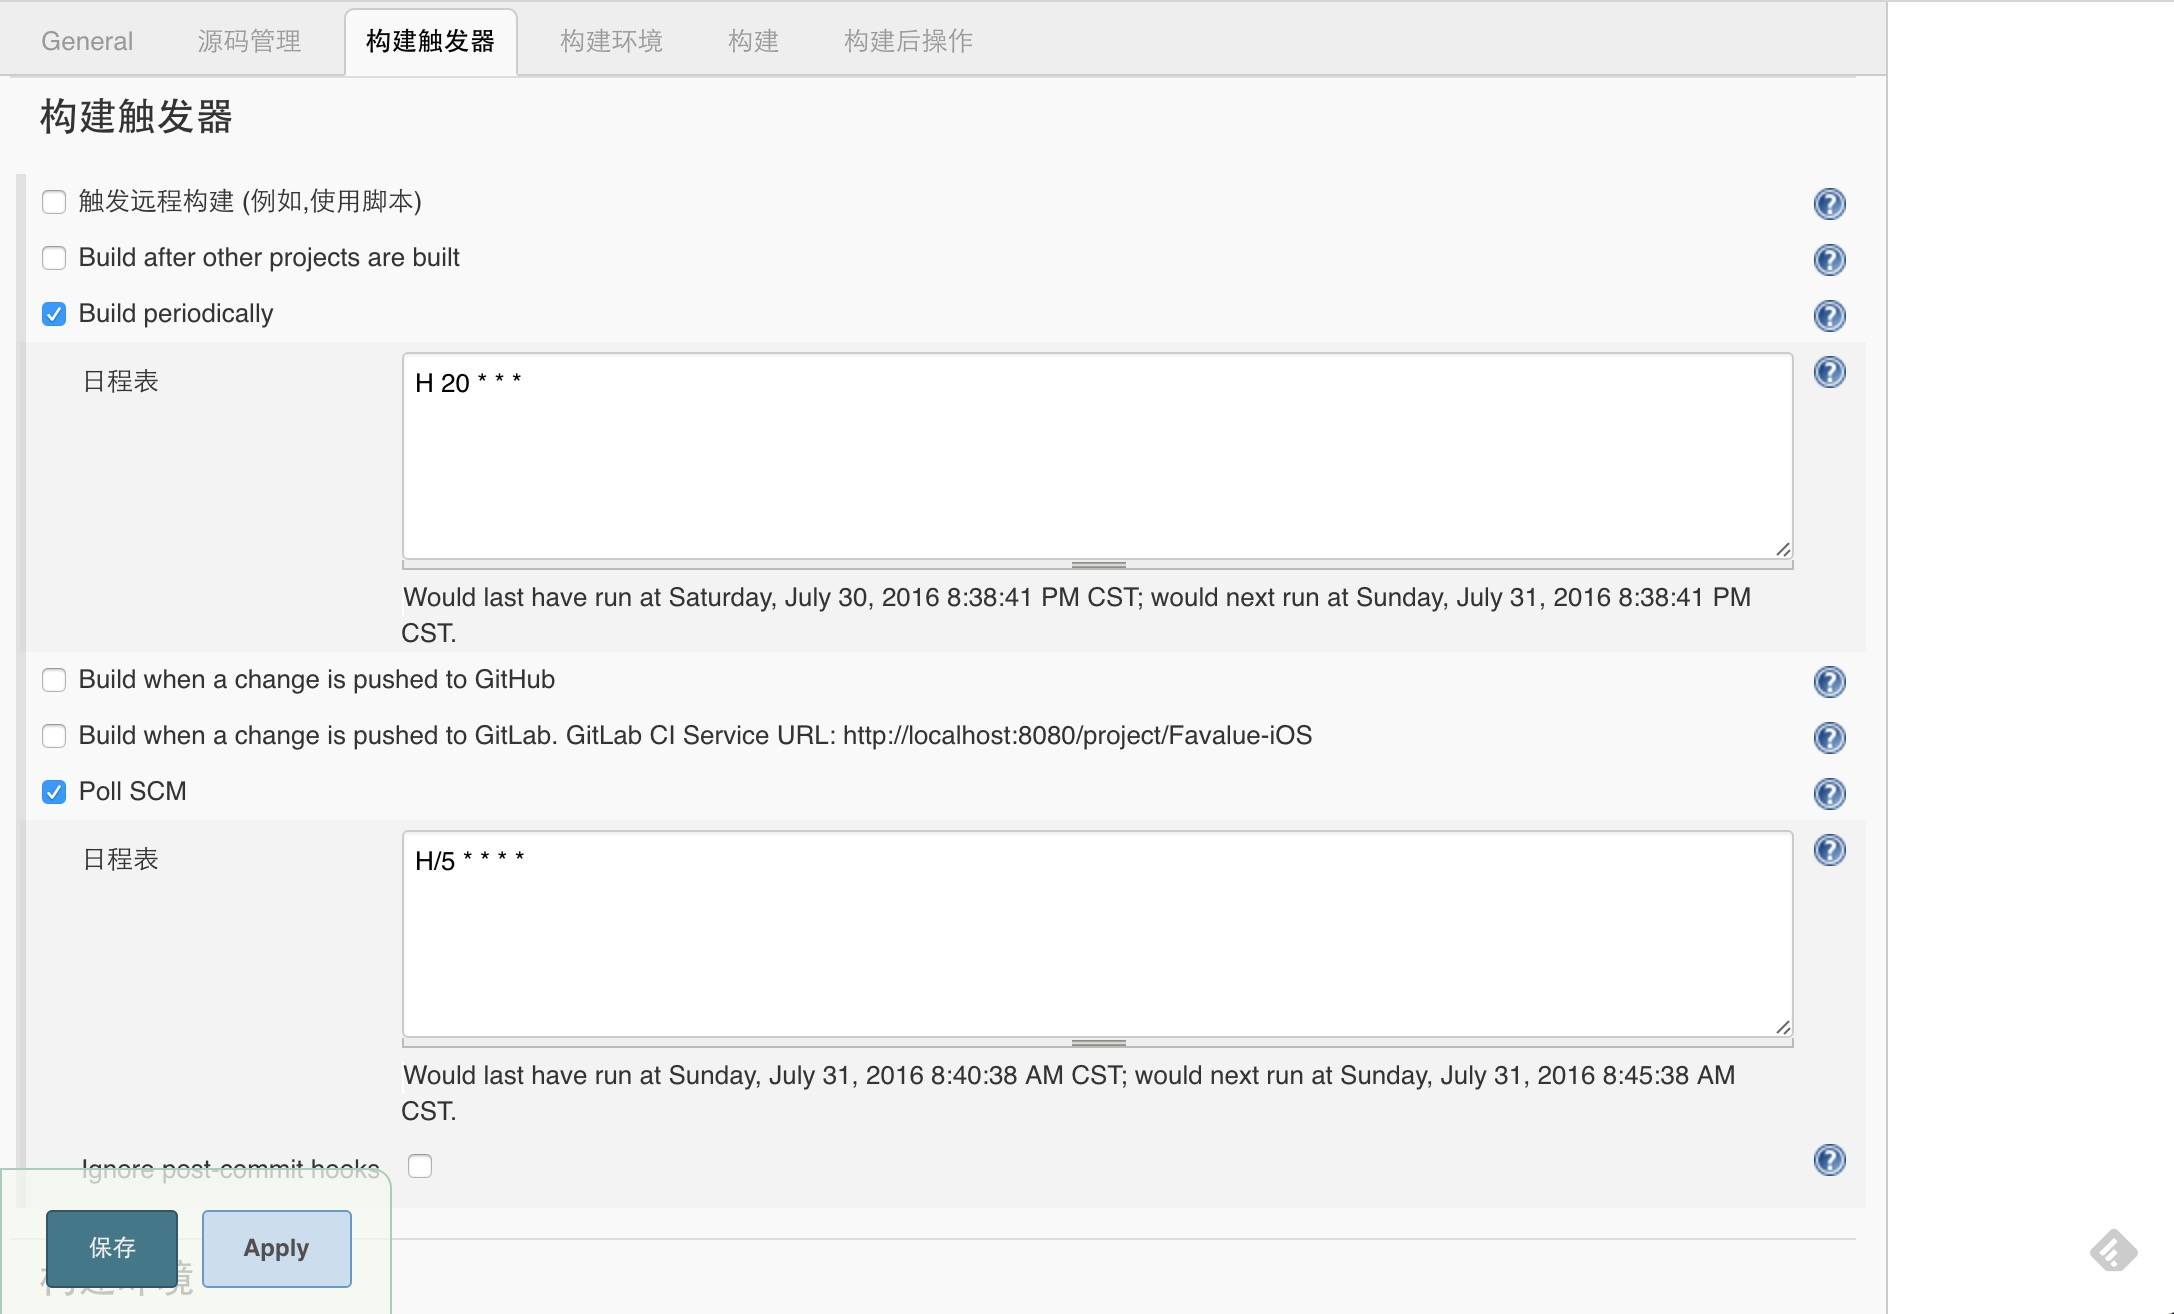
Build trigger settings are where automated testing is configured. There is a lot involved here, and I have not studied it in depth yet, so I will not configure it for now. If you need automated testing, it is worth digging into these settings.
However, there are two configurations here that still need to be set up.
Poll SCM (poll source code management) Poll source code management
You need to set the source code path for polling to take effect. A typical setting looks like: 0/5 * * * *, which polls once every 5 minutes.
Build periodically (scheduled build)
A typical setting looks like: 00 20 * * * It runs a scheduled build at 20:00 every day. Of course, the configuration format for both is the same and can be used interchangeably.
The format is as follows:
Minute (0-59) Hour (0-23) Day of month (1-31) Month (1-12) Day of week (0-7, both 0 and 7 mean Sunday) See more detailed settings here
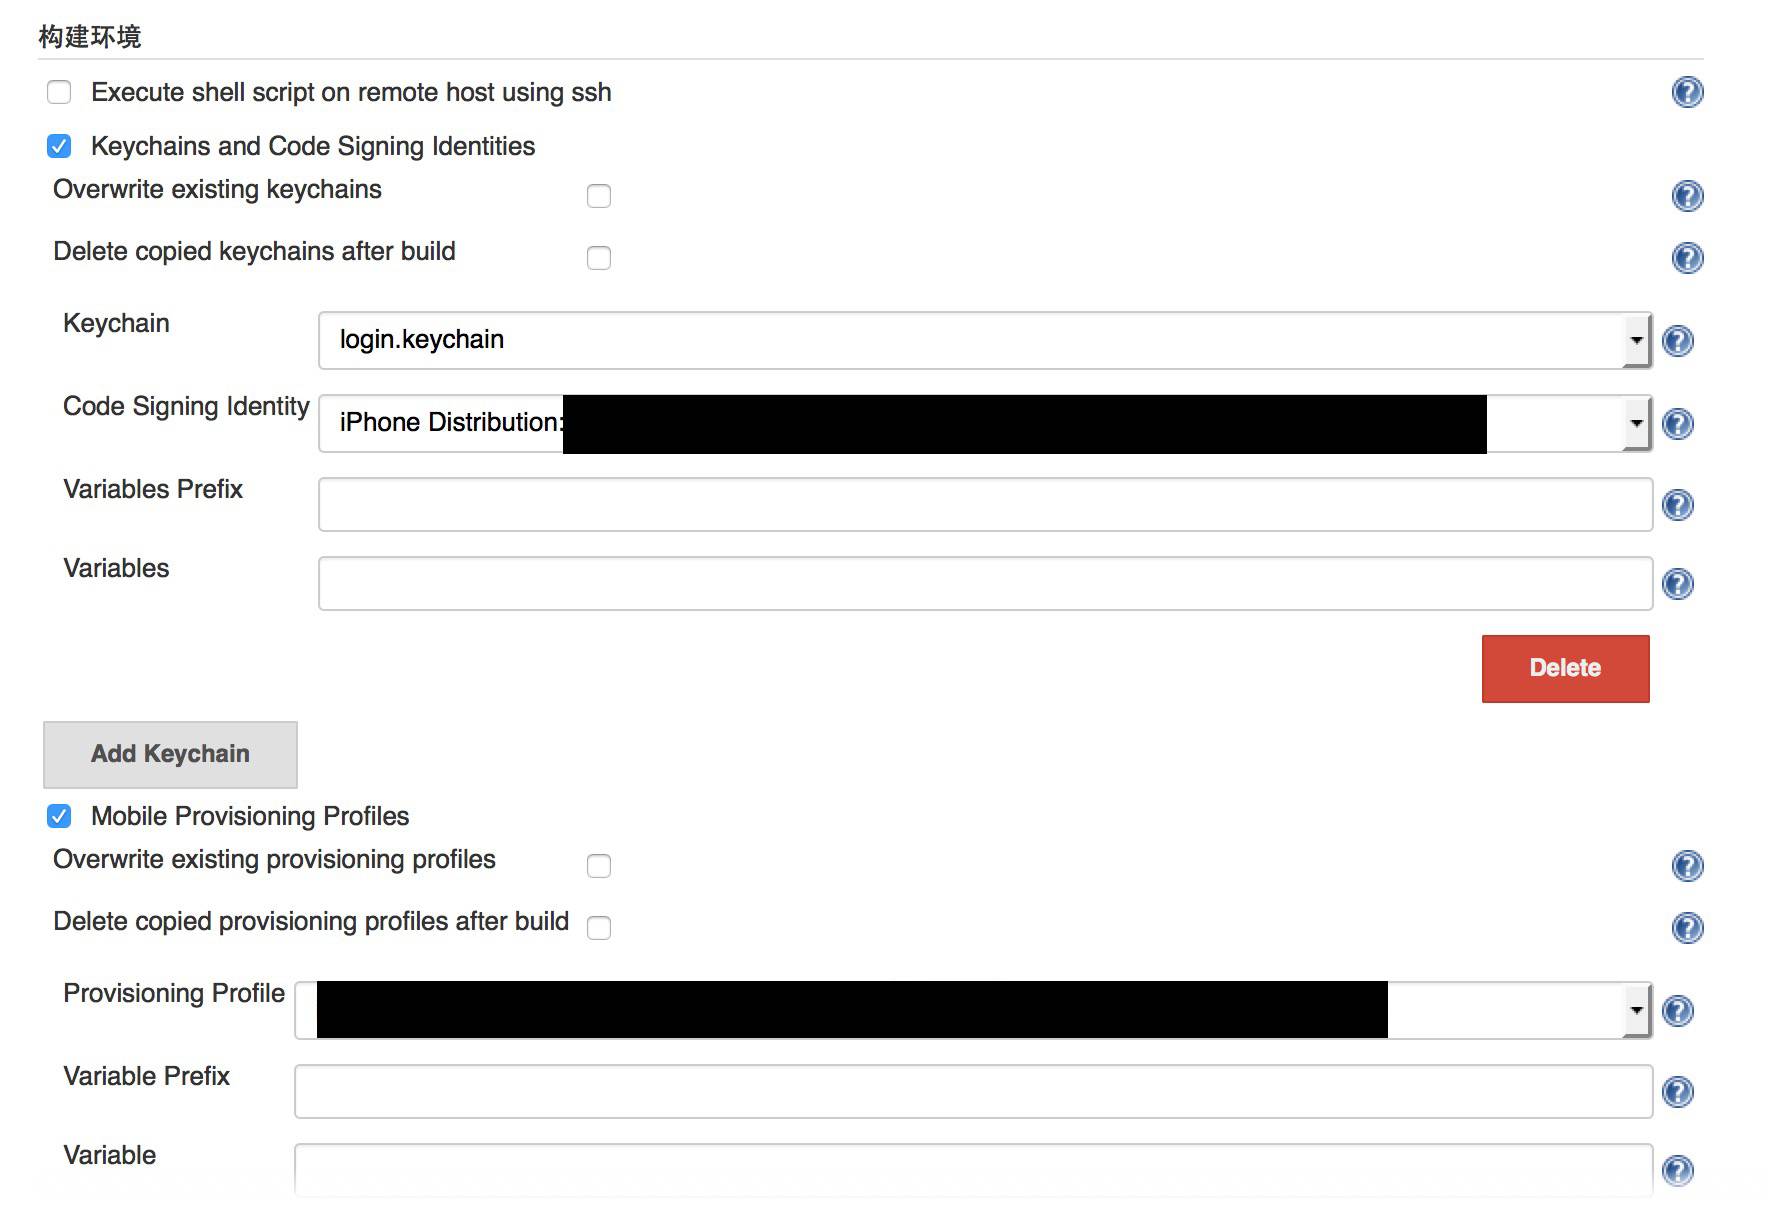
Build environment settings
iOS packaging requires signing files and certificates, so in this section we check “Keychains and Code Signing Identities” and “Mobile Provisioning Profiles”.
Here we again need to use a Jenkins plugin. On the system management page, select “Keychains and Provisioning Profiles Management”.
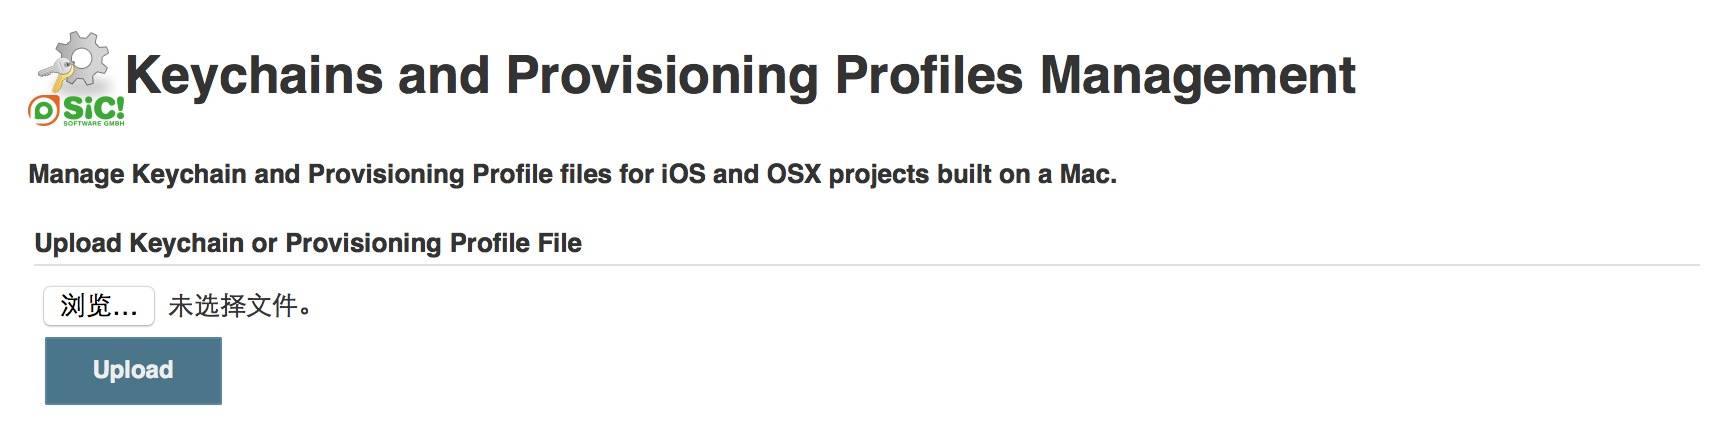
Go to the Keychains and Provisioning Profiles Management page, click the “Browse” button, and upload your keychain and certificate respectively. After the upload succeeds, specify the name of the signing file for the keychain. Click “Add Code Signing Identity”. After it is added successfully, it will look like this:
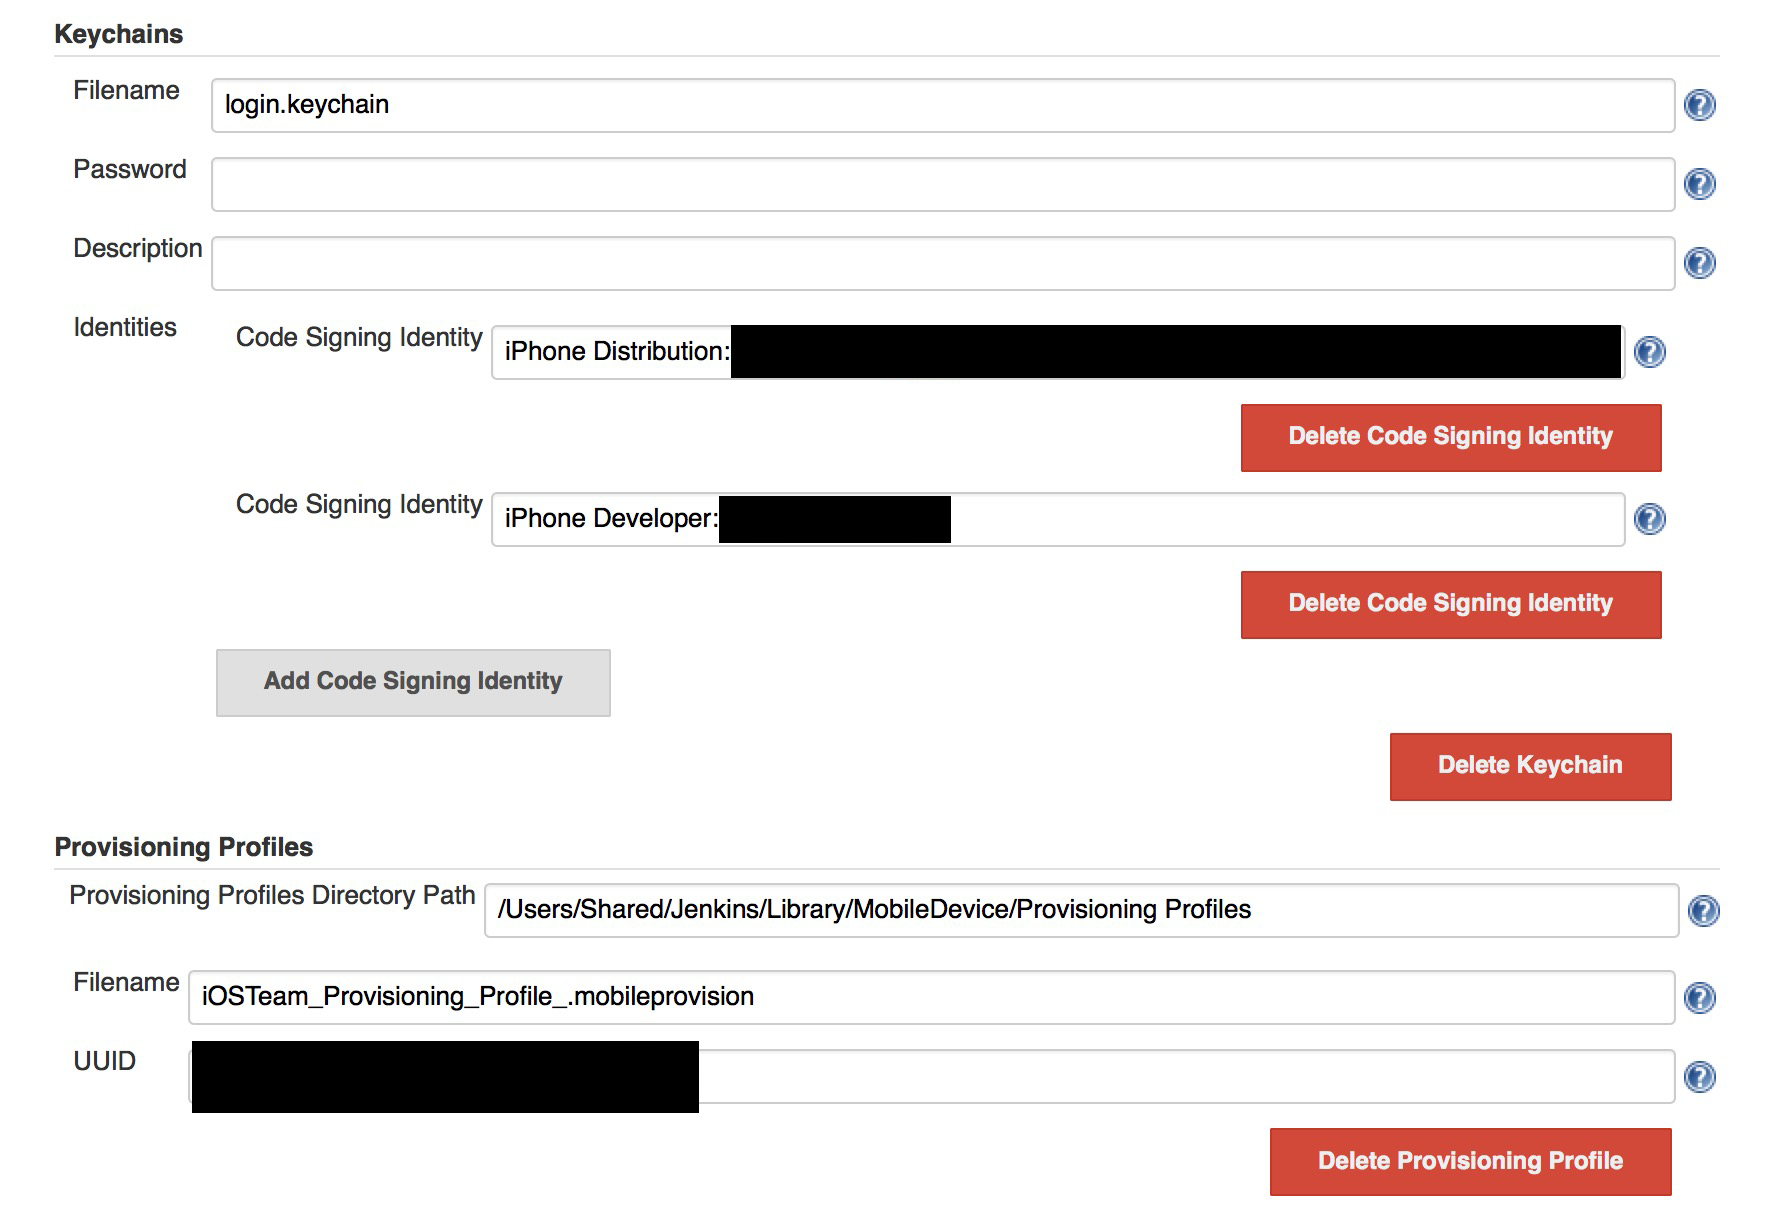
Note: The first time I imported the certificate and Provisioning Profiles file, I ran into a small “gotcha”. At the time, I thought a certificate was required, but what is needed here is the Keychain, not the .cer certificate file. This Keychain is actually located at /Users/<admin_username>/Library/keychains/login.keychain. After this Keychain is configured, Jenkins will copy it to /Users/Shared/Jenkins/Library/keychains (Library is a hidden directory). The Provisioning Profiles file is also copied directly to /Users/Shared/Jenkins/Library/MobileDevice.
At this point, the Adhoc certificate and signing file have been configured in Jenkins. Next, we only need to specify the relevant files in the item settings. Return to the item we created, find Build Environment, and select your corresponding certificate and signing file as shown below.
Next, configure Build.
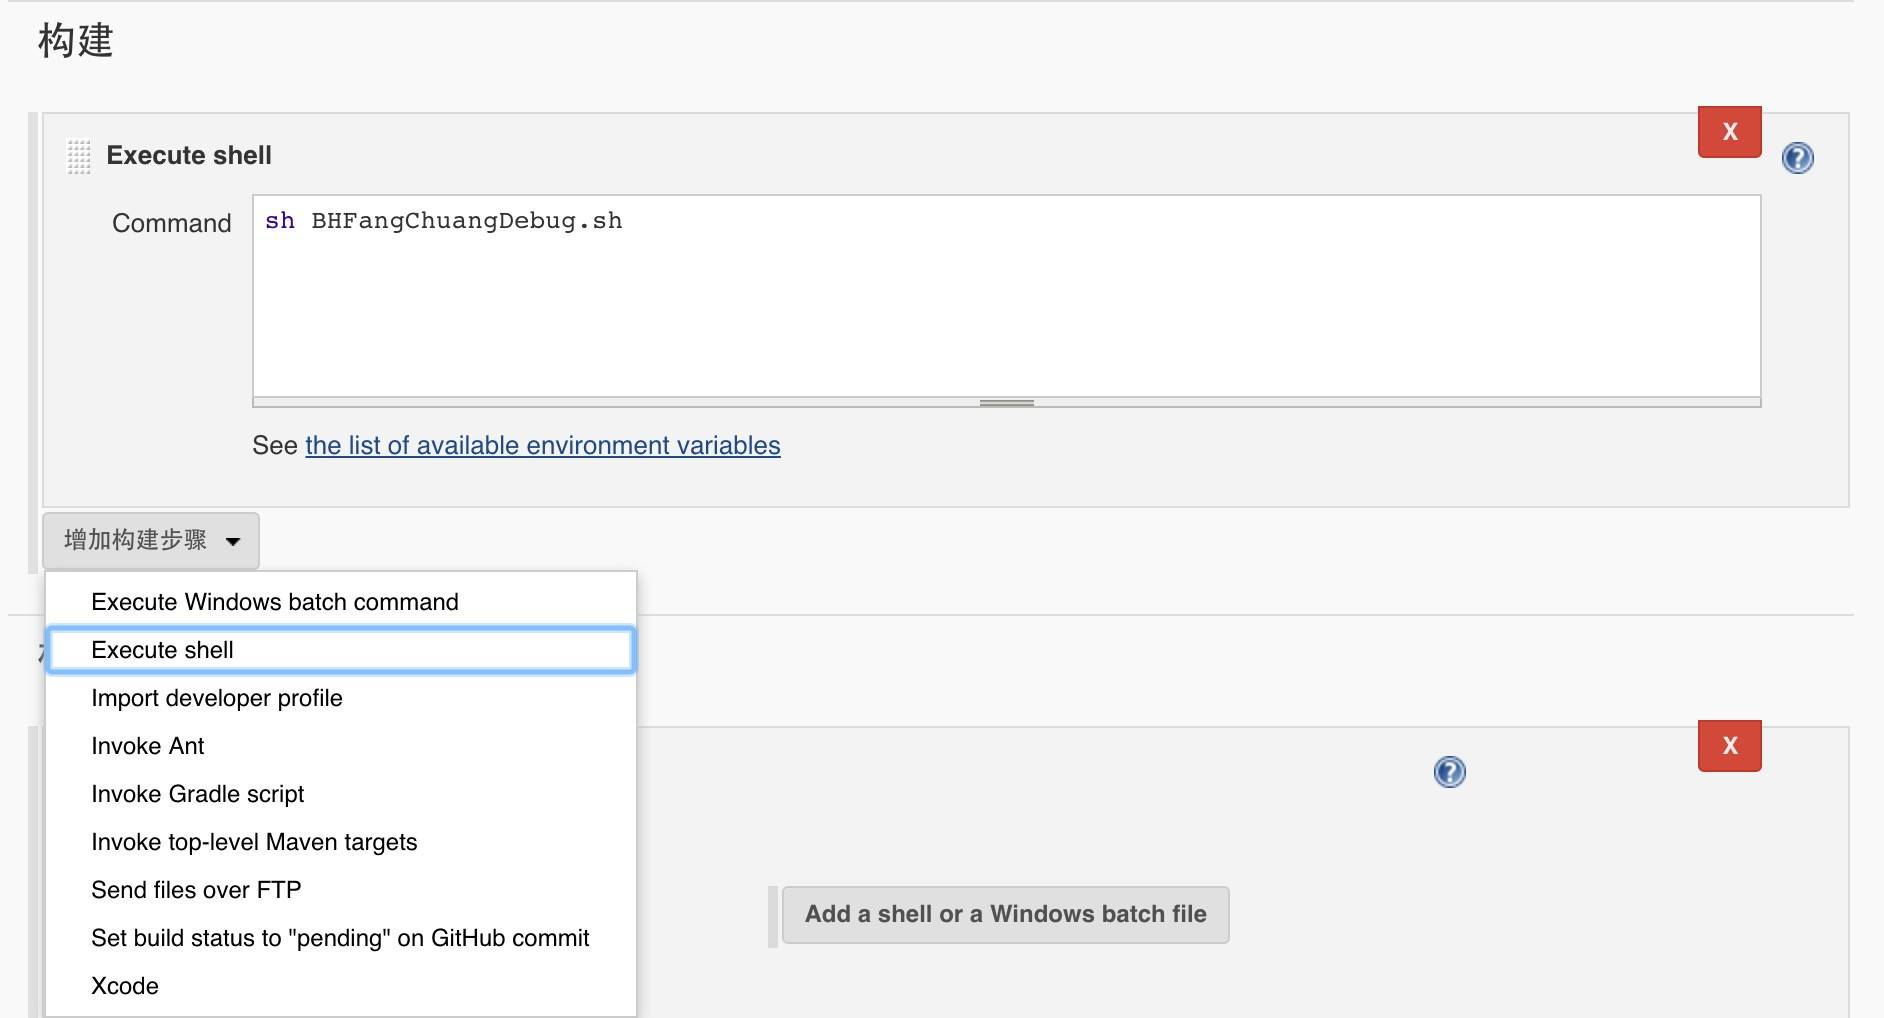
Here we choose to execute a packaging script. The script will be explained in detail in the next section.
Post-build Actions
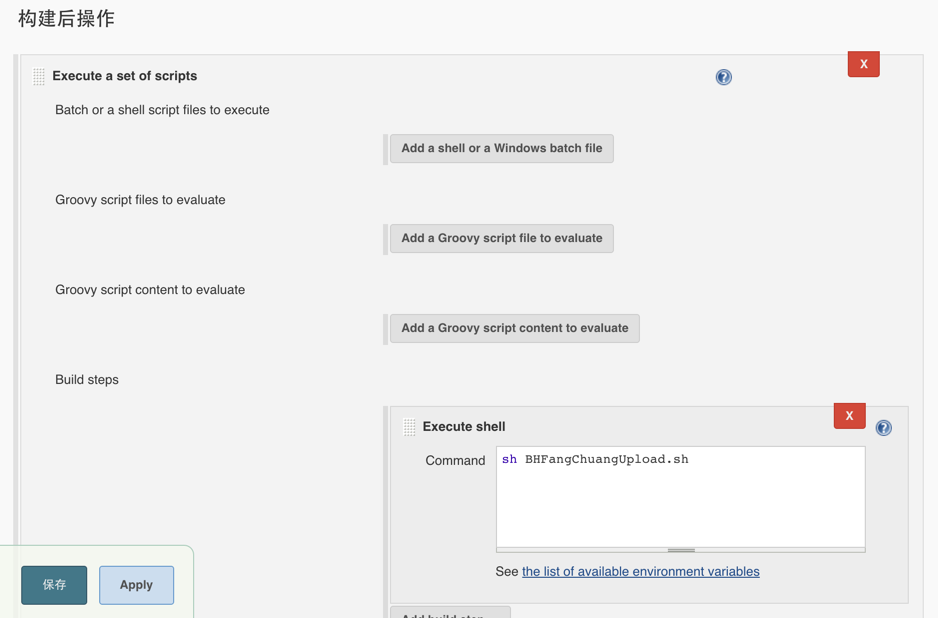
Here we choose Execute a set of scripts. This is also a script, used to upload the automatically packaged ipa file. The script is explained in detail in Chapter 4.
At this point, all of our Jenkins settings are complete. Click Build, and the project build will start.
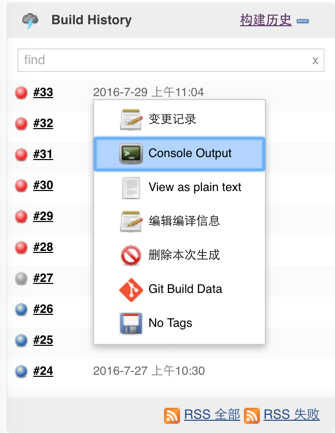
After a build, the meanings of the colors are as follows:
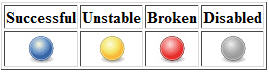
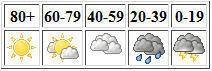
The weather barometer represents the quality of the project, which is also a distinctive Jenkins feature.
If the build fails, you can view Console Output to inspect the log.
3. iOS Automated Packaging Commands—xcodebuild + xcrun and fastlane - gym Commands
In day-to-day development, packaging is an indispensable final step before release. If you need to package a project into an ipa file, the usual approach is to click “Product -> Archive” in Xcode. After the entire project is archived, you then select options in the automatically displayed “Organizer” and export an ad hoc or enterprise ipa package as needed. Although Xcode can already handle packaging perfectly well, it still requires us to click five or six times manually. Since we now need continuous integration, using packaging commands to automate this process becomes a natural requirement.
1. xcodebuild + xcrun Commands
Xcode provides developers with a set of build and packaging commands: xcodebuild and xcrun. xcodebuild packages the specified project into an .app file, and xcrun converts the specified .app file into the corresponding .ipa file.
The detailed documentation is as follows: official xcodebuild documentation, official xcrun documentation
NAME
xcodebuild – build Xcode projects and workspaces

SYNOPSIS
1. xcodebuild [-project name.xcodeproj] [[-target targetname] … | -alltargets] [-configuration configurationname] [-sdk [sdkfullpath | sdkname]] [action …] [buildsetting=value …] [-userdefault=value …]

2. xcodebuild [-project name.xcodeproj] -scheme schemename [[-destination destinationspecifier] …] [-destination-timeout value] [-configuration configurationname] [-sdk [sdkfullpath | sdkname]] [action …] [buildsetting=value …] [-userdefault=value …]

3. xcodebuild -workspace name.xcworkspace -scheme schemename [[-destination destinationspecifier] …] [-destination-timeout value] [-configuration configurationname] [-sdk [sdkfullpath | sdkname]] [action …] [buildsetting=value …] [-userdefault=value …]

4. xcodebuild -version [-sdk [sdkfullpath | sdkname]] [infoitem]

5. xcodebuild -showsdks

6. xcodebuild -showBuildSettings [-project name.xcodeproj | [-workspace name.xcworkspace -scheme schemename]]

7. xcodebuild -list [-project name.xcodeproj | -workspace name.xcworkspace]

8. xcodebuild -exportArchive -archivePath xcarchivepath -exportPath destinationpath -exportOptionsPlist path

9. xcodebuild -exportLocalizations -project name.xcodeproj -localizationPath path [[-exportLanguage language] …]

10. xcodebuild -importLocalizations -project name.xcodeproj -localizationPath path
The first three of the ten commands above are the most important.
Next, let’s explain the parameters:
-project -workspace: These two correspond to the project name. If there are multiple projects and none is specified here, the first project is used by default.
-target: The targets to build/package. If not specified, the first one is used by default.
-configuration: If this configuration has not been modified, the defaults are the Debug and Release versions; if not specified, the Release version is used by default.
-buildsetting=value …: Use this command to modify the project configuration.
-scheme: Specifies the scheme to build/package.
The commands above are the most basic ones.
For the parameters in the first and second of the ten commands above, the -target and -configuration parameters can be obtained using xcodebuild -list ; the -sdk parameter can be obtained using xcodebuild -showsdks . [buildsetting=value …] is used to override existing settings in the project. For the parameters that can be overridden, refer to the official documentation: Xcode Build Setting Reference.
build
Build the target in the build root (SYMROOT). This is the default action, and is used if no action is given.

analyze
Build and analyze a target or scheme from the build root (SYMROOT). This requires specifying a scheme.

archive
Archive a scheme from the build root (SYMROOT). This requires specifying a scheme.

test
Test a scheme from the build root (SYMROOT). This requires specifying a scheme and optionally a destination.

installsrc
Copy the source of the project to the source root (SRCROOT).

install
Build the target and install it into the target’s installation directory in the distribution root (DSTROOT).

clean
Remove build products and intermediate files from the build root (SYMROOT).
The third command above is specifically used to build projects that use CocoaPods, because in this case the project file is no longer an xcodeproj, but an xcworkspace.
Now let’s talk about the xcrun command.
Usage:
PackageApplication [-s signature] application [-o output_directory] [-verbose] [-plugin plugin] || -man || -help

Options:

[-s signature]: certificate name to resign application before packaging
[-o output_directory]: specify output filename
[-plugin plugin]: specify an optional plugin
-help: brief help message
-man: full documentation
-v[erbose]: provide details during operation
There aren’t many parameters, and usage is very straightforward: xcrun -sdk iphoneos -v PackageApplication + the parameters mentioned above.
Once we understand the parameters, let’s look at how to use them. The following is an automated packaging script written using the xcodebuild + xcrun commands.
# Project name
APP_NAME="YourProjectName"

# Certificate
CODE_SIGN_DISTRIBUTION="iPhone Distribution: Shanghai ******* Co., Ltd."

# info.plist path
project_infoplist_path="./${APP_NAME}/Info.plist"

# Get version number
bundleShortVersion=$(/usr/libexec/PlistBuddy -c "print CFBundleShortVersionString" "${project_infoplist_path}")

# Get build value
bundleVersion=$(/usr/libexec/PlistBuddy -c "print CFBundleVersion" "${project_infoplist_path}")

DATE="$(date +%Y%m%d)"
IPANAME="${APP_NAME}_V${bundleShortVersion}_${DATE}.ipa"

# Path of the ipa file to upload
IPA_PATH="$HOME/${IPANAME}"
echo ${IPA_PATH}
echo "${IPA_PATH}">> text.txt

// The following 2 lines are for use without Cocopods
echo "=================clean================="
xcodebuild -target "${APP_NAME}"  -configuration 'Release' clean

echo "+++++++++++++++++build+++++++++++++++++"
xcodebuild -target "${APP_NAME}" -sdk iphoneos -configuration 'Release' CODE_SIGN_IDENTITY="${CODE_SIGN_DISTRIBUTION}" SYMROOT='$(PWD)'

// The following 2 lines are for use with Cocopods integrated
echo "=================clean================="
xcodebuild -workspace "${APP_NAME}.xcworkspace" -scheme "${APP_NAME}"  -configuration 'Release' clean

echo "+++++++++++++++++build+++++++++++++++++"
xcodebuild -workspace "${APP_NAME}.xcworkspace" -scheme "${APP_NAME}" -sdk iphoneos -configuration 'Release' CODE_SIGN_IDENTITY="${CODE_SIGN_DISTRIBUTION}" SYMROOT='$(PWD)'

xcrun -sdk iphoneos PackageApplication "./Release-iphoneos/${APP_NAME}.app" -o ~/"${IPANAME}"
2. The gym Command
Speaking of gym, we should first talk about fastlane. fastlane is a suite of automation tools for building packages. Written in Ruby, it is used for automated build packaging and release workflows for iOS and Android. gym is its build packaging command.
For the fastlane official website, see here; for fastlane on GitHub, see here.
To use gym, you first need to install fastlane.
sudo gem install fastlane --verbose
fastlane includes all the commands we need to run when releasing after day-to-day development.
deliver:uploads screenshots, binary app data, and apps to the App Store
snapshot:automatically captures screenshots of your app on every device
frameit:adds device frames around app screenshots
pem:automatically generates and updates app push notification provisioning profiles
sigh:generates and downloads App Store provisioning profiles
produce:creates a new iOS app in iTunes Connect from the command line
cert:automatically creates iOS certificates
pilot:the best way to manage testers and builds in the terminal
boarding:an easy way to invite beta testers
gym:builds and packages a new release
match:uses git to sync developer certificates and provisioning profiles among your members
scan:runs test cases on iOS and Mac apps
The entire release process can be described with fastlane as follows.
lane :appstore do
  increment_build_number
  cocoapods
  xctool
  snapshot
  sigh
  deliver
  frameit
  sh "./customScript.sh"

  slack
end
PS: You may also have heard of a command called xctool. xctool is an enhanced implementation of the official xcodebuild command, and its output is much more intuitive and readable than xcodebuild’s. It can be installed via brew.
brew install xctool
Use gym to automate packaging; the script is as follows:
#Timing

SECONDS=0

#Assume the script is placed in the same path as the project

project_path=$(pwd)

#Get the current time string to append to the file name

now=$(date +"%Y_%m_%d_%H_%M_%S")

#Specify the project's scheme name

scheme="DemoScheme"

#Specify the configuration name for packaging

configuration="Adhoc"

#Specify the export method used for packaging; currently supports app-store, package, ad-hoc, enterprise, development, and developer-id, i.e. xcodebuild's method parameter

export_method='ad-hoc'

#Specify the project path

workspace_path="$project_path/Demo.xcworkspace"

#Specify the output path

output_path="/Users/your_username/Documents/"

#Specify the output archive file path

archive_path="$output_path/Demo_${now}.xcarchive"

#Specify the output ipa path

ipa_path="$output_path/Demo_${now}.ipa"

#Specify the output ipa name

ipa_name="Demo_${now}.ipa"

#Get the commit message when executing the command

commit_msg="$1"

#Output the set variable values

echo "===workspace path: ${workspace_path}==="

echo "===archive path: ${archive_path}==="

echo "===ipa path: ${ipa_path}==="

echo "===export method: ${export_method}==="

echo "===commit msg: $1==="

#Clean the previous build first

gym --workspace ${workspace_path} --scheme ${scheme} --clean --configuration ${configuration} --archive_path ${archive_path} --export_method ${export_method} --output_directory ${output_path} --output_name ${ipa_name}

#Output the total time

echo "===Finished. Total time: ${SECONDS}s==="
IV. Automatically Upload to Third-Party Platforms such as fir / Pgyer After Packaging Is Complete
To upload to third-party platforms such as fir / Pgyer, you need to register an account and obtain a token before you can perform scripted operations.
1. Automatically Upload to fir
Install the fir-cli command-line tool
You need to install Ruby first before running it.
gem install fir-cli
#Upload to fir
fir publish ${ipa_path} -T fir_token -c "${commit_msg}"
2. Automated Upload to Pgyer
#Pgyer User Key
uKey="7381f97070*****c01fae439fb8b24e"

#Pgyer API Key
apiKey="0b27b5c145*****718508f2ad0409ef4"

#Path to the ipa file to upload
IPA_PATH=$(cat text.txt)

rm -rf text.txt

#Run the command to upload to Pgyer
echo "++++++++++++++upload+++++++++++++"
curl -F "file=@${IPA_PATH}" -F "uKey=${uKey}" -F "_api_key=${apiKey}" http://www.pgyer.com/apiv1/app/upload
V. Complete Continuous Integration Workflow
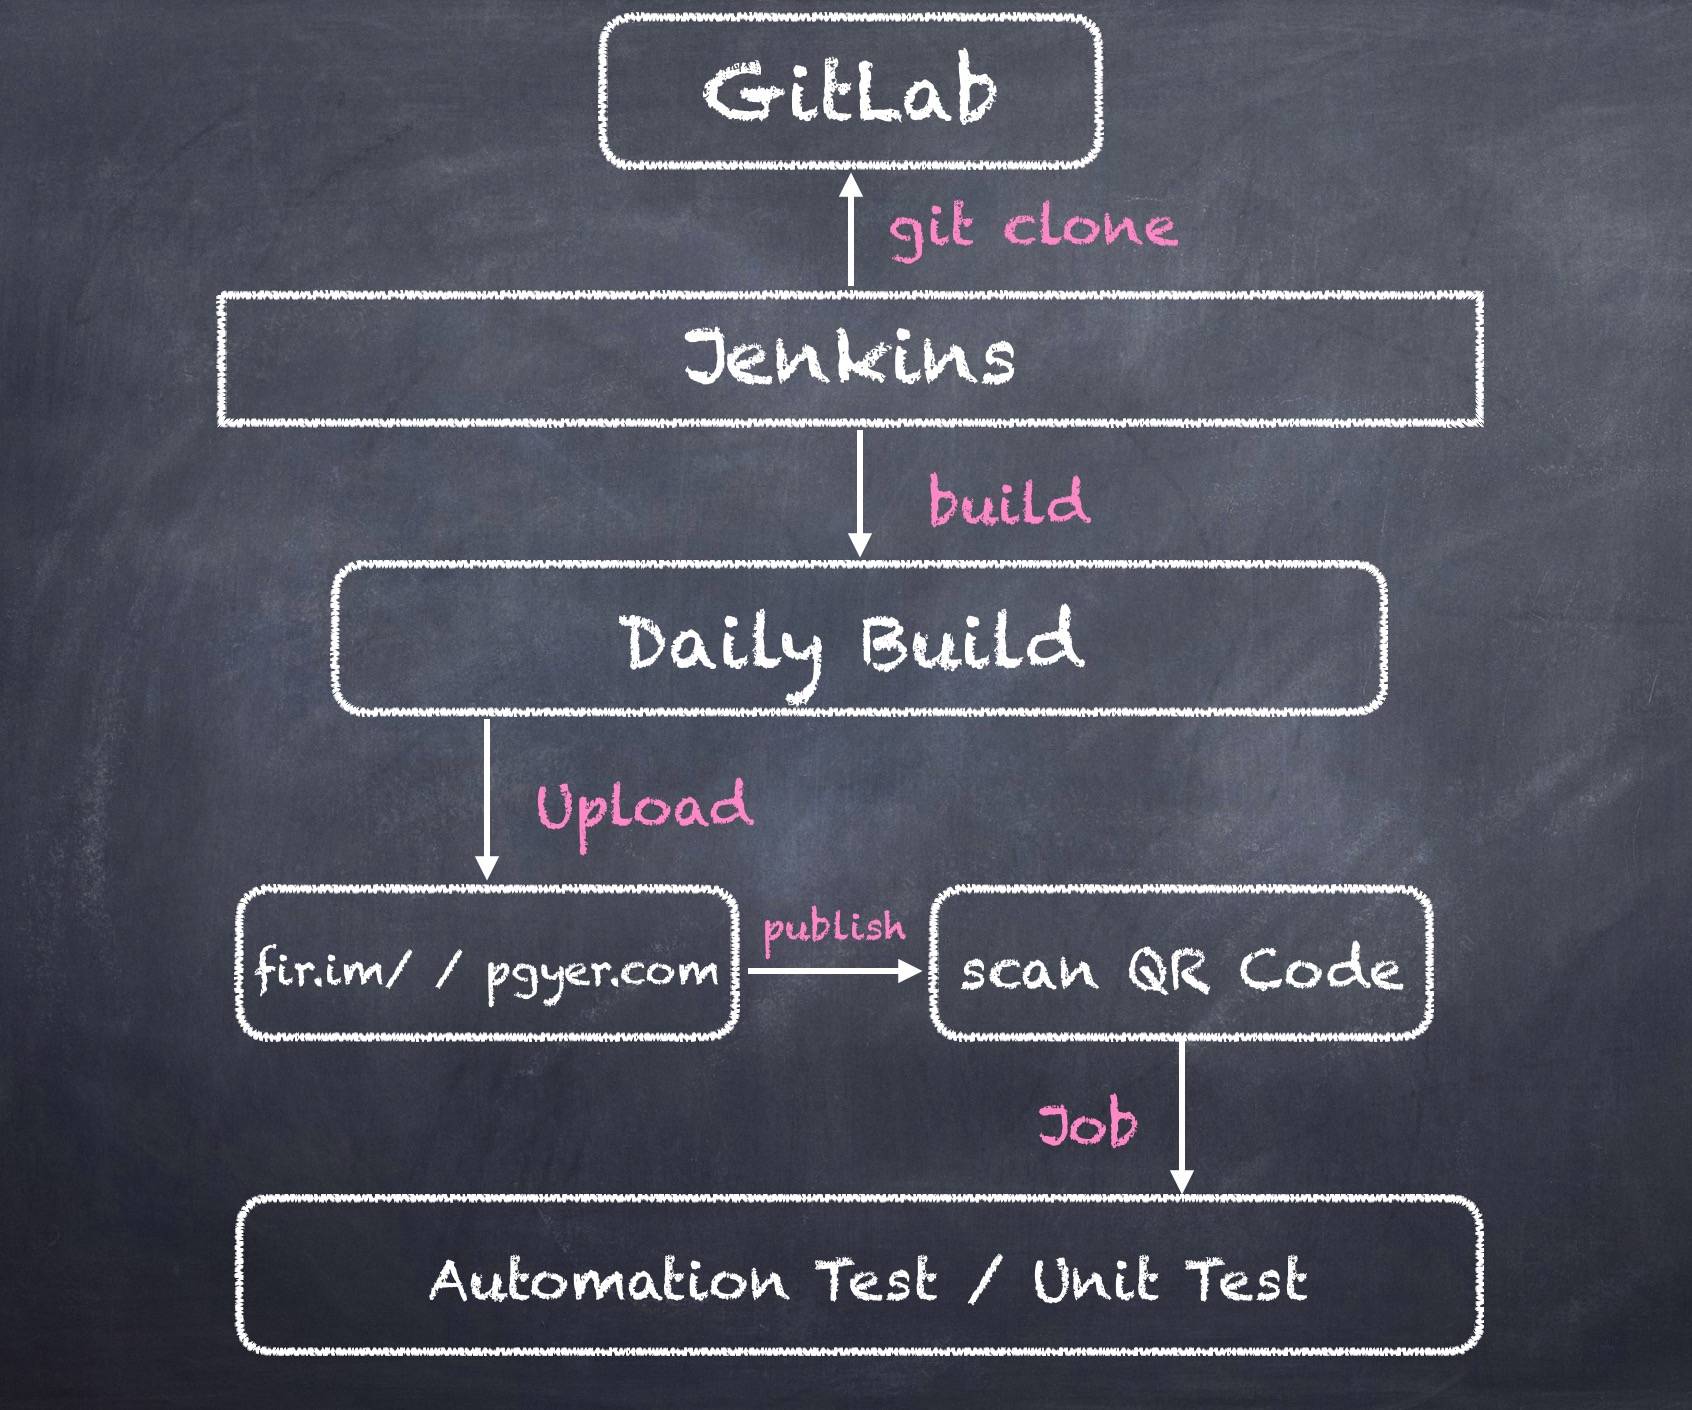
After the continuous integration work described above, we now have the following complete continuous integration workflow:
VI. Jenkins + Docker
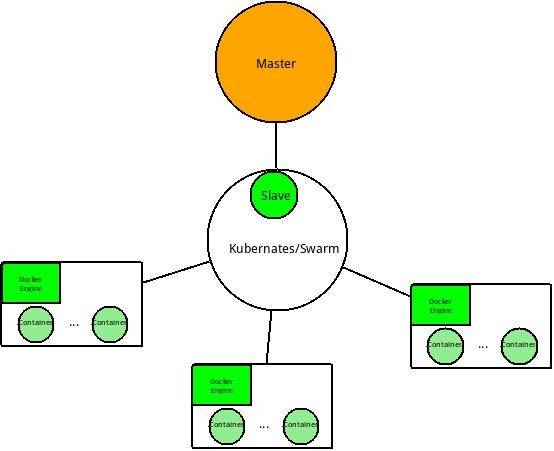
There are actually two types of Jenkins deployments: Single-node (Master) deployment This deployment is suitable for most projects. The build workload is relatively light, the number of builds is small, and a single node is sufficient for day-to-day development needs. Multi-node (Master-Slave) deployment This deployment structure is typically adopted by larger projects with frequent code commits (which means frequent builds) and heavy automated testing pressure. In this structure, the Master usually serves only as the manager, responsible for task scheduling, managing slave nodes, collecting task status, and so on, while the actual build tasks are assigned to slave nodes. In theory, there is no upper limit to the number of slave nodes that a Master node can manage. However, as the number increases, its performance and stability usually degrade to varying degrees. The specific impact depends on the hardware performance of the Master.
However, multi-node deployment also has some drawbacks. When the number of test cases becomes massive, it can introduce certain problems. As a result, someone designed the following deployment structure: Jenkins + Docker.
Since my current project is still using a single-node (Master) deployment, I do not have practical experience with multi-node (Master-Slave) deployment, let alone the improved Docker-based version. However, if you have requirements involving massive test cases, high pressure, and a large volume of complex regression tests, I recommend reading this article.
Finally
That concludes my practical experience with Jenkins-based continuous integration. I’m sharing it with everyone, and if there are any mistakes, I welcome your feedback and guidance.
