A Fresh New Look for the iOS App (Part 1) — Launch Page Makes the Logo 'Fly' Off the Screen
####Preface Today, looks matter. An app’s visual appeal can determine how often users open it, and the appeal of its icon may even determine whether users download it in the first place. If it is too ugly—even unpleasant to look at on the phone’s home screen—users may simply uninstall it. So a beautiful UI plus a reasonable user experience, UX/UE, can also have a major impact on user stickiness. Recently, because our company’s app is being prepared for a visual refresh and performance improvements, I wanted to organize the things worth sharing from the redesign process and bring them out for everyone to learn from together. I’ll turn this “makeover” into a series. I believe the road to beautification is endless! (Voice-over: I’ve dug yet another huge pit for myself.)
####I. Source of Inspiration Some people may not fully understand what the article title means at first glance. In fact, the idea for this design came from an animated GIF I saw on Weibo. It was very vivid and expressive.
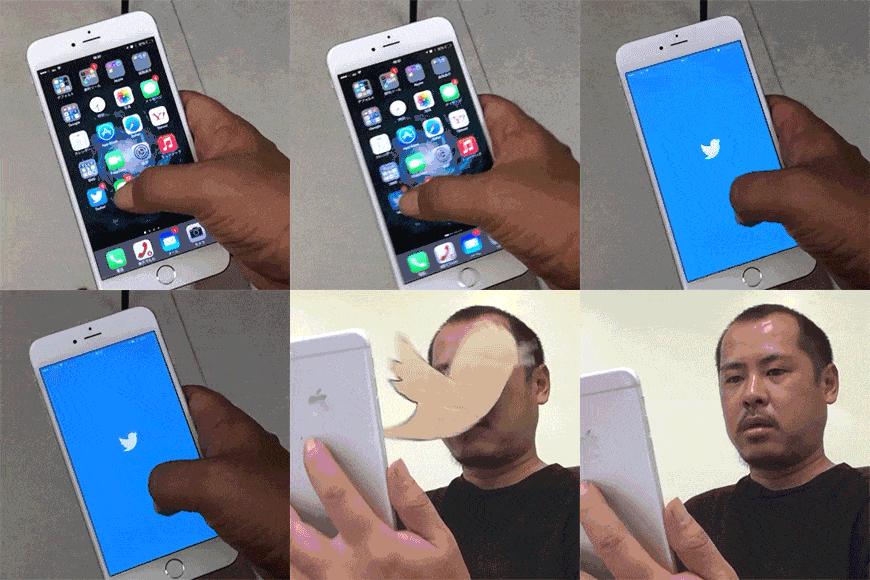
A goofy-looking uncle taps open the Twitter client, and the launch screen has an animation where their logo directly “flies” out of the screen and hits him in the face. I found this effect really interesting when I saw it. Many apps simply enter the main interface after launch, or show an ad page for a few seconds first. If you add this kind of launch feature, it actually feels pretty nice.
####II. Animation Principle Next, let’s talk about the principle behind the launch effect above. The principle is actually very simple: after the app starts, first load a View with our logo on it, and then perform a UIView scaling animation. Now let’s look at how I did it.
####III. Tools Needed PS + AI or Sketch + PaintCode Some people may ask: why do we suddenly need these drawing tools? Actually, you can also load a logo image and place it on the view; that works too. But my boss felt that if the image is too high-definition, it increases the app size, so anything that can be drawn programmatically should be drawn programmatically. For irregular and complex shapes, we have to use the toolchain above.
 PS is mainly used to cut out the logo.

 AI and Sketch are used to trace the cut-out logo with the pen tool and export the path.

Finally, PaintCode converts the path into a UIBezierPath. PaintCode is a very powerful piece of software: it can directly convert paths inside an SVG into the corresponding Swift or Objective-C code. Later I found that PaintCode alone can actually complete all of the functions above, since it can also use the pen tool to draw paths directly.
####IV. Start Creating 1.First, use PS to cut out the Logo image and save it as an image. 2.Then open Sketch and import the Logo image from just now.
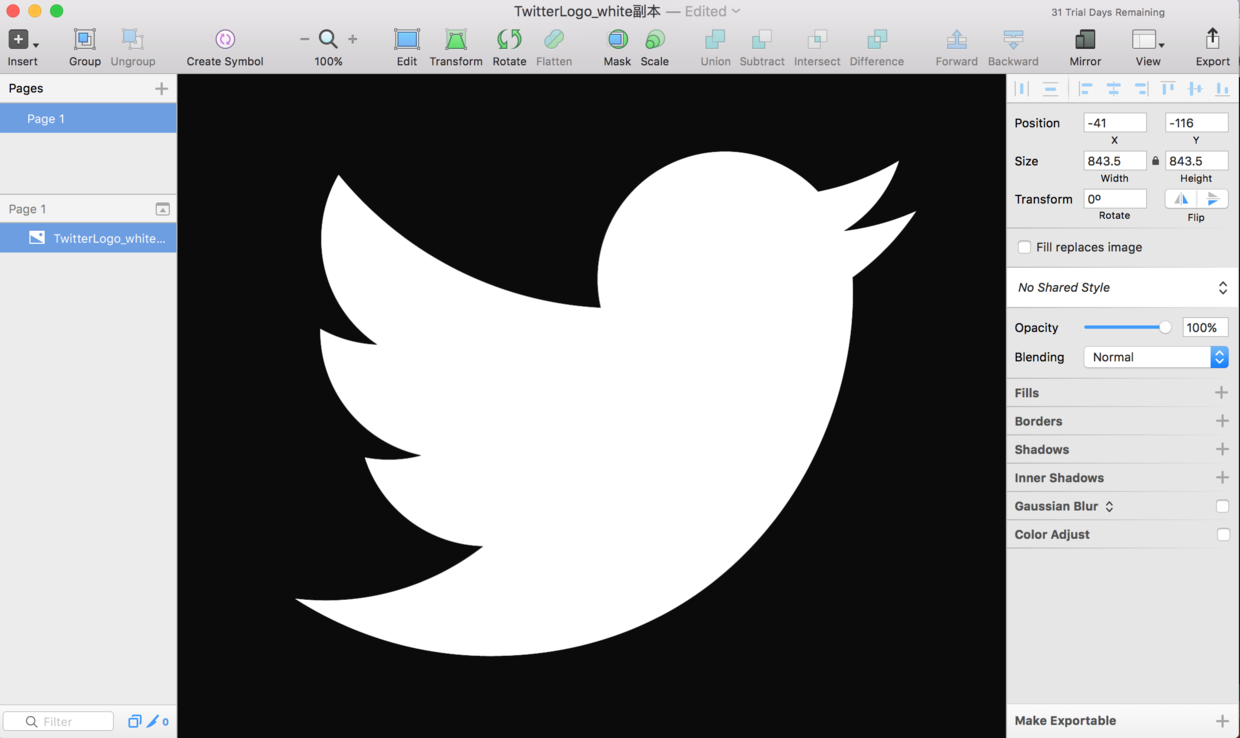
3.Select the “Insert” - “Vector” pen tool in the upper-left corner, and connect each vertex of the Logo icon in sequence.
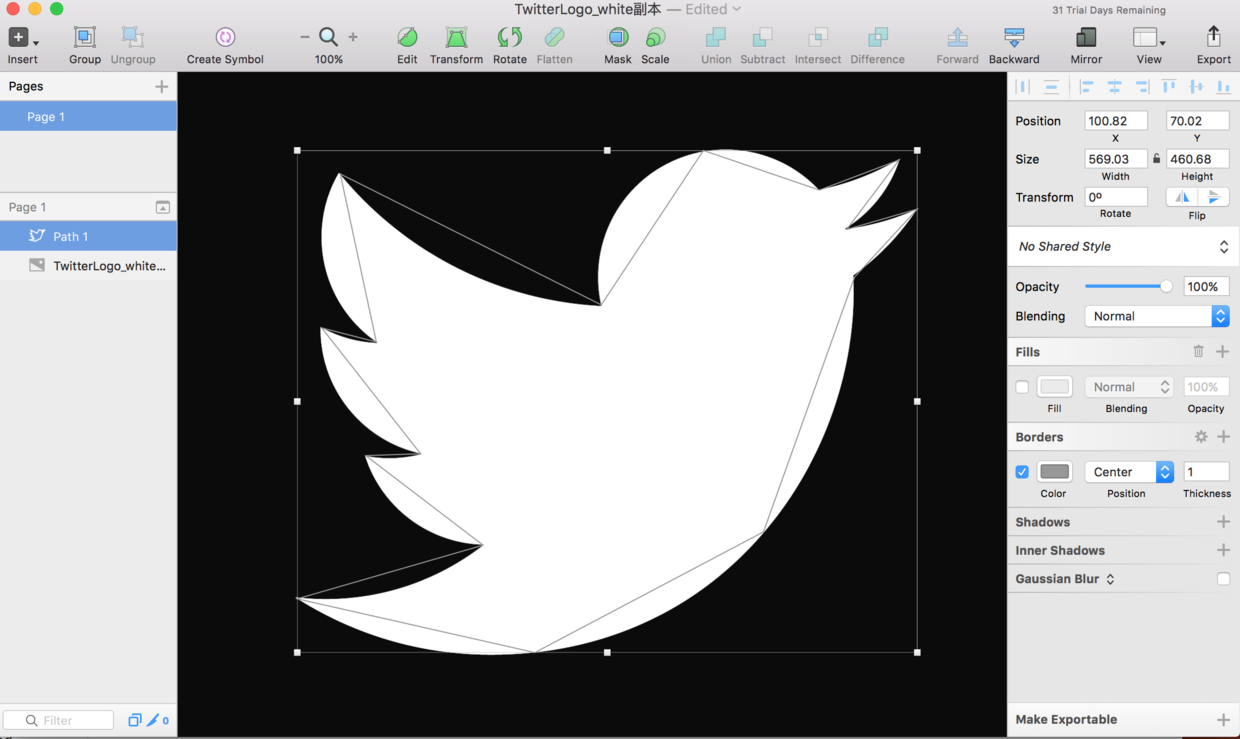
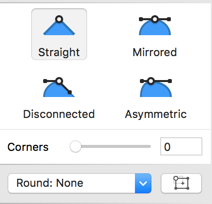
4.Then add new anchor points between each pair of vertices; the pen tool will show a + sign. On the right side of the software, the following panel will appear.
By dragging the points you added, you can make the path fully match the complex outline of the Logo. After a round of dragging and adjustment, it should look like the image below.
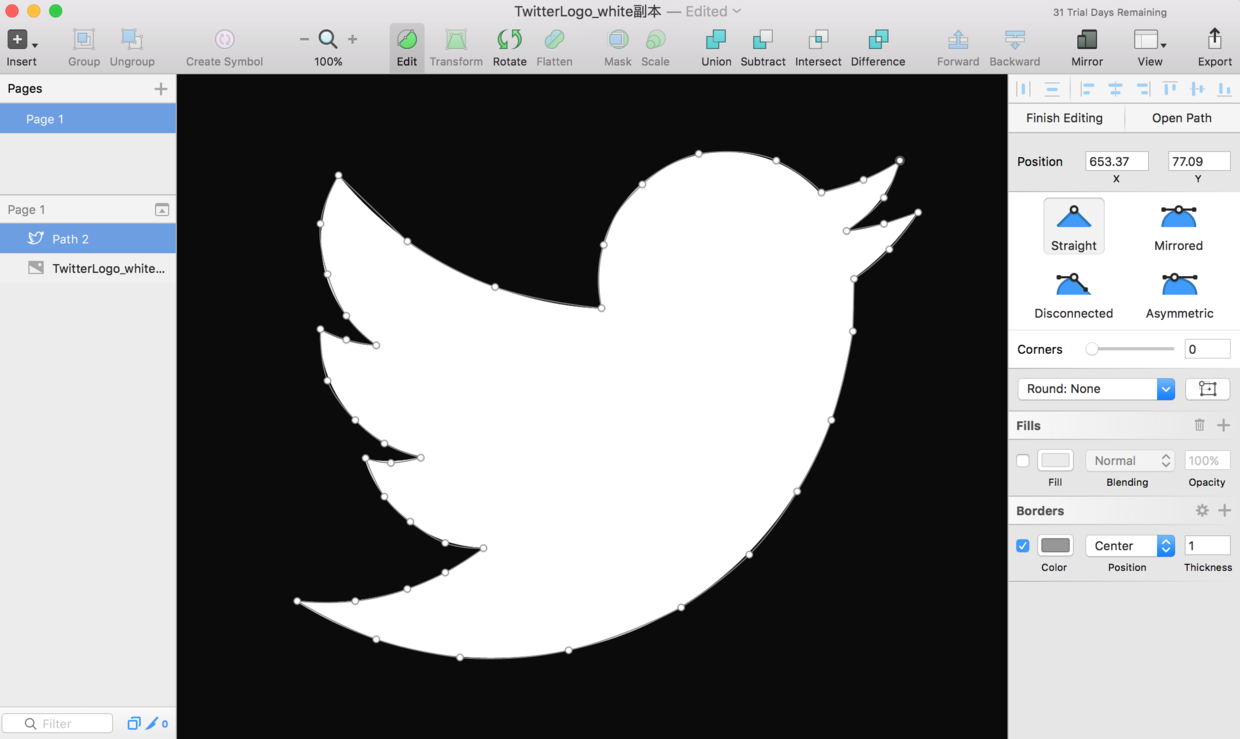
5.Next, select the Page panel on the left panel.
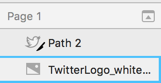
Select the Path you just traced, and an Export panel will appear in the lower-right corner.
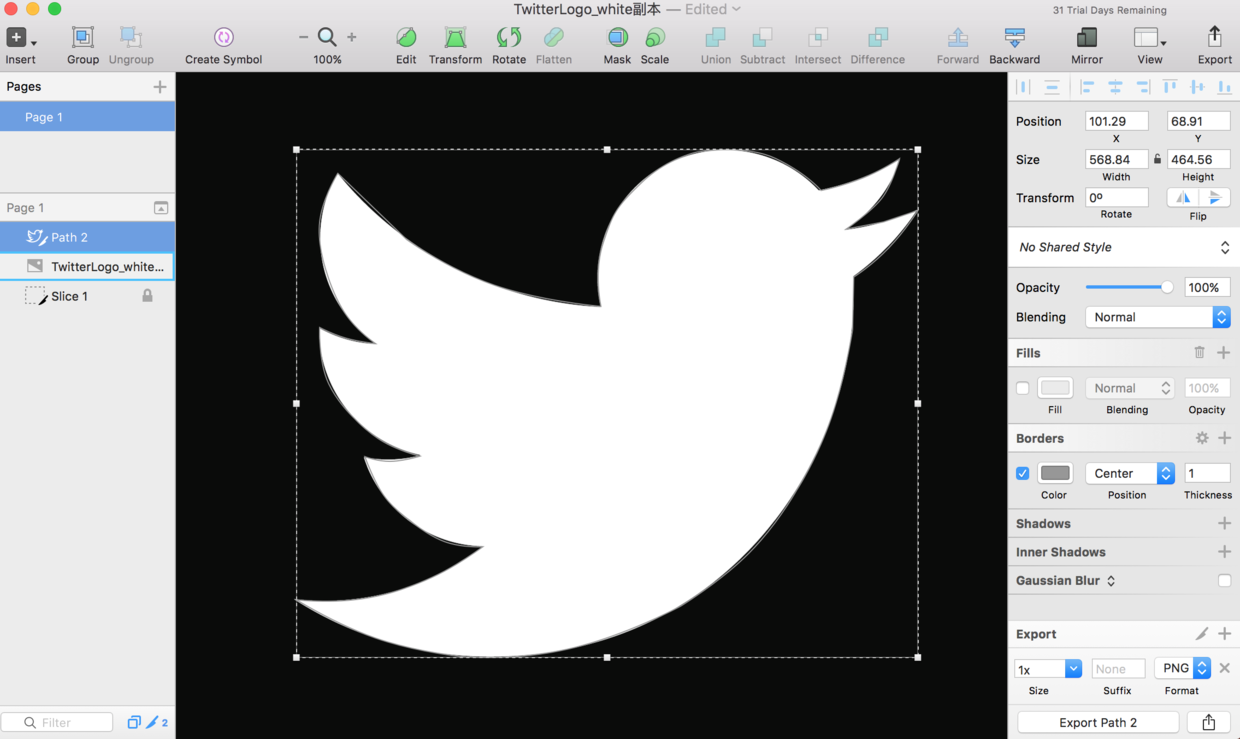
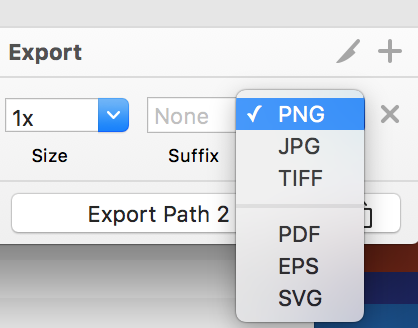
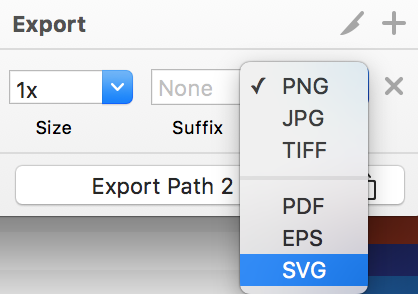
At this point, choose to export an SVG file.
SVG
, Scalable Vector Graphics, is a graphics format based on Extensible Markup Language (XML) for describing two-dimensional vector graphics. SVG is a new two-dimensional vector graphics format developed by the W3C (“World Wide Web Consortium”, the international Web standards organization) in August 2000, and it is also the Web vector graphics standard in the specification. SVG strictly follows XML syntax and uses a descriptive language in text format to describe image content, so it is a vector graphics format independent of image resolution.
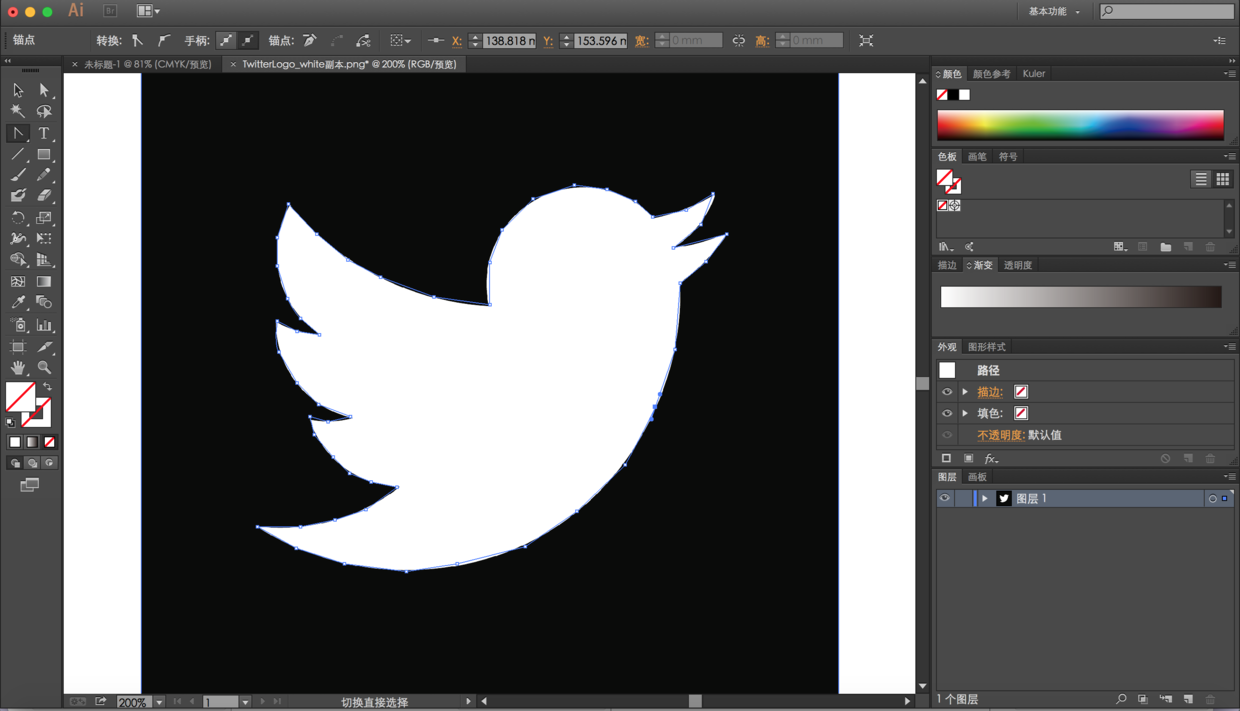
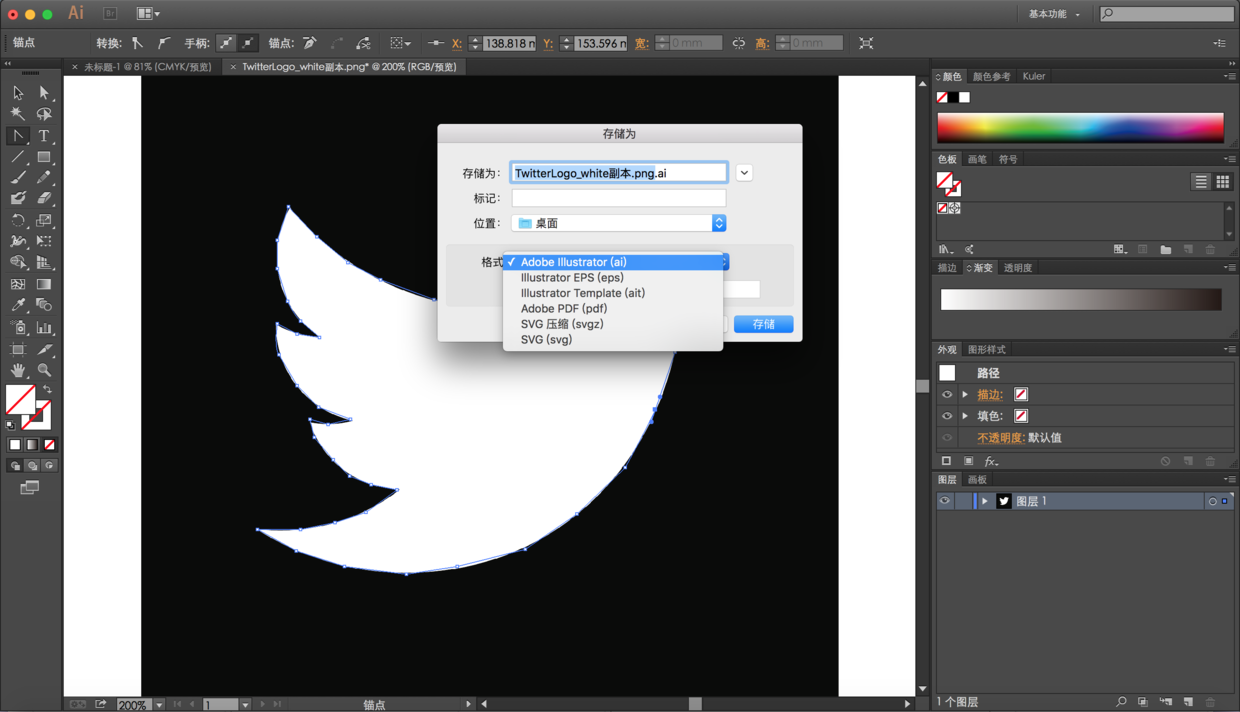
There was actually a small episode here. When drawing the path, I originally used AI to trace the points, and then exported the SVG to PaintCode, but PaintCode unexpectedly failed to recognize my path. Later I asked online, and an expert told me to try switching to Sketch; then it worked. Afterward, I compared the SVGs exported by Sketch and AI to see what was different, and only then did I discover that the SVG I had exported from AI included several extra layers that covered the path. The method for drawing paths in AI is similar to Sketch, as shown below.
6.Import the SVG file exported earlier into PaintCode, and Objective-C code will be generated automatically below.
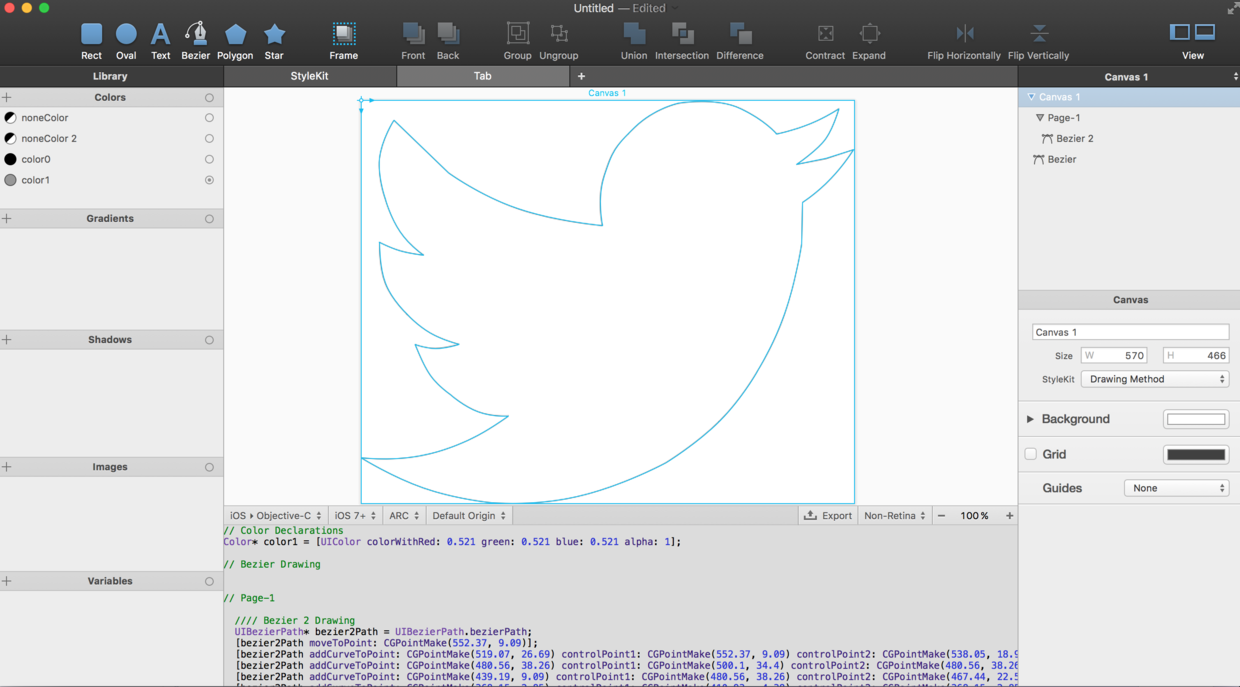
Copy out the generated code.
//// Color Declarations
UIColor* color1 = [UIColor colorWithRed: 0.521 green: 0.521 blue: 0.521 alpha: 1];

//// Bezier Drawing


//// Page-1
{
    //// Bezier 2 Drawing
    UIBezierPath* bezier2Path = UIBezierPath.bezierPath;
    [bezier2Path moveToPoint: CGPointMake(552.37, 9.09)];
    [bezier2Path addCurveToPoint: CGPointMake(519.07, 26.69) controlPoint1: CGPointMake(552.37, 9.09) controlPoint2: CGPointMake(538.05, 18.98)];
    [bezier2Path addCurveToPoint: CGPointMake(480.56, 38.26) controlPoint1: CGPointMake(500.1, 34.4) controlPoint2: CGPointMake(480.56, 38.26)];
    [bezier2Path addCurveToPoint: CGPointMake(439.19, 9.09) controlPoint1: CGPointMake(480.56, 38.26) controlPoint2: CGPointMake(467.44, 22.55)];
    [bezier2Path addCurveToPoint: CGPointMake(368.15, 2.85) controlPoint1: CGPointMake(410.93, -4.38) controlPoint2: CGPointMake(368.15, 2.85)];
    [bezier2Path addCurveToPoint: CGPointMake(316.47, 30.92) controlPoint1: CGPointMake(368.15, 2.85) controlPoint2: CGPointMake(340.52, 7.85)];
    [bezier2Path addCurveToPoint: CGPointMake(281.09, 86.36) controlPoint1: CGPointMake(292.42, 53.99) controlPoint2: CGPointMake(290.08, 59.09)];
    [bezier2Path addCurveToPoint: CGPointMake(279.09, 144.27) controlPoint1: CGPointMake(272.1, 113.63) controlPoint2: CGPointMake(279.09, 144.27)];
    [bezier2Path addCurveToPoint: CGPointMake(181.55, 124.87) controlPoint1: CGPointMake(279.09, 144.27) controlPoint2: CGPointMake(224.85, 139.76)];
    [bezier2Path addCurveToPoint: CGPointMake(101.23, 83.11) controlPoint1: CGPointMake(138.25, 109.98) controlPoint2: CGPointMake(101.23, 83.11)];
    [bezier2Path addLineToPoint: CGPointMake(38.19, 22.55)];
    [bezier2Path addCurveToPoint: CGPointMake(21.56, 66.97) controlPoint1: CGPointMake(38.19, 22.55) controlPoint2: CGPointMake(24, 45.21)];
    [bezier2Path addCurveToPoint: CGPointMake(28.04, 113.2) controlPoint1: CGPointMake(19.12, 88.74) controlPoint2: CGPointMake(28.04, 113.2)];
    [bezier2Path addCurveToPoint: CGPointMake(45.34, 151.3) controlPoint1: CGPointMake(28.04, 113.2) controlPoint2: CGPointMake(34.12, 134.96)];
    [bezier2Path addCurveToPoint: CGPointMake(72.71, 178.32) controlPoint1: CGPointMake(56.55, 167.65) controlPoint2: CGPointMake(72.71, 178.32)];
    [bezier2Path addCurveToPoint: CGPointMake(45.34, 173.23) controlPoint1: CGPointMake(72.71, 178.32) controlPoint2: CGPointMake(57.6, 176.78)];
    [bezier2Path addCurveToPoint: CGPointMake(21.56, 163.51) controlPoint1: CGPointMake(33.08, 169.68) controlPoint2: CGPointMake(21.56, 163.51)];
    [bezier2Path addCurveToPoint: CGPointMake(28.04, 210.73) controlPoint1: CGPointMake(21.56, 163.51) controlPoint2: CGPointMake(20.58, 191.27)];
    [bezier2Path addCurveToPoint: CGPointMake(53.47, 246.86) controlPoint1: CGPointMake(35.49, 230.2) controlPoint2: CGPointMake(53.47, 246.86)];
    [bezier2Path addCurveToPoint: CGPointMake(80.14, 268.29) controlPoint1: CGPointMake(53.47, 246.86) controlPoint2: CGPointMake(65.25, 259.74)];
    [bezier2Path addCurveToPoint: CGPointMake(113.46, 281.28) controlPoint1: CGPointMake(95.04, 276.83) controlPoint2: CGPointMake(113.46, 281.28)];
    [bezier2Path addCurveToPoint: CGPointMake(86.11, 286.04) controlPoint1: CGPointMake(113.46, 281.28) controlPoint2: CGPointMake(98.18, 285.95)];
    [bezier2Path addCurveToPoint: CGPointMake(62.93, 281.67) controlPoint1: CGPointMake(74.03, 286.13) controlPoint2: CGPointMake(62.93, 281.67)];
    [bezier2Path addCurveToPoint: CGPointMake(80.14, 317.03) controlPoint1: CGPointMake(62.93, 281.67) controlPoint2: CGPointMake(71.12, 304.22)];
    [bezier2Path addCurveToPoint: CGPointMake(103.91, 339.84) controlPoint1: CGPointMake(89.17, 329.83) controlPoint2: CGPointMake(103.91, 339.84)];
    [bezier2Path addCurveToPoint: CGPointMake(135.88, 359.44) controlPoint1: CGPointMake(103.91, 339.84) controlPoint2: CGPointMake(119.59, 353.53)];
    [bezier2Path addCurveToPoint: CGPointMake(170.93, 364.15) controlPoint1: CGPointMake(152.16, 365.34) controlPoint2: CGPointMake(170.93, 364.15)];
    [bezier2Path addCurveToPoint: CGPointMake(135.88, 386.44) controlPoint1: CGPointMake(170.93, 364.15) controlPoint2: CGPointMake(153.54, 376.98)];
    [bezier2Path addCurveToPoint: CGPointMake(101.13, 401.54) controlPoint1: CGPointMake(118.21, 395.9) controlPoint2: CGPointMake(101.13, 401.54)];
    [bezier2Path addCurveToPoint: CGPointMake(53.47, 412.64) controlPoint1: CGPointMake(101.13, 401.54) controlPoint2: CGPointMake(81.16, 409.59)];
    [bezier2Path addCurveToPoint: CGPointMake(0.29, 412.64) controlPoint1: CGPointMake(25.78, 415.7) controlPoint2: CGPointMake(0.29, 412.64)];
    [bezier2Path addCurveToPoint: CGPointMake(72.71, 447.67) controlPoint1: CGPointMake(0.29, 412.64) controlPoint2: CGPointMake(36.62, 435.16)];
    [bezier2Path addCurveToPoint: CGPointMake(149.39, 464.31) controlPoint1: CGPointMake(108.8, 460.17) controlPoint2: CGPointMake(149.39, 464.31)];
    [bezier2Path addCurveToPoint: CGPointMake(249.01, 457.71) controlPoint1: CGPointMake(149.39, 464.31) controlPoint2: CGPointMake(196.6, 469.56)];
    [bezier2Path addCurveToPoint: CGPointMake(352.07, 418.46) controlPoint1: CGPointMake(301.42, 445.86) controlPoint2: CGPointMake(352.07, 418.46)];
    [bezier2Path addCurveToPoint: CGPointMake(414.45, 370.11) controlPoint1: CGPointMake(352.07, 418.46) controlPoint2: CGPointMake(388.26, 396.31)];
    [bezier2Path addCurveToPoint: CGPointMake(458.34, 312.2) controlPoint1: CGPointMake(440.64, 343.92) controlPoint2: CGPointMake(458.34, 312.2)];
    [bezier2Path addCurveToPoint: CGPointMake(489.68, 246.86) controlPoint1: CGPointMake(458.34, 312.2) controlPoint2: CGPointMake(476.64, 284.33)];
    [bezier2Path addCurveToPoint: CGPointMake(509.39, 165.55) controlPoint1: CGPointMake(502.73, 209.38) controlPoint2: CGPointMake(509.39, 165.55)];
    [bezier2Path addLineToPoint: CGPointMake(510.48, 117.41)];
    [bezier2Path addCurveToPoint: CGPointMake(542.8, 90.45) controlPoint1: CGPointMake(510.48, 117.41) controlPoint2: CGPointMake(526.7, 107.34)];
    [bezier2Path addCurveToPoint: CGPointMake(569.12, 56.54) controlPoint1: CGPointMake(558.9, 73.55) controlPoint2: CGPointMake(569.12, 56.54)];
    [bezier2Path addLineToPoint: CGPointMake(537.79, 66.97)];
    [bezier2Path addLineToPoint: CGPointMake(503.61, 73.55)];
    [bezier2Path addCurveToPoint: CGPointMake(537.79, 43.14) controlPoint1: CGPointMake(503.61, 73.55) controlPoint2: CGPointMake(528.94, 56.27)];
    [bezier2Path addCurveToPoint: CGPointMake(552.37, 9.09) controlPoint1: CGPointMake(546.63, 30.01) controlPoint2: CGPointMake(552.37, 9.09)];
    [bezier2Path closePath];
    bezier2Path.miterLimit = 4;

    bezier2Path.usesEvenOddFillRule = YES;

    [color1 setStroke];
    bezier2Path.lineWidth = 1;
    [bezier2Path stroke];
}
Aside: After I finished all of this, I realized that PaintCode also has a pen tool.
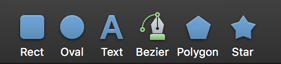
In other words, PaintCode alone can do everything we need; there’s no need to use Sketch or AI to draw paths. PaintCode can draw paths itself and export Objective-C or Swift code.
- Now let’s go back to the Xcode project. Add a
UIViewto display the Logo, and add the Layer to the View’s Layer.
-(void)addLayerToLaunchView
{
    //self.launchView is a UIVIew I added to display the Logo
    CAShapeLayer *layer = [[CAShapeLayer alloc]init];
    layer.path = [self setBezierPath].CGPath;
    layer.bounds = CGPathGetBoundingBox(layer.path);

    self.launchView.backgroundColor = [UIColor blueColor];
    layer.position = CGPointMake(self.view.layer.bounds.size.width / 2, self.view.layer.bounds.size.height/ 2);
    layer.fillColor = [UIColor whiteColor].CGColor;
    [self.launchView.layer addSublayer:layer];
}
-(UIBezierPath *)setBezierPath
{
    //  Add the code just pasted from PaintCode here
}
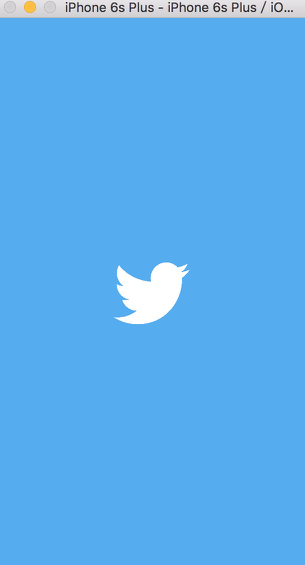
- Add an animation to this View. If you look closely at the GIF at the beginning of my article where that goofy guy opens Twitter, the animation first shrinks the bird and then enlarges it.
- (void)startLaunch
{
    [UIView animateWithDuration:0.2 animations:^{
        // First shrink the View here
        self.launchView.frame = CGRectMake(0, 0, 50, 50);
        self.launchView.center = self.view.center;
    } completion:^(BOOL finished) {
        [UIView animateWithDuration:0.3 animations:^{
            // Enlarge the View here
            self.launchView.frame = CGRectMake(0, 0, 5000, 5000);
            self.launchView.center = self.view.center;
            self.alpha = 0;
        } completion:^(BOOL finished) {
            [self.launchView removeFromSuperview];
        }];;
    }];
}
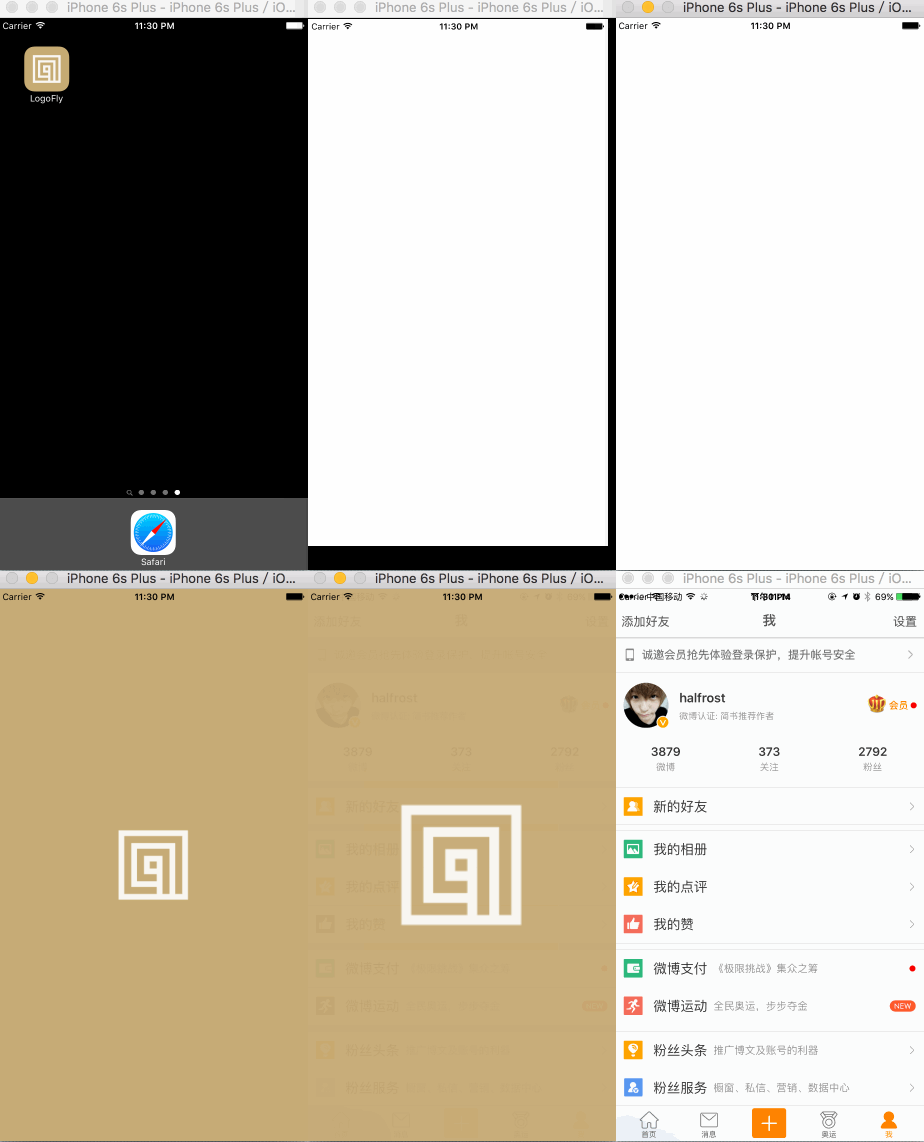
Next, run the project, and you’ll get the effect where the Logo “flies” when the app starts.
Here’s what it looks like after I integrated this effect into the app:
####Conclusion This effect is actually suitable for many apps. If your company doesn’t require an ad page or other similar pages, you can consider adding these animations after launch to improve the app’s user experience. A great transition animation can make an app feel more vivid and full of energy!
